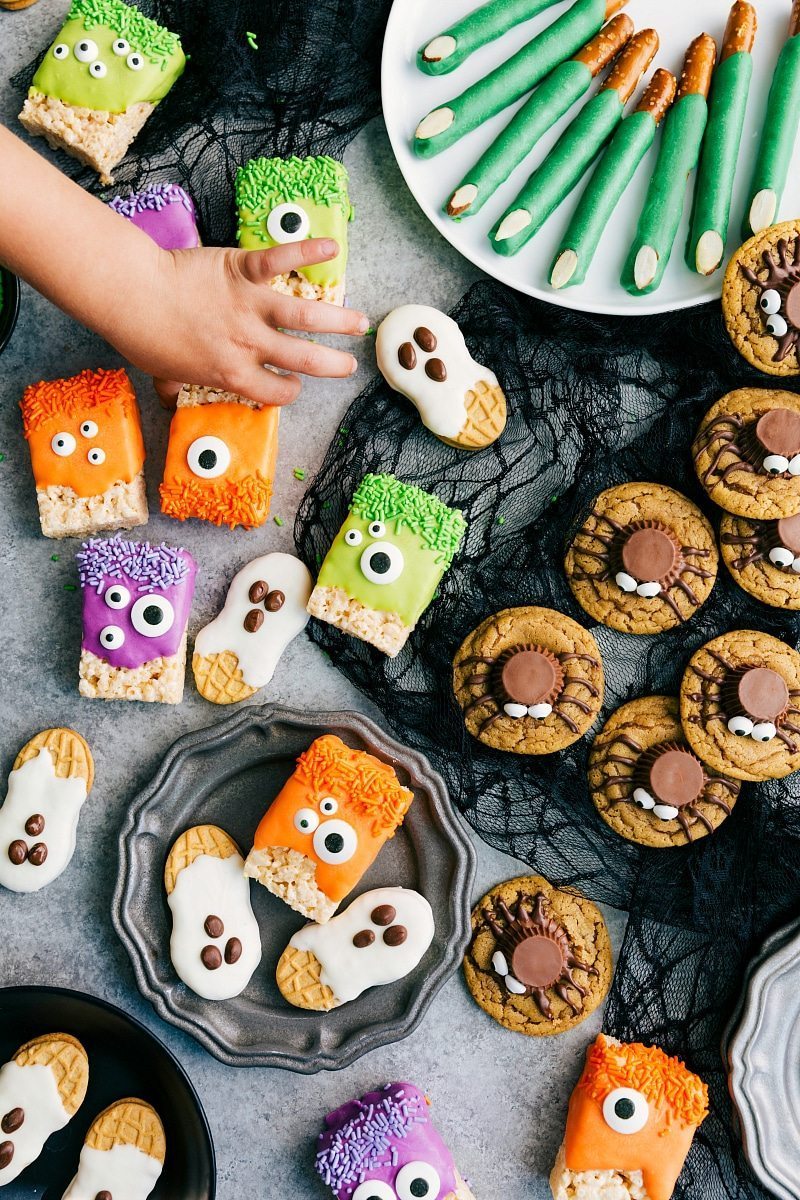
These Monster Halloween Treats have a lot of different options and while they can certainly be more than 3-ingredients, you can definitely go the “minimalist” route and make some cute monster treats with only 3 ingredients.
I chose to use a variety of colored candy melts and ended up using about 1/3rd of each (12 ounce) bag of chocolate. If you do just one color, you’ll use just about the entire bag coating the tops of the Krispie treats. You can also use an assortment of eye candies or just one shape/size.
In case you prefer the convenience of shopping online, you can purchase the ingredients to make these by clicking the links below:
1(12-ounce) bagcandy meltsin your favorite color, or use a variety of colors
1(16-pack) boxindividually wrapped Rice Krispies Treatsor your favorite homemade recipe
Assorted candy eyeballs
3teaspoonsShorteningor vegetable oil, optional
Colored sprinklesoptional
Instructions
Line a large sheet pan with parchment paper and set aside.
Add candy melts to microwave-safe bowls. If using one color, divide it into three equal parts. If using multiple colors, place about 1/3 of each color into separate bowls. Optionally add shortening or oil for easier application of the chocolate to the krispie treats, 1 teaspoon to each 1/3 chocolate candy melts.
Microwave each bowl in 20-second bursts, stirring vigorously for 10 seconds between each burst until smooth.
Upwrap Rice Krispies Treats.
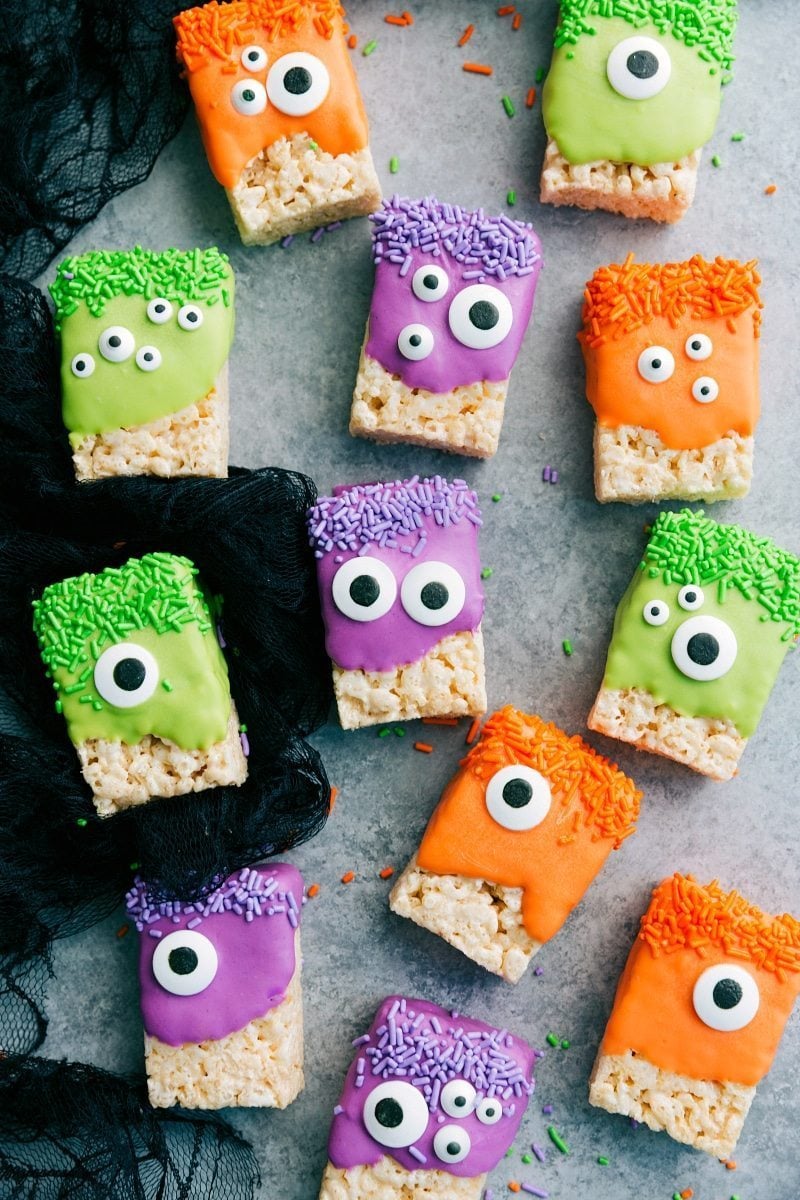
Once chocolate is smooth, dip Krispie Treats in melted chocolate and use a spoon to help spread it over the treat, giving it a ragged “monster” look.
Working quickly (the melted candy melts harden fast), press on candy eyeballs and sprinkles (if desired). Decorate however you’d like!
Transfer to the prepared sheet pan and allow chocolate to set at room temperature. Best enjoyed the same day they’re made.
These spider cookies are a simple and tasty Halloween treat idea! Stick to three ingredients with refrigerated peanut butter cookie dough, or use your favorite recipe—just skip pressing the center with a fork.
Eyeball candies are optional but fun! Swap them for chocolate chips or piped chocolate if you prefer.
In case you prefer the convenience of shopping online, you can purchase the ingredients to make these by clicking the links below:
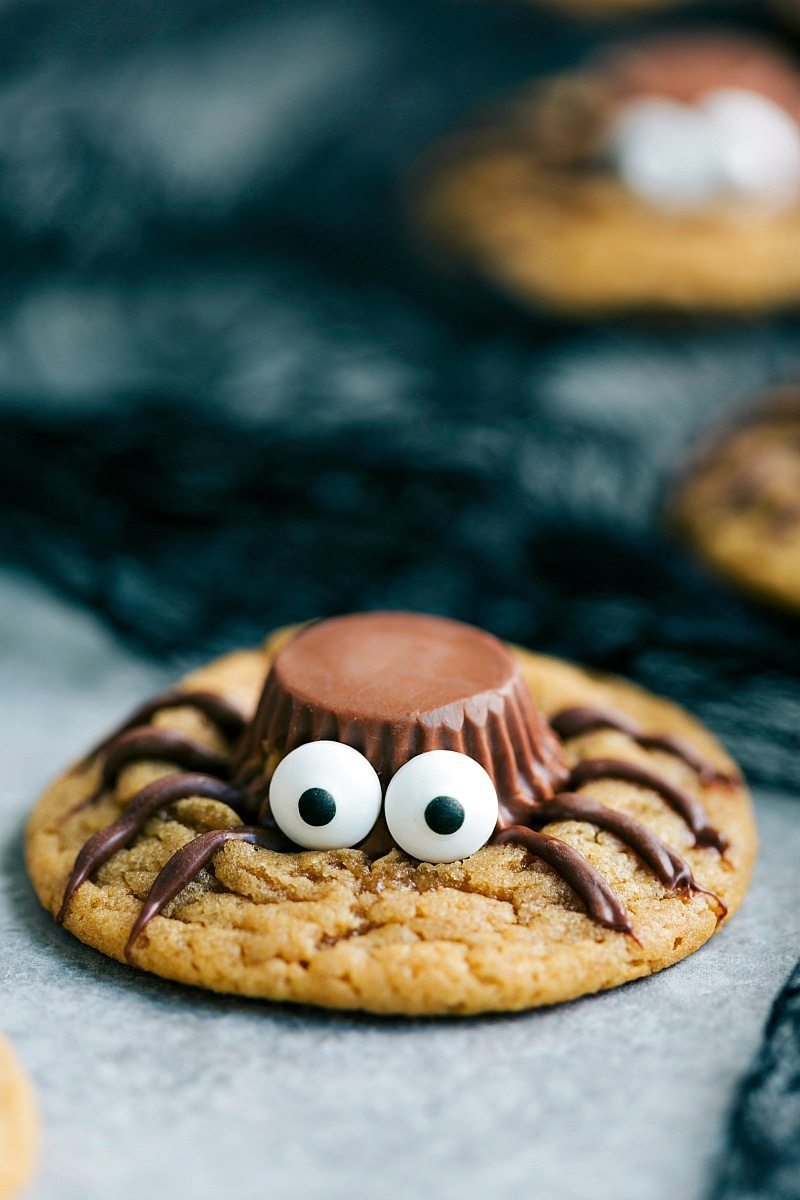
Get ready for a fun Halloween treat with these spooky Peanut Butter Spider Cookies! They're easy to make, delicious, and perfect for your next Halloween party!
Prepare the cookies according to package directions. Remove from oven and transfer the cookies to a cooling rack to slightly cool.
Unwrap the peanut butter cups and gently press in the center of the cookies. Let harden.
In a microwave-safe bowl, add chocolate chips and vegetable oil or shortening (if desired; it makes the chocolate a little easier to work with!)
Microwave in 15-second bursts, stirring between each burst for 10 seconds until chocolate is melted and smooth. Transfer melted chocolate to a plastic bag and cut off the very tip of the bag.
Pipe “spider legs” onto the cookie starting from the Reese's cup going outward.
If desired, pipe a little melted chocolate on the back of the edible eye candies and press into the Reese's cup.
A few years ago, I made these Mummy Cookies using Milanos. We make them every year and sometimes I switch up the Milanos to use Nutter Butters! I thought it would be fun this year to make a few different versions, and Ghosts were the first thing that came to mind. With pretty much the same ingredients you can make these ghosts AND the mummies at the same time.
Instead of melting chocolate for the ghost eyeballs/mouth, you could also use un-melted chocolate chips.
In case you prefer the convenience of shopping online, you can purchase the ingredients to make these by clicking the links below:
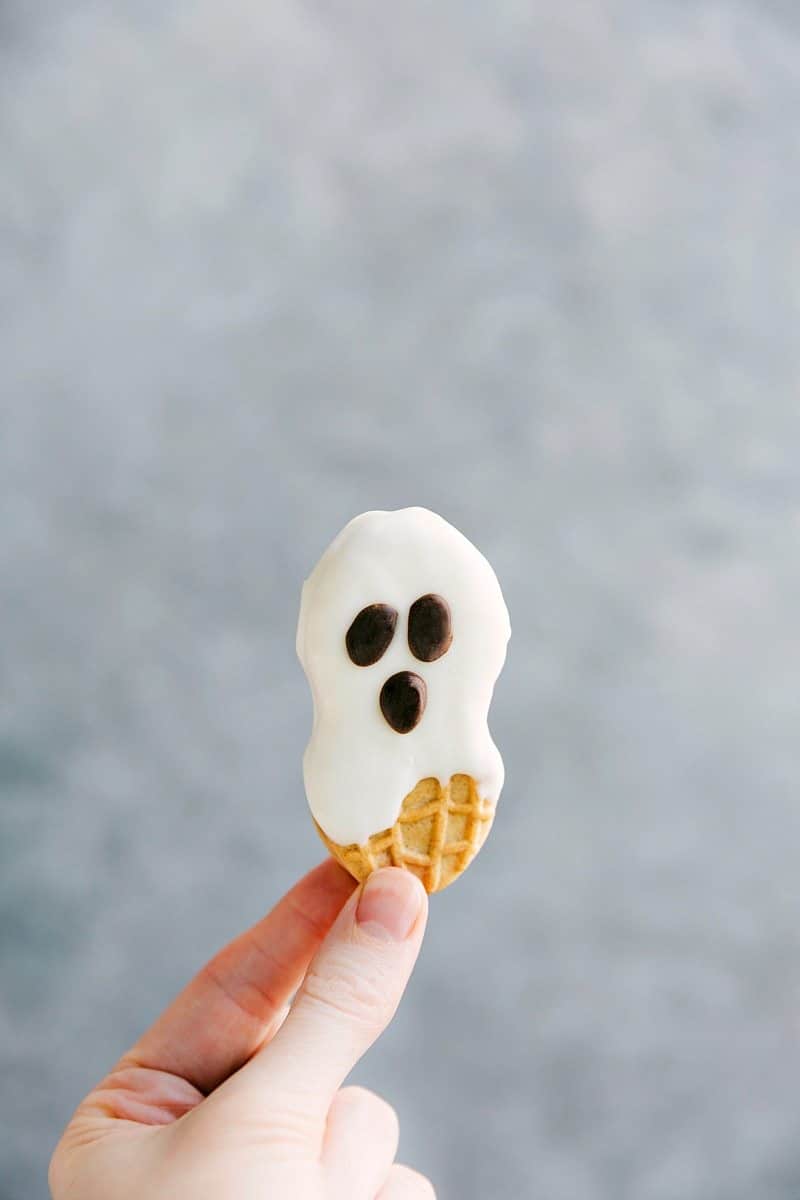
Get ready for some spooky fun with these easy 3-ingredient Ghost Cookies! Just dip Nutter Butters in smooth white chocolate and add some playful chocolate faces for a ghostly treat that’s both simple and delicious.
Line a large sheet pan with parchment paper and set aside.
Separate white chocolate into 3 microwave-safe bowls and optionally vegetable oil or shortening to each (not essential, but makes it easier to coat the cookies). Melt one bowl of chocolate at a time in the microwave in 15-second bursts, stirring for 10 seconds between bursts, until melted and smooth.
Dip Nutter Butter cookies into melted white chocolate, using a spoon to create a ragged shape near the bottom of each cookie. Shake and tap off excess chocolate and smooth it.
Transfer dipped cookies to the prepared sheet pan and allow to completely set.
Once set, melt milk chocolate in microwave. Transfer melted chocolate to a plastic bag, cut off the tip, and pipe eyeballs and a mouth onto the cookies. Let harden.
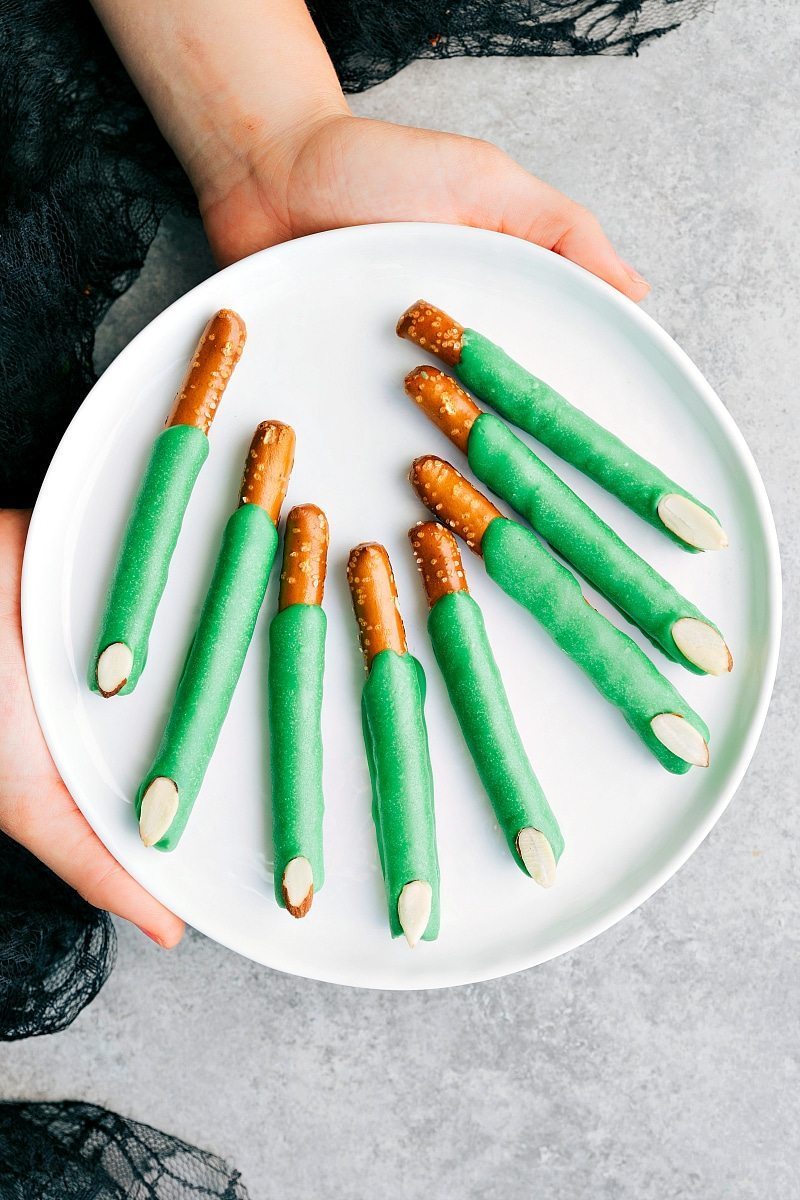
These slightly creepy fingers are too much fun to NOT make 🙂 For a different variation, you could use lime green candy melts instead of the dark candy melts I used. You could also dye the almonds black with black gel coloring (See here!). However you make them they go great with these adorable Witch Oreo Truffles!
In case you prefer the convenience of shopping online, you can purchase the ingredients to make these by clicking the links below:
Line a large sheet pan with parchment paper and set aside. Break pretzel rods so you remove 1/4th of one end. (Snack on those while you make these:))
Separate green chocolate candy melts into 3 microwave-safe bowls and optionally add vegetable oil or shortening to each bowl (not essential, but makes it easier to coat pretzels). Melt one bowl of chocolate at a time in the microwave in 15-second bursts, stirring vigorously for 10 seconds between bursts, until melted and smooth.
Dip the ragged end (from breaking) of the pretzel into the melted chocolate and dip about 3/4ths the way down. Use a spoon to cover the amount you want.
Tap and shake pretzel to smooth the chocolate and remove excess. Place each rod on the prepared sheet pan.
Add a sliced almond to the tip of each pretzel and allow for pretzel rods to harden at room temperature.
Hello, and welcome to Chelsea’s Messy Apron! I’m Chelsea, the recipe developer, food photographer, and writer behind the site. I’m passionate about creating simple, reliable, and delicious recipes that anyone can make.
Thanks for stopping by—I hope you find something delicious to make!
I made these for October “spooky bookclub” and they were so simple yet fun to make! I hit up my local Bulk Foods store to buy the eyes and the melting wafers. Even though it’s grown-up book club, I made enough that the moms can take some home to their kiddos. What a quick and fun and cute idea 🥰


Awesome recipe look so pretty thank you great idea
Thanks so much! 🙂
Merci pour cette recette
So welcome! 🙂
I made these for October “spooky bookclub” and they were so simple yet fun to make! I hit up my local Bulk Foods store to buy the eyes and the melting wafers. Even though it’s grown-up book club, I made enough that the moms can take some home to their kiddos. What a quick and fun and cute idea 🥰
I love that! So happy these were a hit! Thanks Caro! 🙂
So cute and simple. I love these Halloween Treats. I’ll be back for more!
Really cute and easy treat
Thank you! 🙂
Yaaaaaas! It gives me goosebumps to see bloggers come out with their Halloween recipes!!
Yay! 🙂 I’m obsessed with Halloween so be prepared for a lot from this site 🙂
Such great ideas! Bookmarked to make this weekend 😉
you share these with your family and friends.
Thanks! 🙂