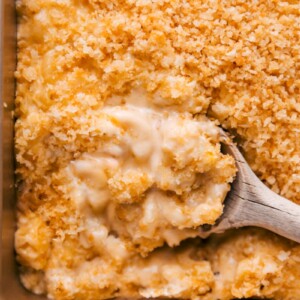
Baked Mac and Cheese is the best ever! It’s creamy, cheesy, and rich with a perfect blend of cheeses and a crispy topping. Plus, it’s super easy to make!
Try this next: Jalapeño Popper Mac & Cheese or BBQ Pork Mac & Cheese!

What To Expect From This Recipe
I can’t believe I’ve been sharing recipes for nearly 8 years without a standard baked mac and cheese! After trying countless cheese combinations and noodle ratios, I finally found a version worth sharing.
I wanted a mac and cheese that was very rich, creamy, and packed with cheese—without taking hours to make. So, here it is: my favorite Baked Mac and Cheese recipe!
Expect a very creamy dish with lots of creamy cheese sauce that fully coats every bite. No one wants a bad plate of mac and cheese! Enjoy!

Baked Mac And Cheese Ingredients
- Elbow Macaroni: Cook just under the package time to avoid mushy pasta.
- Unsalted Butter: Keep some separate for toasting the panko for extra crunch.
- Seasonings: Adjust spices to your preference—add more garlic for extra zing!
- Flour: Thickens the cheese sauce. Whisk well with the butter to prevent lumps.
- Evaporated Milk or Whole Milk: Evaporated milk thickens faster; if using whole milk, warm it first.
- Freshly Shredded Cheese: Grate your own cheese for better melting and texture.
- Panko Breadcrumbs: Creates a crunchy topping. Toast in butter until golden for the best texture.

How To Make Baked Mac And Cheese
- Preheat Oven: Heat to 350°F (175°C) and grease a baking pan.
- Cook Pasta: Boil salted water, cook pasta, then drain and stir in butter.
- Make Sauce: In a pot, melt butter, then add seasonings. Whisk in flour. Gradually add evaporated milk.
- Add Cheese: Stir in shredded cheese until combined.
- Combine: Mix the cheese sauce with the macaroni until well coated.
- Prepare Topping: In a skillet, melt remaining butter and toast panko breadcrumbs.
- Assemble: Pour the mac and cheese into the baking pan, top with Parmesan and toasted panko.
- Bake: Bake for 10–15 minutes until golden brown. Enjoy!

Tips For Success
- Use Panko: Panko is the crispiest breadcrumb, giving a nice crunch.
- Salt Pasta Water: Salt the water well while cooking pasta—about 1 teaspoon per 4 cups of water—to make sure it’s seasoned.
- Choose the Right Pasta: Use pasta with shape or ridges to hold the cheese sauce. Smaller or fragile pasta may break while cooking.
- Large Pot Needed: Use a big pot with plenty of water to avoid sticky pasta. After draining, toss the pasta with butter to stop sticking.
- Aged Cheese: For a cheesier flavor, use aged Cheddar (9-15 months). Look for “sharp” on the label, which shows it’s aged. Brands like Tillamook have good aged options.
- Cheese Combinations: A favorite mix is sharp Cheddar, smoked Gouda, and Gruyere. Other tasty mixes include 2 cups sharp Cheddar with 1 cup smoked Gouda or 2 cups Gruyere with 1 cup mozzarella.

Variations
Baked Mac and Cheese Variations
- Easy Baked Mac and Cheese: Stick to two cheeses. Use a food processor’s grater for quick shredding.
- Mozzarella Baked Mac and Cheese: Swap Gouda for mozzarella for that gooey goodness.
- Mix-ins: Enhance your mac and cheese with cooked bacon, chorizo, sausage, grilled chicken, ground beef, frozen peas, sautéed mushrooms, spinach, caramelized onions, roasted broccoli, or butternut squash. To test a mix-in, stir a small amount into a portion of mac and cheese, taste, and if you like it, mix it into the pot before baking!

Storage
Leftovers?
Enjoy this mac and cheese right out of the oven for the best creaminess! Leftovers are still tasty.
Warming Up Leftovers: Microwave it, then spray with cooking spray and broil for a minute—watch it closely!
Freezing: Not a good idea; the dairy and pasta can turn grainy when thawed.
Making for Two: Halve the recipe and use a 9×5-inch loaf pan.
Preparing Ahead: Cook and cool the pasta, then store it in the fridge. Keep the topping and sauce separate. When ready to bake, add a splash of milk to the sauce if needed, assemble, and bake for about 5 extra minutes if everything is cold.

More Delicious Pasta Dishes
- Butternut Squash Pasta with bacon!
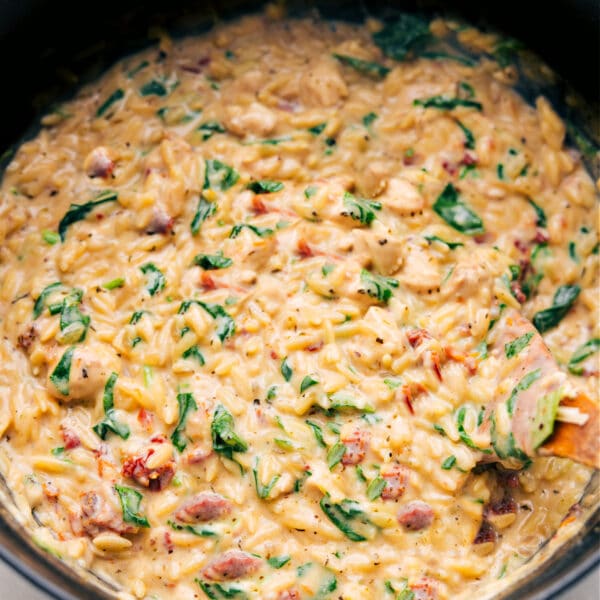
- Creamy Chicken Pasta with sun-dried tomatoes and spinach
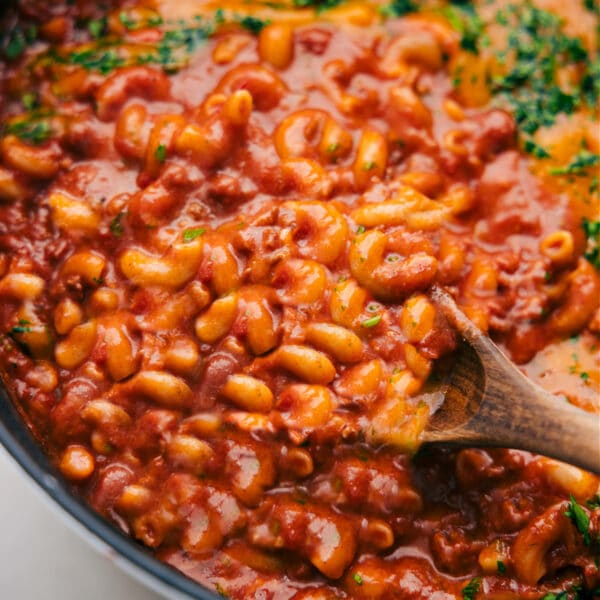
- Sausage Rigatoni with a creamy tomato sauce
- Chicken Pot Pie Pasta made in one pot
- Chicken Orzo with Parmesan cheese
Baked Mac and Cheese
Equipment
- Baking pan 9 x 9-inch
- Medium pot
Ingredients
- Cooking spray
- 2 packed cups uncooked elbow macaroni pasta
- 7 tablespoons unsalted butter separated
- 1 teaspoon garlic powder
- 1/2 teaspoon onion powder
- 1/2 teaspoon mustard powder
- 1/2 teaspoon salt
- 1/2 teaspoon pepper
- 1/3 cup flour
- 2 (12-ounce) cans evaporated milk or 3 cups whole milk, see note 1
- 3 cups freshly shredded cheese see note 2
- 1/4 cup freshly grated Parmesan cheese optional
- 2/3 cup panko breadcrumbs see note 3
Instructions
- Preheat the oven to 350℉. Lightly grease a 9 x 9-inch (or 2-1/2 quart) baking pan with cooking spray and set aside.
- Bring a large pot of water to a boil and then generously salt the water; I add 1 tablespoon. Once boiling, add pasta and cook for 1 minute less than the package directs. As soon as the pasta is done, drain and return to the empty pot. Add in 1 tablespoon butter and gently stir until butter is melted. Set aside to cool slightly.
- In a medium pot, melt 4 tablespoons butter on medium heat . Once melted, add in garlic powder, onion powder, mustard powder, salt, and pepper. Whisk, then add in the flour and whisk again until smooth. Cook, stirring constantly, for 1 minute.
- Very gradually, while whisking constantly, add in the evaporated milk. Briskly whisk as you add the milk until the sauce is smooth. Once smooth, cook, whisking frequently until mixture is thickened nicely, about 5–7 minutes (see note 4). Once thickened, remove from heat. Add in the grated cheeses and stir—it's ok if cheese isn't fully melted, since we're baking it all!
- Add the last 2 tablespoons of butter to a skillet. Heat to medium and once melted, add in the panko and another sprinkle of salt, about 1/4 teaspoon. Gently stir until butter is absorbed and panko is toasted to a light brown color. Remove from heat.
- Use a spatula to scrape every bit of sauce onto the cooked elbows. Gently stir—and remember, it's going to be very saucy, you don't want dry pasta after baking. Sprinkle Parmesan cheese on top. Sprinkle panko topping evenly. Bake for 10–15 minutes or until the top is a light golden brown—don't bake too long or it will dry out the pasta!
Recipe Notes
Nutrition
Nutrition information is automatically calculated, so should only be used as an approximation.


Can you prep this a day before, refrigerate overnight and bake the next day?
You can prepare the components beforehand (boil pasta, grate cheese, make sauce), but I wouldn’t assemble it until right before baking otherwise the pasta will absorb the sauce and it will be dry!
Delicious & easy! My 11 year old could make it. 5 stars!
Yay!! So happy to hear this! 🙂
At the top of the recipe it says to bake it for 25 minutes. Down in the directions, it says 15. Did I miss something?
Sorry Andrea, I updated the top of the recipe!
Good recipe. Easy to make and it turns out creamy, cheesy with a wonderful crunchy topping.
I added a variety of cheeses and a bit of heat for my family but the recipe as written is perfect.
Yum! I am so happy you guys loved this Baked Mac and Cheese! Thanks Phoenix! 🙂