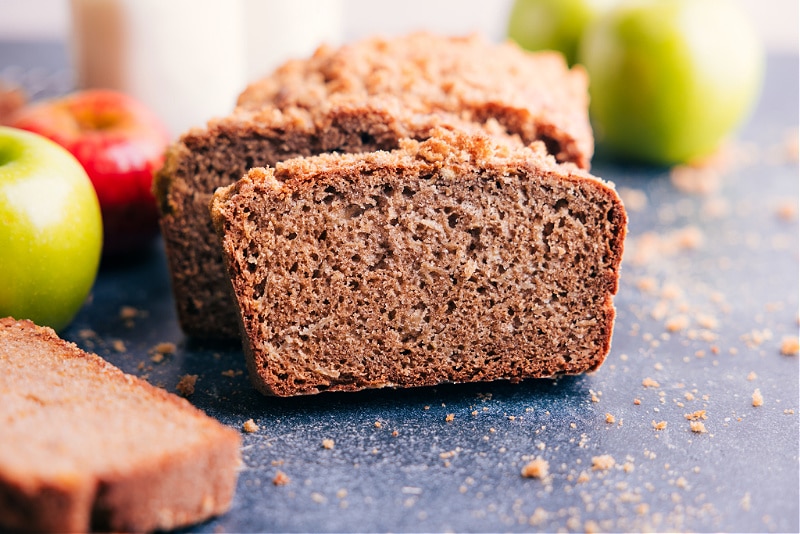
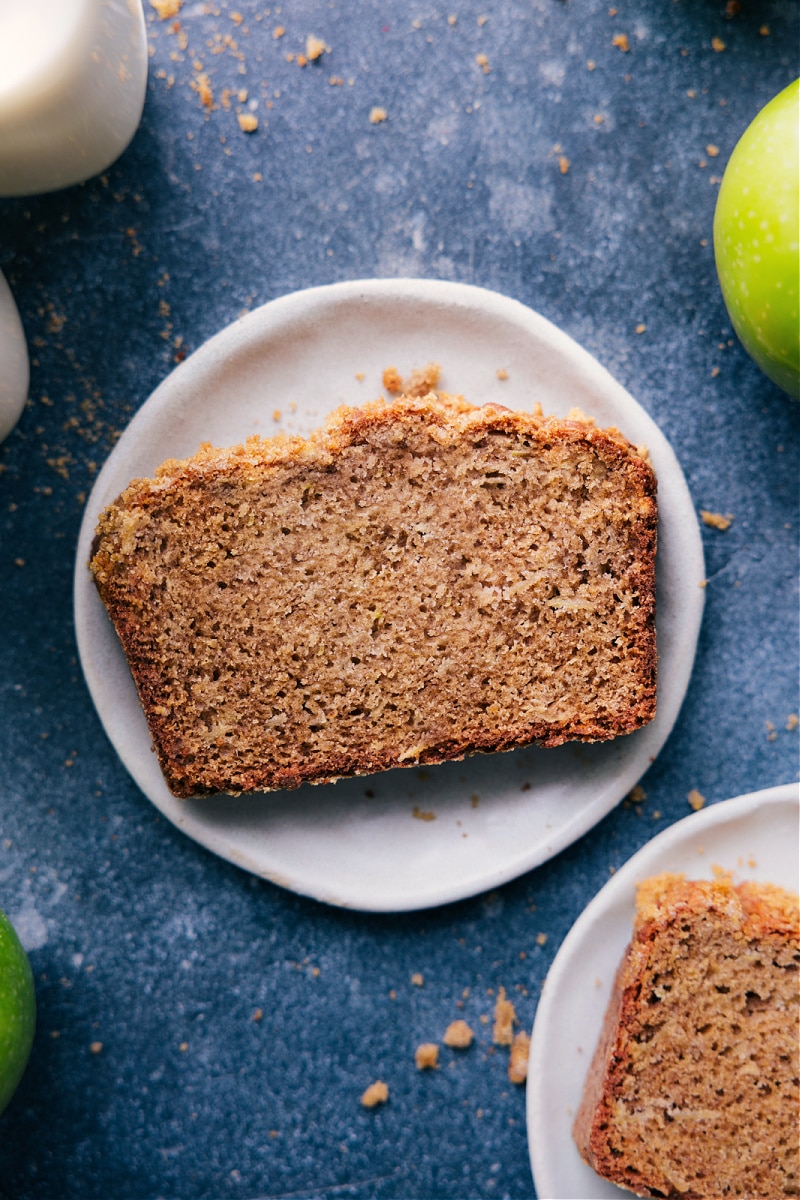
This Apple Bread Recipe is one of our all-time favorite quick breads! It’s sweet, tender, and moist with shredded apples in every bite. This loaf is warmly spiced with a hint of cinnamon and a touch of nutmeg.
What To Do With Excess Apples
If you’ve got leftover apples after making this bread, be sure to try some of our other favorite apple recipes! This homemade Applesauce utilizes loads of apples and can be turned into these thick and fluffy Applesauce Pancakes. For some delicious desserts, try our family favorite Apple Pie, Apple Crumble, or Apple Nachos!
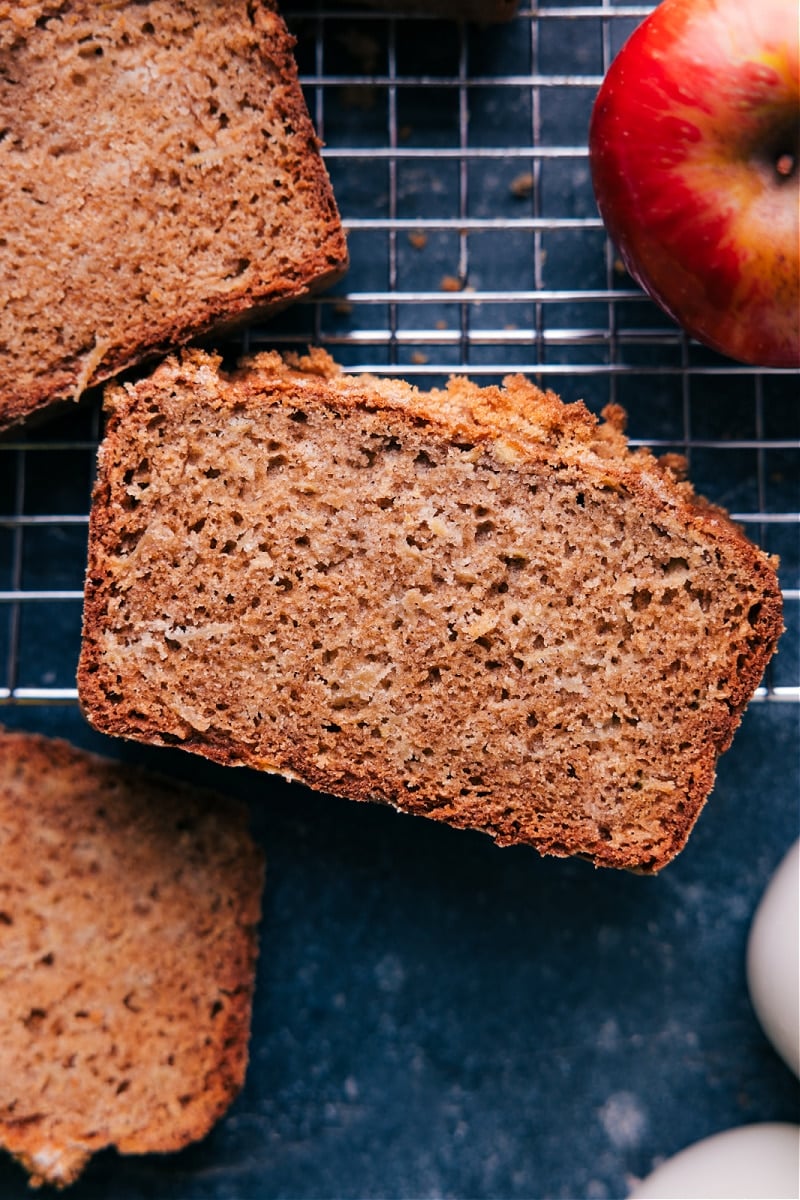
It’s no secret that we’re obsessed with quick bread recipes; from this banana bread to this zucchini bread to our favorite pumpkin bread, and over a dozen recipes in between, quick breads are the best!
And now for the best apple bread recipe I’ve ever tasted!
A Really Moist Apple Bread Recipe
This bread is moist, cinnamon-spiced, packed with apples, and ridiculously tender. The “secret” to this bread is in the preparation of the apples. Most apple bread recipes require diced up apples which bake up just fine, but, personally, I always feel these little chunks of apples are incongruous with the bread. More like an add-in such as nuts or chocolate chips as opposed to being fully and totally integrated in the bread.
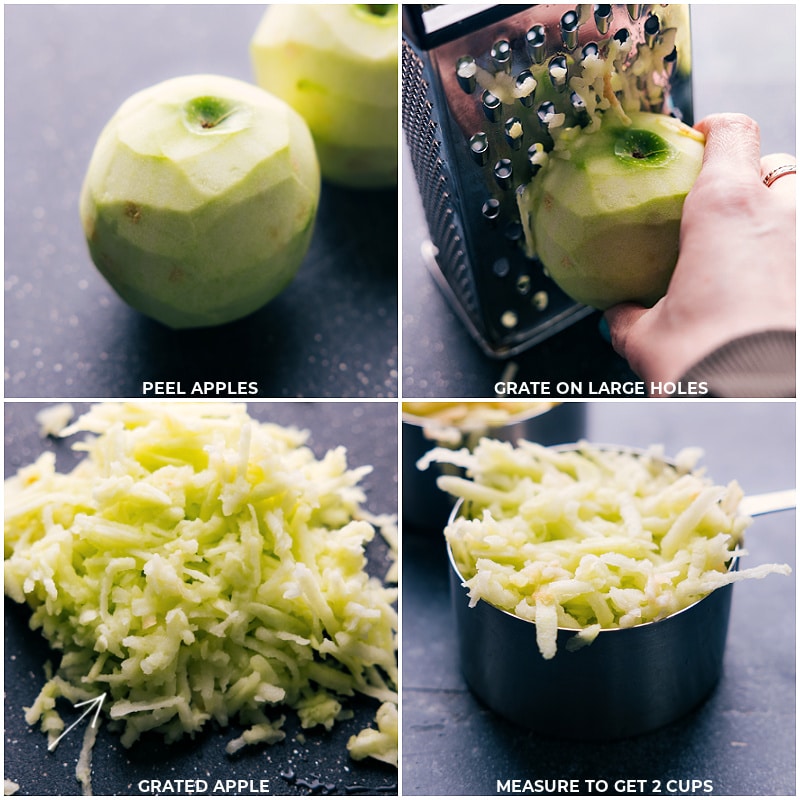
So the solution? Grating the apples. This way the apples integrate beautifully, appear in every single bite, and deliver a wonderful sweetness and moistness to the bread. Try grating the apples–you may never make apple bread any other way!
The Best Apples For Baking Bread
The best apple to use when making apple bread is one that is crisp, firm, and nicely balances sweet and tart flavors. We also want to make sure to use an apple that won’t break down (and turn to mush) during the baking process. The perfect apple for this? Granny Smith!
What Apples Are Similar To Granny Smith?
Crispin apples (also called Mutsu) are similar and a great alternative in this apple bread recipe.
Can Honeycrisp Apples Be Used For Baking?
We have also tested this Apple Cinnamon Bread with Honeycrisp apples! They are sweet, juicy, and crisp. They do yield a slightly more moist and sweeter bread compared to Granny Smith apples
Quick Tip
Make sure to peel the apples before grating and adding into the batter.
Apple Bread Recipe That’s Easy!
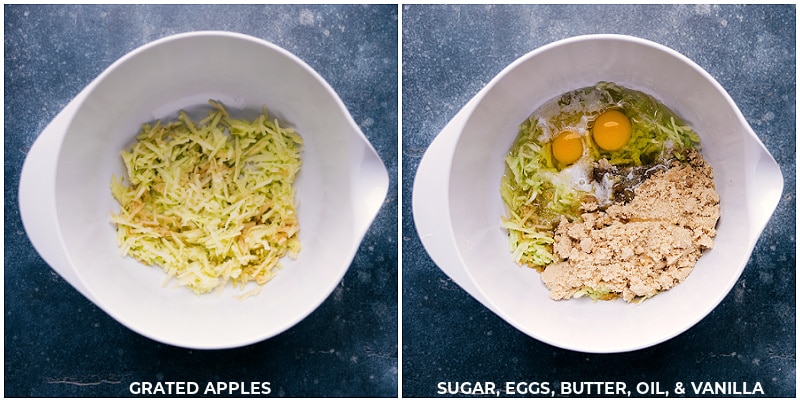
Not only is this apple cinnamon bread recipe so moist and tasty, it’s also very simple to make! In fact, we mix everything together in one bowl with a wooden spoon — score! Below are a few tips:
- Avoid hand mixers or using a stand mixer as these instruments will introduce too much air into the batter. This can cause bread to rise and fall or sink during baking.
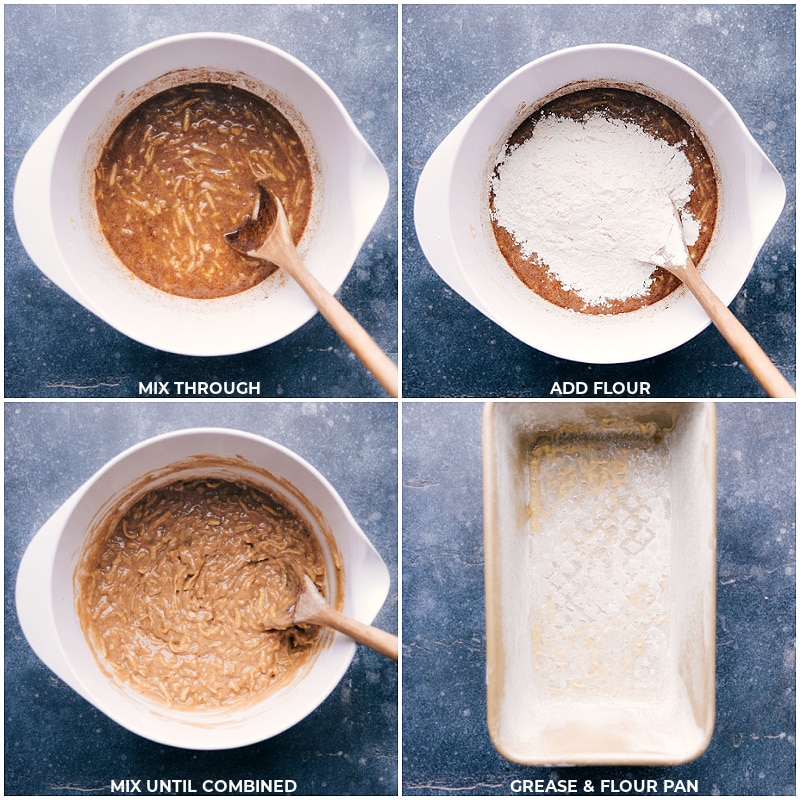
- Don’t over mix. If you over-mix the batter after the flour is added in, the bread will end up overly dense with less of a rise. Stop mixing when no dry streaks of flour remain.
- Measure carefully. Baking is a science. Even with a quick bread that is intended to be easy (this apple bread recipe!), we’re still relying on careful measuring. Measure every cup or spoon to be heaping/overfilled then level off the top with the back of a butter knife for the perfect measurements.
How To Make Apple Bread
- Generously grease bread pan. There are few things as frustrating as trying to invert a loaf and having it fall apart or stick to the bottom. Grease with nonstick spray (or rub on shortening) and then lightly dust with flour. Alternatively, line it with parchment paper. If you line with parchment paper, leave an overhang for easy removal.
- Wait 15 minutes after baking to remove the bread from the pan. Baking is still happening, even out of the oven! It’s best to let the loaf sit in the pan to finish solidifying before trying to invert the loaf.
- Always cool baked goods on a wire rack. Run a table knife along the edge of the pan and invert the loaf onto the wire rack. Quick breads need to be elevated so air can circulate around all sides as it cools. Otherwise, moisture (from the heat of the bread) will condense on the bottom of the bread, making it damp and slightly sticky.
Why Is My Apple Bread Dry?
A few likely culprits to dry apple bread:
- Too much flour packed into the measuring cup (which can happen if you’re pressing a measuring cup into a bag or box of flour and it gets compressed in the cup)
- The bread is baked too long
- The batter is over-mixed
- Not enough apples! Be sure to get a full two cups of grated apples — this is about 2 large-sized apples.
- Expired baking agents. Test the freshness of your baking soda and baking powder.
Variations
Variation Ideas
- Add some frosting. Top with this cream cheese frosting to convert this apple bread to apple cake!
- Want to make this apple bread recipe healthy? Use coconut oil instead of vegetable oil and use a white whole-wheat flour in place of all-purpose.
- Make a loaded apple bread by adding in some finely chopped pecans or walnuts to the batter. Another option is to add in some dried cranberries or raisins.
- For a more spiced apple bread recipe, add 1 to 2 teaspoons of apple pie spice to the bread batter.
Storage
Apple Bread Recipe Storage
How Long Does Apple Bread last?
We like to finish this bread within 1-2 days of being made. (It’s even more moist, spiced, and flavorful on day 2!) After day 2, it begins to lose texture (becoming overly moist). It can, however, last up to a week stored in an airtight container/tightly wrapped in plastic wrap. After the second day, I recommend storing it in the fridge.
How To Store Apple Bread
You can store this bread on the counter for a day or two, but after that, refrigerate it, each slice wrapped tightly and placed in an airtight container.
Can You Freeze Apple Bread?
Yes, here’s how: Let the bread cool completely. Slice and then wrap individual slices tightly in plastic wrap. Add the wrapped slices to a large freezer bag, remove any air, and place it in the freezer.
Now you’ve got a grab-and-go quick breakfast whenever you need it! Let stand on the counter for a few minutes or defrost in the microwave/pop in the toaster.
Quick Tip
Use the right size bread pan! This apple bread recipe won’t bake up properly in other loaf pan sizes. Be sure to use a 9×5-inch (1 pound) pan. By the way, here’s our favorite loaf pan!
More Amazing Apple Recipes
- Caramel Apple Cheesecake with a graham cracker crust
- Applesauce Cake with a cream cheese frosting
- Healthy Applesauce Muffins with a crisp topping
- Applesauce Bread with cinnamon
- Apple Muffins with Greek yogurt
Apple Bread Recipe
Equipment
- Bread pan 9 x 5-inch, see note 1
- Microwave
Ingredients
Wet
- 2 large Granny Smith apples or Honey Crisp, see note 2
- 2 large eggs at room temperature
- 1/3 cup canola oil or vegetable oil
- 1/3 cup unsalted butter melted and cooled, or 1/3 cup more oil
- 1 cup light brown sugar lightly packed
- 2 teaspoons vanilla extract
Dry
- 1 teaspoon salt
- 2 teaspoons ground cinnamon
- 1/4 teaspoon ground nutmeg
- 3/4 teaspoon baking soda
- 1/2 teaspoon baking powder
- 2 cups flour plus some for dusting the pan
- 2 tablespoons light brown sugar firmly packed, for topping
Instructions
- Preheat oven to 350℉. Grease and flour a 9 x 5-inch bread pan (or grease pan and line with parchment paper, leaving an overhang for easy removal). Melt butter in microwave and let cool to room temperature. Peel and grate apples with the large holes, measuring loosely two cups without packing.
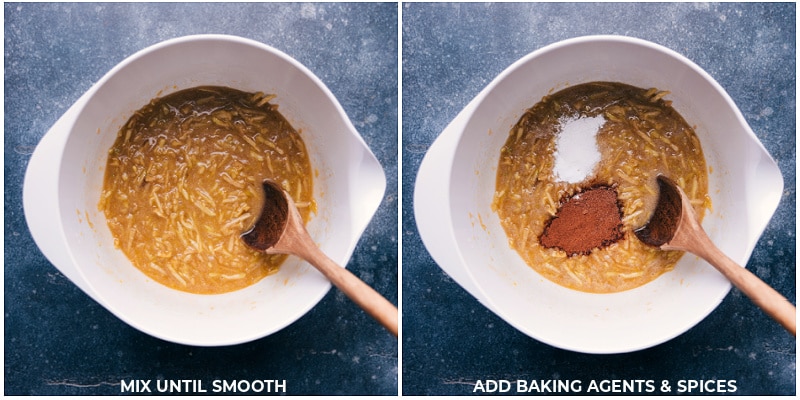
- Mix wet ingredients with a wooden spoon until combined. Don't use hand or stand mixers—they beat in too much air.
- Add dry ingredients (except flour and brown sugar) and mix, then incorporate flour until you have a smooth batter. Avoid over-mixing as it can result in a dense loaf of bread.
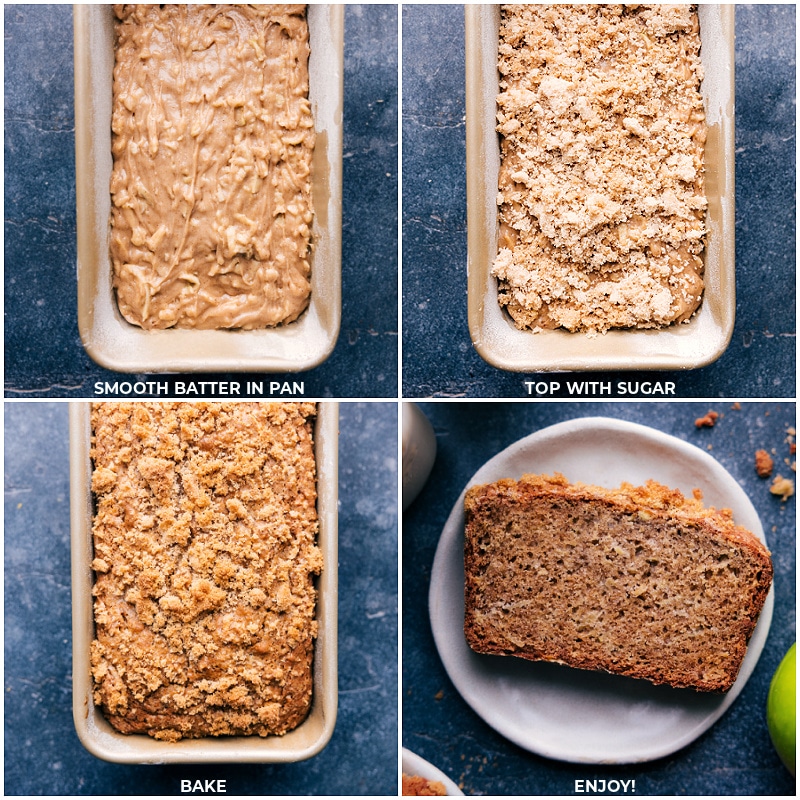
- Transfer batter to the prepared pan, smooth the top, and sprinkle with brown sugar. Bake for 55–70 minutes or until a toothpick comes out clean or with moist crumbs when inserted into the center.
- Cool in the pan for 15 minutes, then remove and allow to finish cooling at least an hour on a cooling rack before slicing (it crumbles if cut when too hot—see note 3). Enjoy!
Video
Recipe Notes
Nutrition
Nutrition information is automatically calculated, so should only be used as an approximation.




Do you think you could use pears for this recipe? I have two pear trees that really produce, but the quality of fruit is hard as rocks and doesn’t soften. They seem more like an asian pear in consistency. I haven’t successfully found a way to use them.
I tried to leave 5 stars on this with my previous comment but my phone screen does not work nearly as well as this recipe. It definitely deserves 5 stars!!
Your pictures are stunning and these sound delicious.
Thanks so much Jenn! 🙂
look yummy
Thanks Dina! 🙂
Chelsea, I can’t wait to make these for Thanksgiving! Thank you for the great recipe. ~ Millie
Thanks so much Millie!