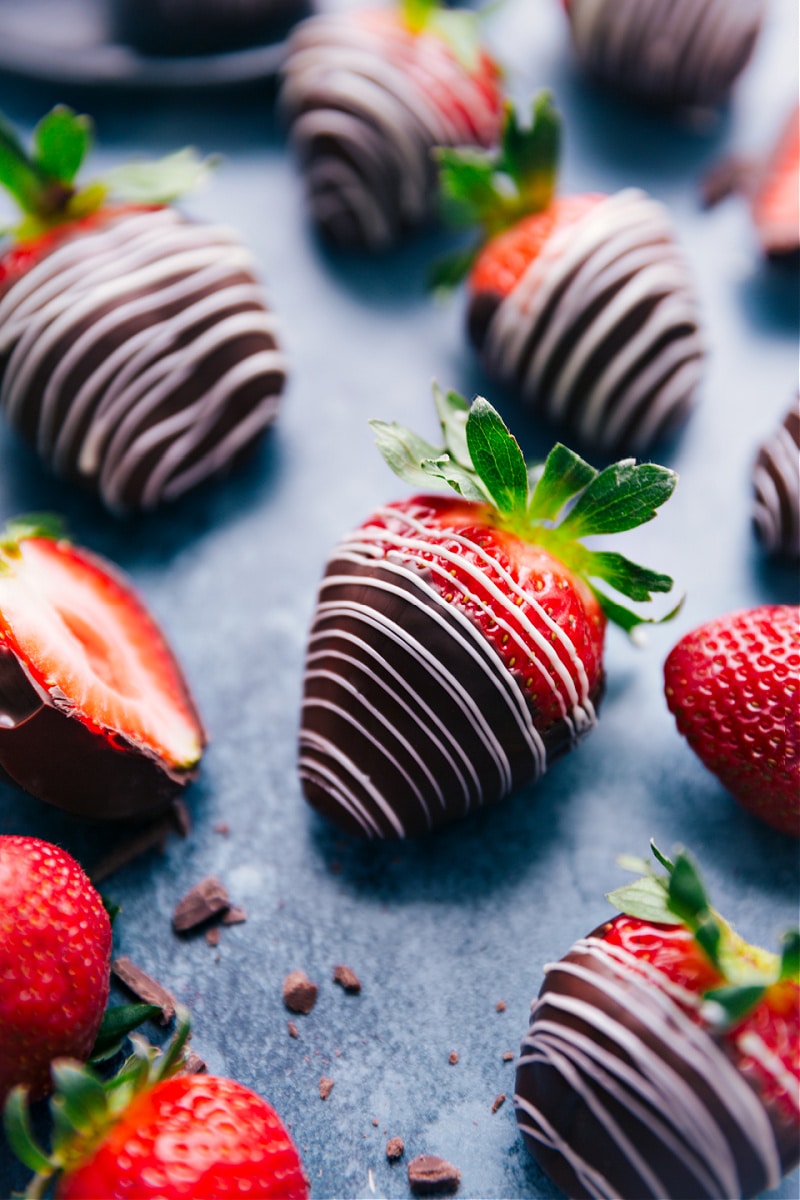
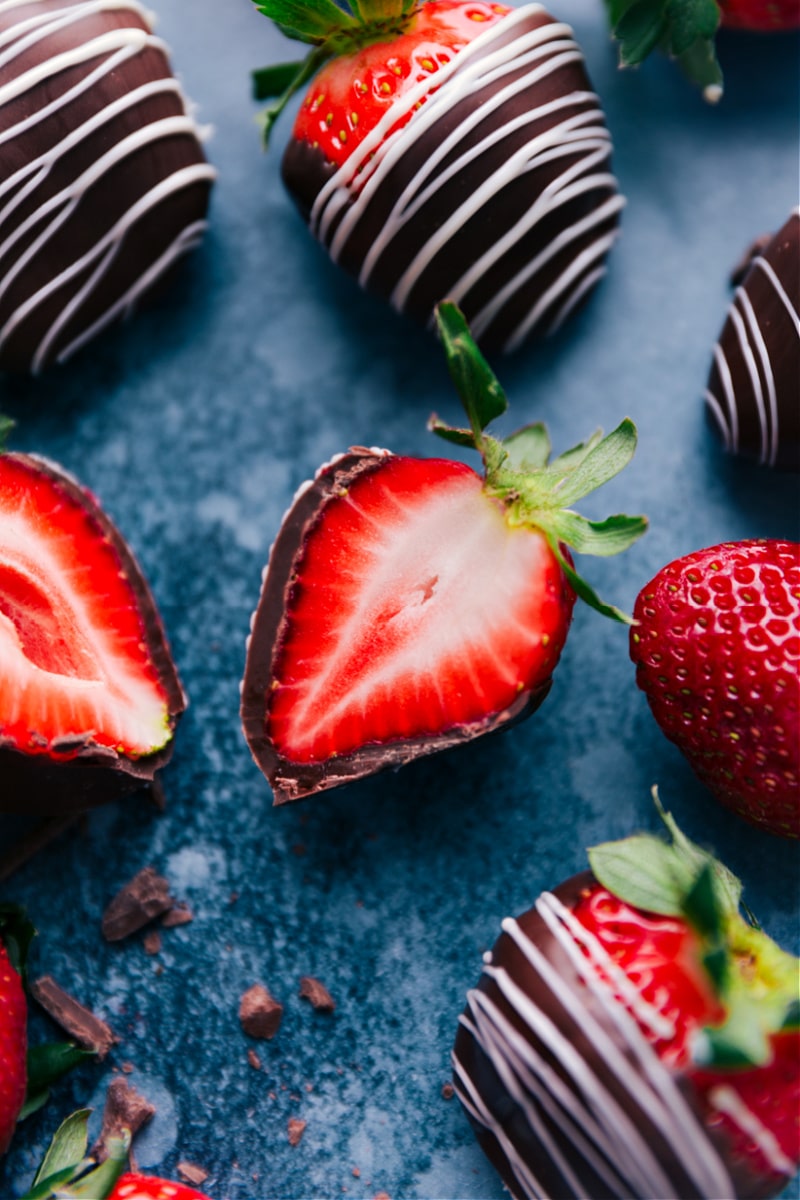
Chocolate Covered Strawberries are elegant yet easy! Juicy berries meet rich chocolate for a decadent treat. Add a chocolate drizzle for a fun touch.
Are you hosting? Try this Chocolate-Covered Strawberry Dessert Bar.
Table of Contents
- Best Chocolate Covered Strawberries
- Chocolate-Covered Strawberry Ingredients
- How To Prep Strawberries For Dipping
- How To Make Chocolate Covered Strawberries (Tips)
- Decorating Chocolate Covered Strawberries
- Common Issues
- Making Chocolate Covered Strawberries Ahead?
- Use Extra Strawberries In:
- Chocolate Covered Strawberries Recipe
Best Chocolate Covered Strawberries
One of my favorite treats is a simple chocolate-covered strawberry. But store-bought ones? They’re almost always a letdown. The strawberries are often old, and the chocolate slides off as the fruit leaks.
So, I decided to make my own. After lots of testing (I’m not mad about it), I’ve found the best way to make them—fresh, delicious, and never disappointing!
They’re the perfect treat or way to show your loved ones just how loved they are.
Chocolate-Covered Strawberry Ingredients
- Strawberries: Use the freshest, firm, bright red berries. Skip any that are soft.
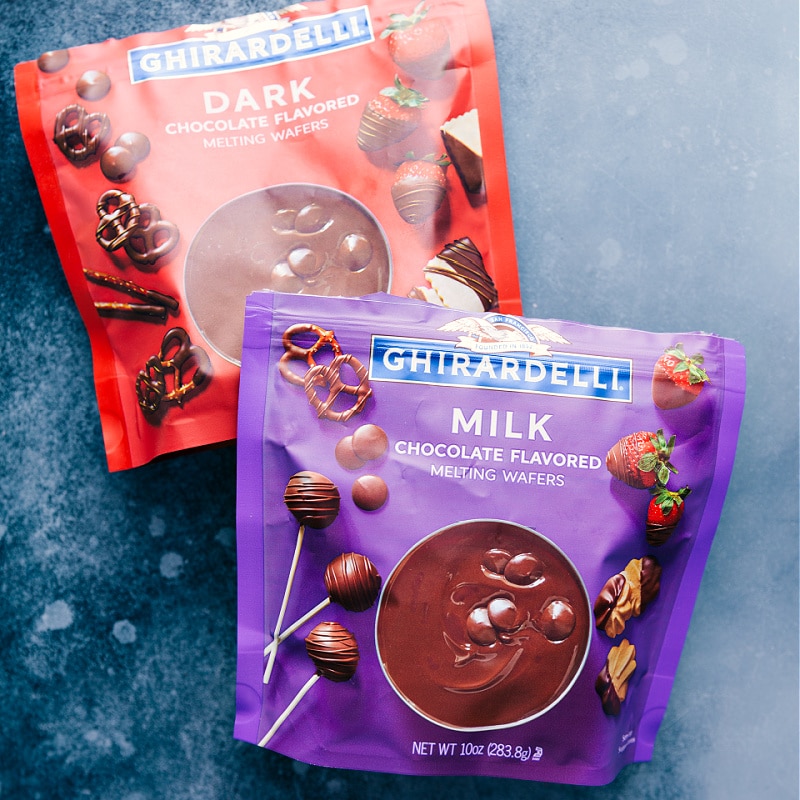
- Melting Wafers or Baking Bars: Wafers and bars are easier to use and won’t clump like chocolate chips.
- Oil: A little oil makes the chocolate smoother and easier to dip.
How To Prep Strawberries For Dipping
- Start with ripe and fresh strawberries without any soft spots.
- Wash very gently in cool water and carefully dry with paper towels.
- Let stand at room temp for about 30 mins to make sure the strawberries are completely dry and the berries aren’t cold from being in the fridge.
How To Make Chocolate Covered Strawberries (Tips)
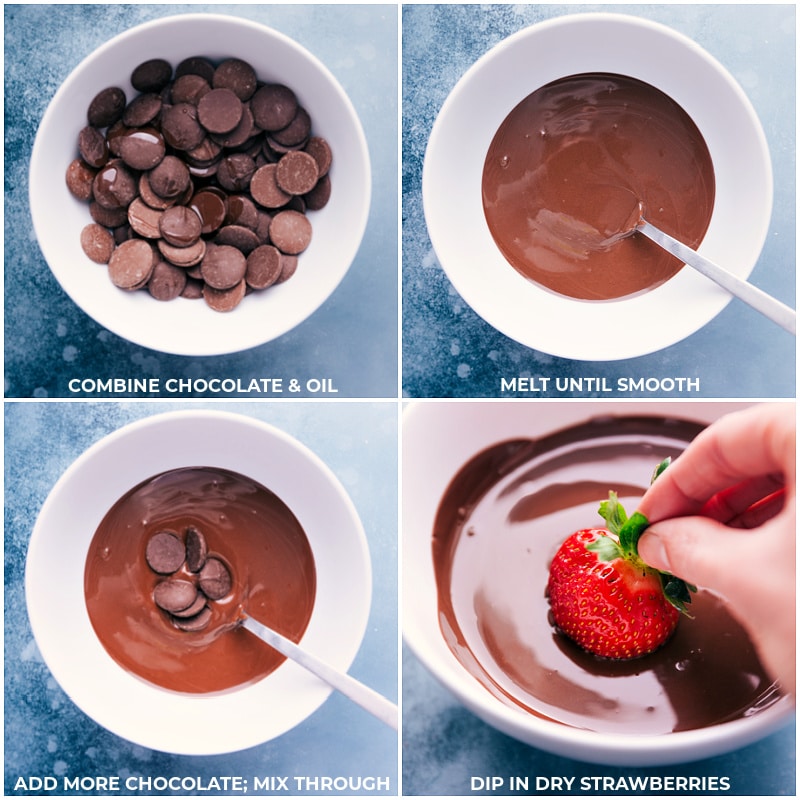
- Use heat safe bowls: Microwave chocolate in heat-safe bowls. Don’t use plastic.
- Don’t burn: Heat in short 15-second bursts, stirring well each time. Chocolate keeps melting even after it’s out, so don’t overheat.
- Keep chocolate smooth: When most of it melts, stir in a few solid pieces. This cools it down and helps it set properly for a shiny finish.
- Hold by leaves: Holding the strawberry by the leaves keeps your hands clean and makes dipping easier.
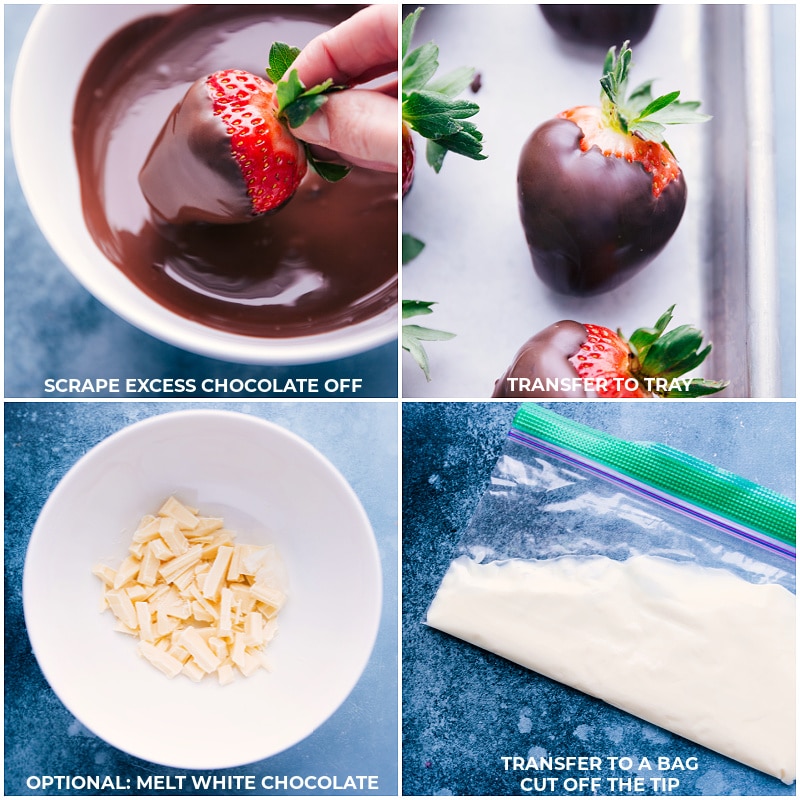
- Set on Paper: Put dipped strawberries on parchment paper so they don’t stick.
Decorating Chocolate Covered Strawberries
- Salty and Sweet: Add a pinch of sea salt flakes.
- Extra Toppings: Dip or sprinkle strawberries with Oreo crumbs, graham cracker crumbs, coconut flakes, nuts, or sprinkles.
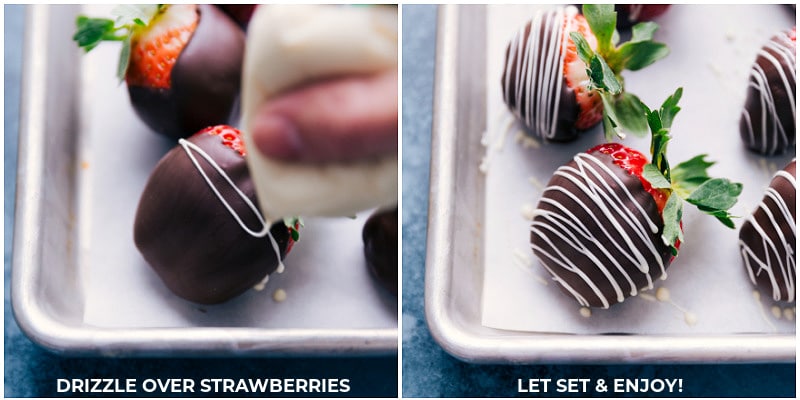
- Chocolate Drizzle: Drizzle melted white or dark chocolate. Pour into a plastic bag, cut the tip, and drizzle over strawberries.
Common Issues
How To Help Chocolate Stick To Strawberries:
Use melting wafers or baking bars—chocolate chips won’t melt smoothly. Make sure strawberries are dry. Don’t add too much oil, or the chocolate may slide off.
How To Prevent Leaking:
Use fresh, dry strawberries. Avoid hot chocolate or quick temp changes—don’t refrigerate or freeze to harden. Let set in a cool, dry place and enjoy the same day.
Why Won’t Chocolate Stick?
Strawberries may be wet or bruised. Moisture makes chocolate clump and turn grainy.
Storage
Making Chocolate Covered Strawberries Ahead?
They’re best the same day and last 8–10 hours in a cool, dry place before they start getting sticky or leaking.
If possible don’t refrigerate—moisture can make the chocolate crack. If you have to, store with a paper towel in the container.
Use Extra Strawberries In:
- Jamba Juice Strawberry Wild with frozen yogurt
- Strawberry Pretzel Salad with a sweet center
- Strawberry Scones with Greek yogurt mixed in
- Nutella Crepes with fresh strawberries
- Strawberry Milkshake with only four ingredients

Chocolate Covered Strawberries
Equipment
- Sheet pan lined
Ingredients
- 1-1/3 cups melting wafers see note 1
- 1 teaspoon coconut oil
- 2 pounds strawberries see note 2
Instructions
- Wash strawberries very gently in cool water and carefully dry with paper towels. Let stand at room temperature for about 30 minutes to ensure the strawberries are completely dry. Don't dip strawberries unless they are completely dry otherwise chocolate will become cloudy or won't stick to the berries.
- Line a large sheet pan with parchment paper, wax paper, or a silicone baking mat and set it aside. If using baking bars, coarsely chop the chocolate. Be patient when melting the chocolate and avoid rapid temperature changes. Do not microwave for too long or too many times; stir the chocolate frequently as it melts. Allow the coated raspberries to harden at room temperature instead of refrigerating or freezing them.
- Add all but 2 tablespoons of the chocolate melting wafers to a large microwave-safe bowl (see note 3). Add 1 teaspoon oil. Microwave for 15 seconds and then stir vigorously for 15 seconds. Continue to do this until the chocolate is melted. Once the chocolate is melted, add the reserved 2 tablespoons of chocolate and stir until it melts (see note 4). Be patient and resist the urge to microwave unless it isn't melting after stirring for a full minute.
- Once the chocolate is fully melted and smooth, hold a berry by the stem and dip it into the melted chocolate. Gently swirl to cover in the chocolate. Carefully slide the bottom of the strawberry against the edge of the bowl to remove any excess chocolate. Place the strawberry on the lined sheet pan. Repeat with remaining strawberries. If the melted chocolate is getting too hard to dip, heat it in the microwave for another 15 seconds and remix. You may need to add a 1/2 teaspoon or more of oil too.
- To drizzle chocolate on top, melt 2 ounces of white chocolate with 1/2 teaspoon of oil. Transfer the melted chocolate to a small plastic bag, seal it without air, and cut off a tiny tip. Drizzle over the strawberries. For a raised drizzle, wait until the chocolate has hardened; for a melted effect, drizzle right after coating the strawberries. You can also sprinkle on toppings like sprinkles or crushed Oreos before the chocolate sets. Let the strawberries cool at room temperature.
Recipe Notes
Nutrition
Nutrition information is automatically calculated, so should only be used as an approximation.





What a sweet and yummy treat!
Thank you Maribel! 🙂
I think I may make some for my daughter’s Kindergarten Brunch.
Thanks Cindy! I hope you enjoy them!
What a nice recipe
Thanks Loraine!
What a great and cute recipe!
Thank you Camille! 🙂
I’m a huge fan of chocolate covered strawberries. And thanks for the white chocolate melting tips – patience is one thing I struggle with. 🙂
Chelsea, I love chocolate strawberries and these are just the perfect way to make them.
These are super sweet unfortunately I have to admit, I probably don’t have the patience to make them myself. I’m going to have to pay someone to make them for me 🙂
Omg, Chelsea! Usually I’m terrible at dipping things in chocolate, haha, but I would so love to try these!
I love chocolate covered strawberries, and I love this version!
You are so sweet, thanks Kelly!