4 MORE adorable and simple to make Christmas oreo pops: a snowman, a Christmas tree, an ornament, and a polar bear.
This is the second installment of Christmas Oreo pops! If you’re looking for the first four (a penguin, snowflake, reindeer, and a candy cane) they were shared yesterday! You can see those by clicking here. 🙂
And today: Snowman, Christmas Tree, Ornament, and a Polar Bear!! Note that each recipe makes about 20-25 Oreo pops so if you want to do a variety of the pops then you’ll want to halve (or third or forth) each of the recipes.
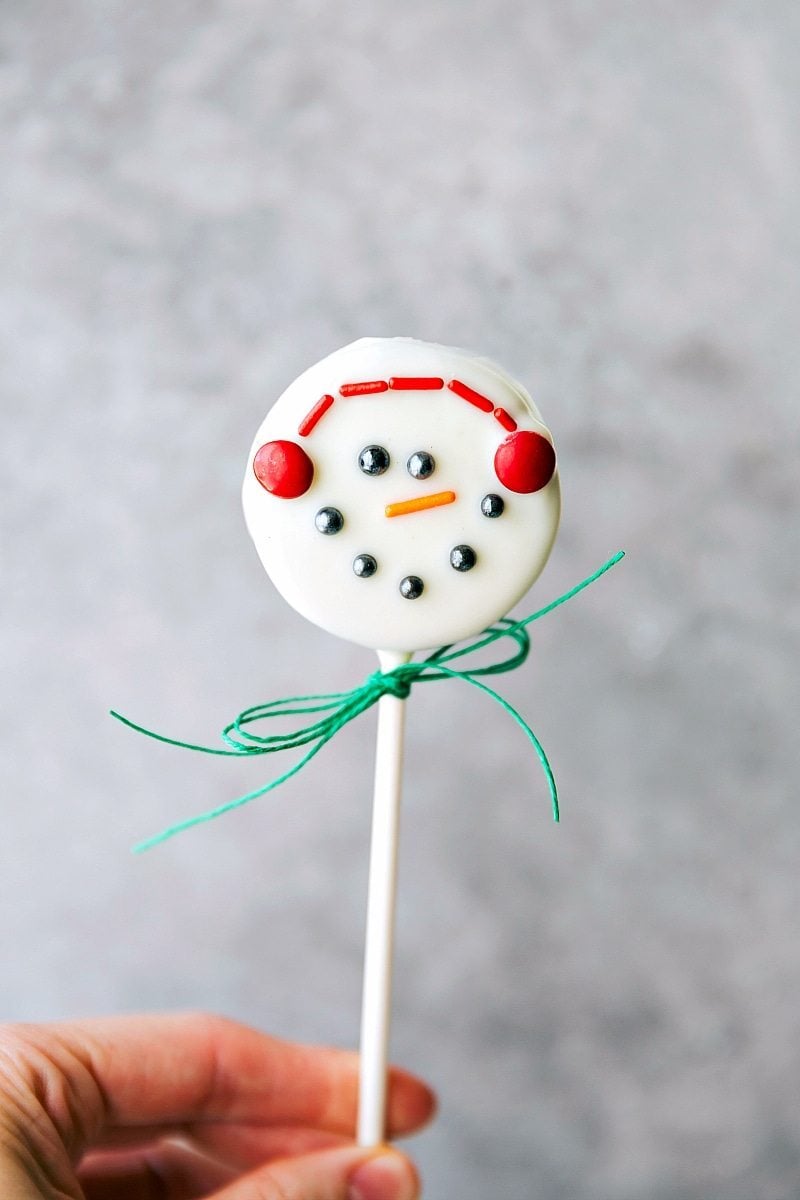
First: a SNOWMAN
In case you can’t find the ingredients in the store, or prefer the convenience of shopping online, here are links to the ingredients I used (click on the words below):
- Black Sugar Pearls
- Rainbow Jimmies Sprinkles
(pick out the orange and red ones)
- M&M’s Minis Milk Chocolate Baking Bits

Snowman Pops
Equipment
Ingredients
- 1 package of your favorite Oreos
- 1 (11-ounce) bag white chocolate
- 1 container black pearl sprinkles
- Red and orange jimmie sprinkles I just pick them out of a big tub of funfetti sprinkles
- 48 Miniature Red M&M’s
- Vegetable oil optional, makes the white chocolate easier to work with
- Lollipop sticks
Instructions
- Gently separate the Oreos by slowly twisting them apart. (Some will break. It’s okay; just try to be gentle.)
- Separate the white chocolate into 3 parts (this is to keep it from getting hard while you decorate) and place each section in a microwave safe bowl. If using chocolate chips, add about 1/2 teaspoon vegetable oil (more if needed to thin it even more).
- Melt in 20 second bursts in the microwave (microwave 20 seconds, stir 20 seconds, etc.). Be patient when melting and stir well between bursts to avoid burning the chocolate.
- Dip one end of the lollipop stick into the melted chocolate and press that side into the cream side of the Oreo.
- Place the other half of the oreo on top and gently press and hold.
- Place the oreo pop on top of a fork over the bowl of melted chocolate. Use a spoon to spoon chocolate over the oreo.
- Shake the fork gently on the edge of the bowl until the chocolate forms an even layer.
- Place on a sheet of parchment paper. Add 2 pearl sprinkles for eyes, an orange jimmie sprinkle for the nose, and more pearl sprinkles to form a mouth.
- Place 2 miniature M&M’s on either side of the Oreo to form “earmuffs.” Connect the earmuffs by using red jimmie sprinkles.
- Allow to harden at room temperature.
Video
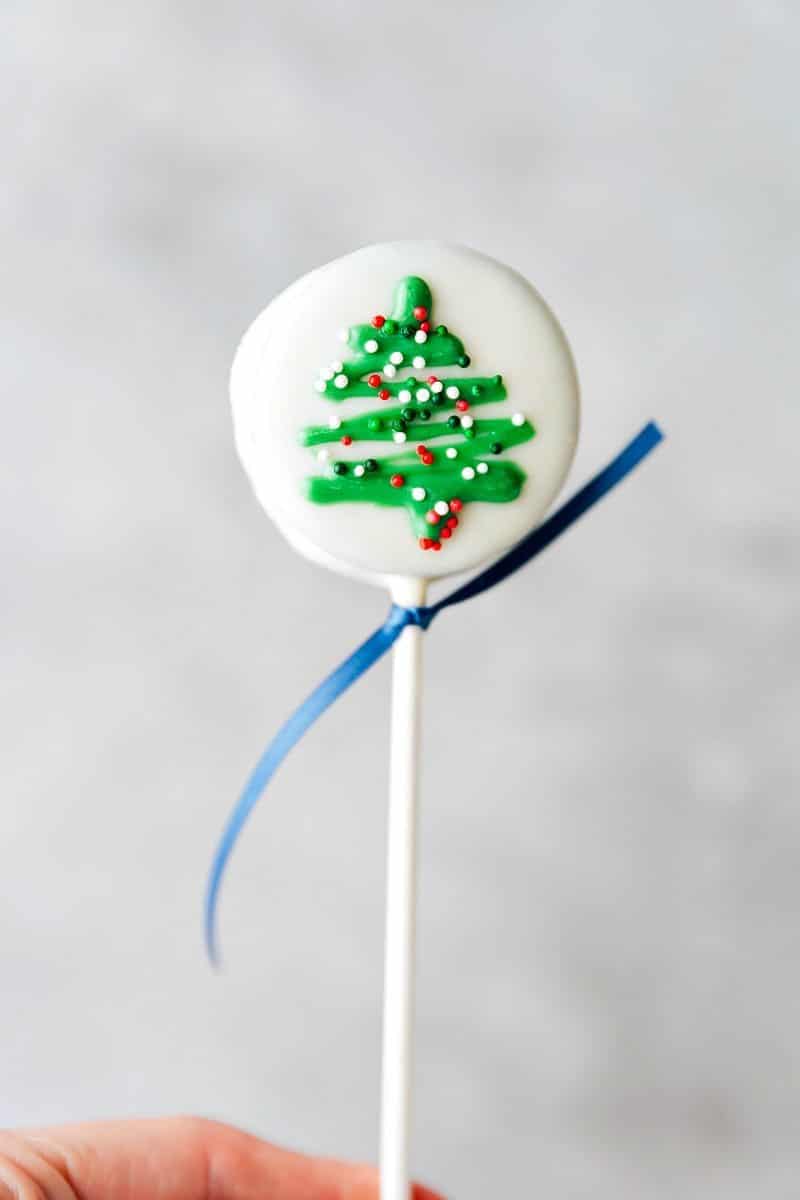
Next: a CHRISTMAS TREE
In case you can’t find the ingredients in the store, or prefer the convenience of shopping online, here are links to the ingredients I used (click on the words below):

Christmas Tree Pops
Equipment
- Resealable plastic bag small
Ingredients
- 1 package of your favorite Oreos
- 1 (11-ounce) bag white chocolate chips
- 1 (12-ounce) bag dark green candy melts
- Christmas sprinkles
- Vegetable oil optional
- 24 lollipop sticks
Instructions
- Gently separate the Oreos by slowly twisting them apart. (Some will break. It’s okay; just try to be gentle.)
- Separate the green candy melts into 3 parts (this is to keep it from getting hard while you decorate) and place each section in a microwave-safe bowl.
- To make the chocolate easier to work with, add about 1/2 teaspoon vegetable oil to each section of chocolate (you can add more later if needed to thin it even more).
- Melt in 20 second bursts in the microwave (microwave 20 seconds, stir 20 seconds, etc.). Be patient when melting and stir well between bursts to avoid burning the chocolate.
- Dip one end of the lollipop stick into the melted chocolate and press that side into the cream side of the Oreo.
- Place the other half of the Oreo on top and gently press and hold.
- Place the Oreo on top of a fork over the bowl of melted chocolate. Use a spoon to spoon chocolate over the Oreo.
- Shake the fork gently on the edge of the bowl until the chocolate forms an even layer.
- Set aside and allow to completely harden.
- Once hard, melt 1/3rd of the dark green chocolate. Add a little oil if needed to thin.
- Transfer the melted green chocolate into a plastic bag and snip off the very tip with scissors.
- Pipe the outline of the Christmas tree (see video tutorial), then sprinkle the Christmas sprinkles on top.
- Allow to harden at room temperature.
Third: ORNAMENT
In case you can’t find the ingredients in the store, or prefer the convenience of shopping online, here are links to the ingredients I used (click on the words below):

Ornament Pops
Equipment
Ingredients
- 1 package of your favorite Oreos
- 1 (12-ounce) bag red candy melts
- 1 bag miniature red M&M’s
- 1 bag miniature Reese’s
- Vegetable oil optional, makes chocolate easier to work with
- 24 lollipop sticks
Instructions
- Gently separate the Oreos by slowly twisting them apart. (Some will break. It’s okay; just try to be gentle.)
- Separate the chocolate into 3 parts (this is to keep it from getting hard while you decorate) and place each section in a microwave safe bowl.
- To make the chocolate easier to work with, add about 1/2 teaspoon vegetable oil to each section of chocolate (you can add more later if needed to thin it even more).
- Melt in 20 second bursts in the microwave (microwave 20 seconds, stir 20 seconds, etc.). Be patient when melting and stir well between bursts to avoid burning the chocolate.
- Dip one end of the lollipop stick into the melted chocolate and press that side into the cream side of the Oreo.
- Place the other half of the Oreo on top and gently press and hold.
- Place the Oreo on top of a fork over the bowl of melted chocolate. Use a spoon to spoon chocolate over the Oreo.
- Shake the fork gently on the edge of the bowl until the chocolate forms an even layer.
- Place on a sheet of parchment paper.
- Add M&M’s in whatever pattern (using whatever colors) you like!
- Press a miniature Reese’s on the top of the Oreo and hold to secure.
- Allow to harden at room temperature.
Last: a POLAR BEAR.
These cute little guys were inspired by Miss Candiquik!
In case you can’t find the ingredients in the store, or prefer the convenience of shopping online, here are links to the ingredients I used (click on the words below):

Polar Bear Pops
Equipment
Ingredients
- 1 package of your favorite Oreos
- 2 (11-ounce) bags white chocolate candy melts
- Black decorating gel
- 24 brown miniature M&M’s
- 48 miniature marshmallows
- Vegetable oil optional
- 24 lollipop sticks
Instructions
- See note 1 below to decide which step to add the marshmallows.
- Gently separate the Oreos by slowly twisting them apart. (Some will break. It’s okay; just try to be gentle.)
- Separate the white candy melts into 3 parts (this is to keep it from getting hard while you decorate) and place each section in a microwave-safe bowl.
- To make the chocolate easier to work with, add about 1/2 teaspoon vegetable oil to each section of chocolate (you can add more later if needed to thin it even more).
- Melt in 20 second bursts in the microwave (microwave 20 seconds, stir 20 seconds, etc.). Be patient when melting and stir well between bursts to avoid burning the chocolate.
- Dip one end of the lollipop stick into the melted chocolate and press that side into the cream side of the Oreo.
- Place the other half of the Oreo on top and gently press and hold.
- Place the Oreo on top of a fork over the bowl of melted chocolate. Use a spoon to spoon chocolate over the Oreo.
- Shake the fork gently on the edge of the bowl until the chocolate forms an even layer.
- Set aside on a sheet of parchment paper.
- Add 2 marshmallows to the top and hold to secure. Press a white candy melt on the Oreo, and using melted white chocolate, attach the mini M&M to that candy melt.
- Allow the chocolate to mostly harden (or harden all the way if you want the eyes to stand out more), then pipe on 2 dots for eyes.
Recipe Notes
Nutrition
Nutrition information is automatically calculated, so should only be used as an approximation.
More Christmas Fun:
- Easy Christmas Mason Jars (4 Ideas)
- Peppermint Sugar Cookies (Bakery Style)
- Peppermint Bark Pretzels (Only 3 Ingredients)
- Easy Microwave Fudge
- Christmas Oreo Pops










As Chelsea’s employee I love making these with my kids every holiday season! They are so cute, easy, and SO yummy!