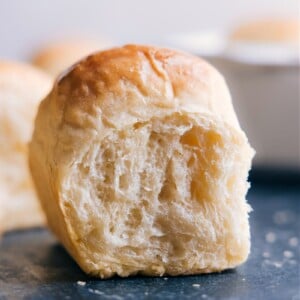
My favorite Life-Changing No-Knead Dinner Rolls are incredibly easy – no stand mixer, no hand mixer, and no kneading required!
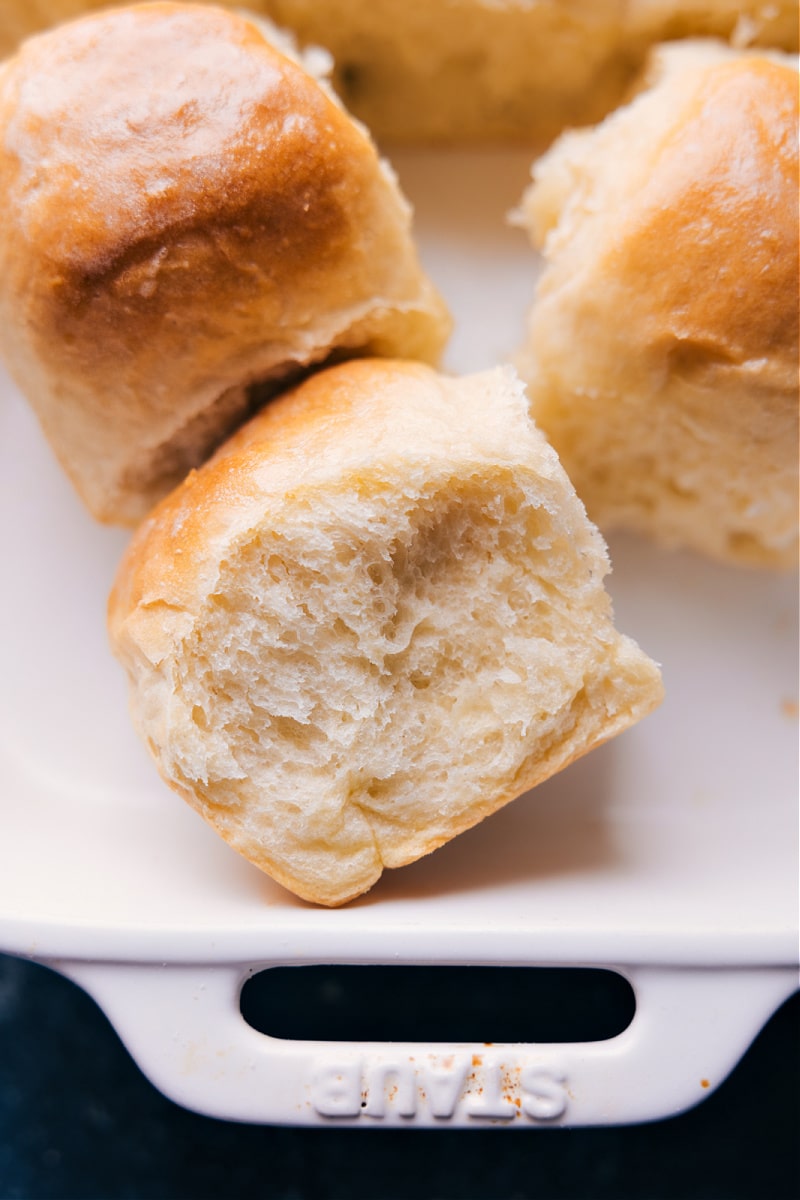
These rolls rise high with soft, fluffy centers and crisp edges. Yes, they really are life-changing!
If you’ve never made homemade rolls before, I’ll guide you through each step with all the tips and tricks I’ve learned over the years.
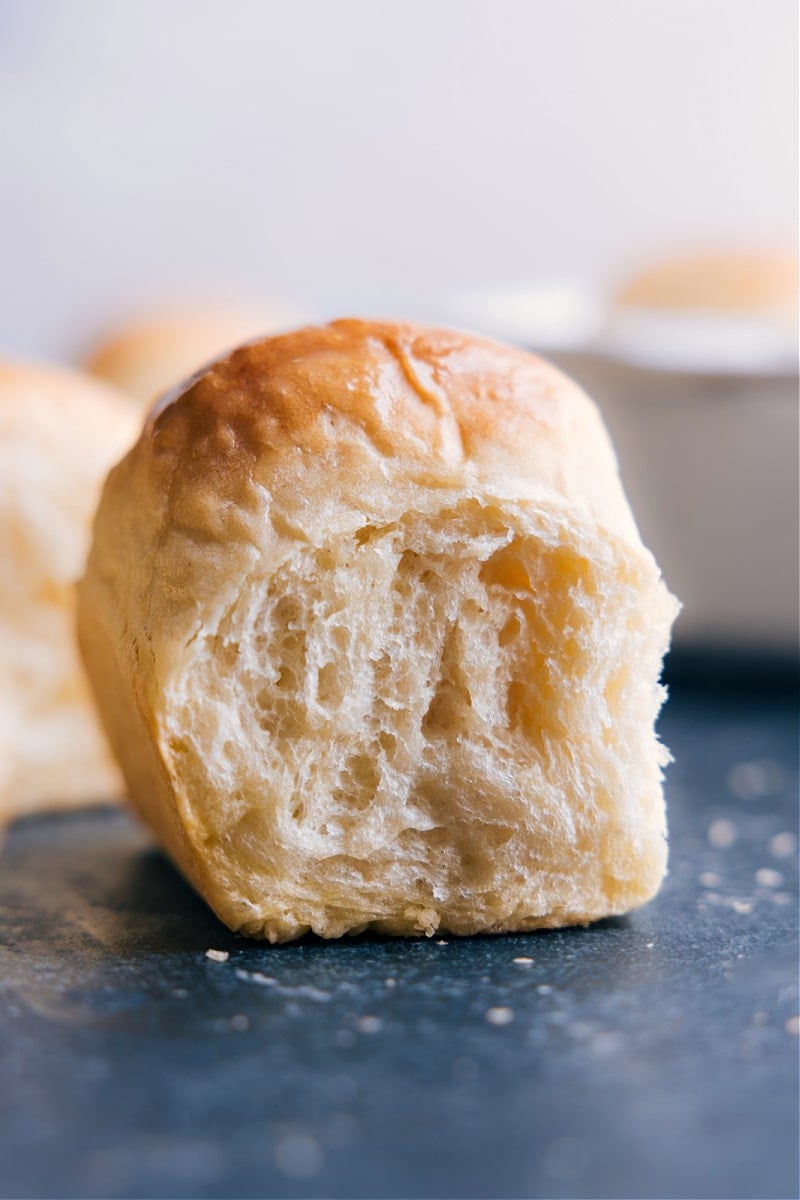
Why You Need This Dinner Roll Recipe!
These are the best dinner rolls! They’re big, soft, buttery, and taste amazing fresh from the oven with some honey butter or jam!
Besides tasting incredible, they’re also super easy to make. This No-Knead Bread recipe is a favorite at my house because it’s so simple, and I wanted the same in a roll.
Here’s why these rolls are magic:
- Only 7 ingredients
- No mixer needed
- Mixed by hand with a spatula
- No kneading required
- Make ahead or can be ready same-day
I can’t wait to hear what you think!
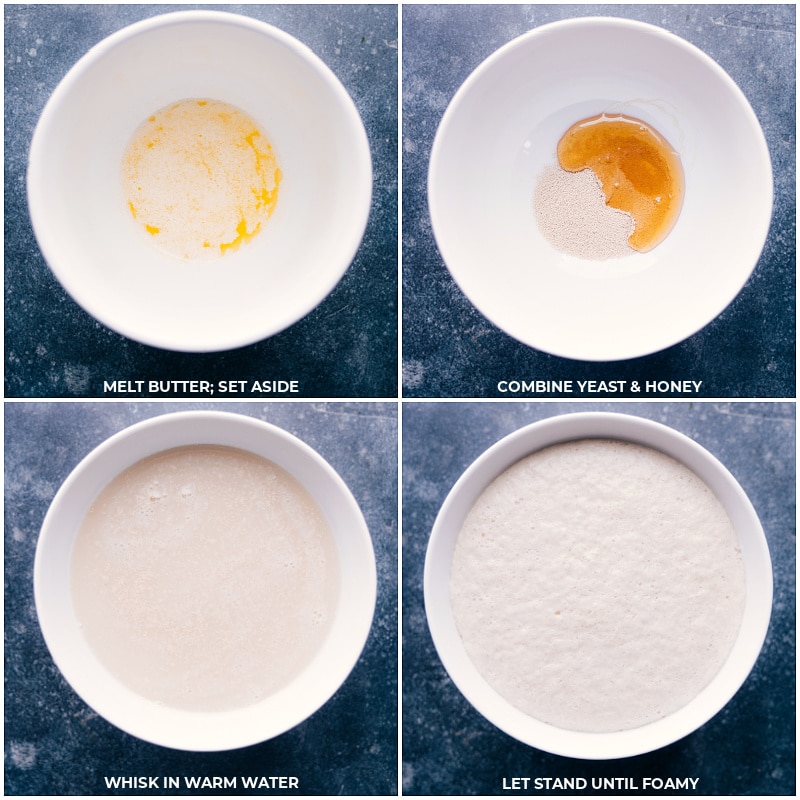
How To Make Dinner Rolls
- Proof the yeast: Mix warm water with yeast and honey, and let it sit for 5-10 minutes until it gets foamy.
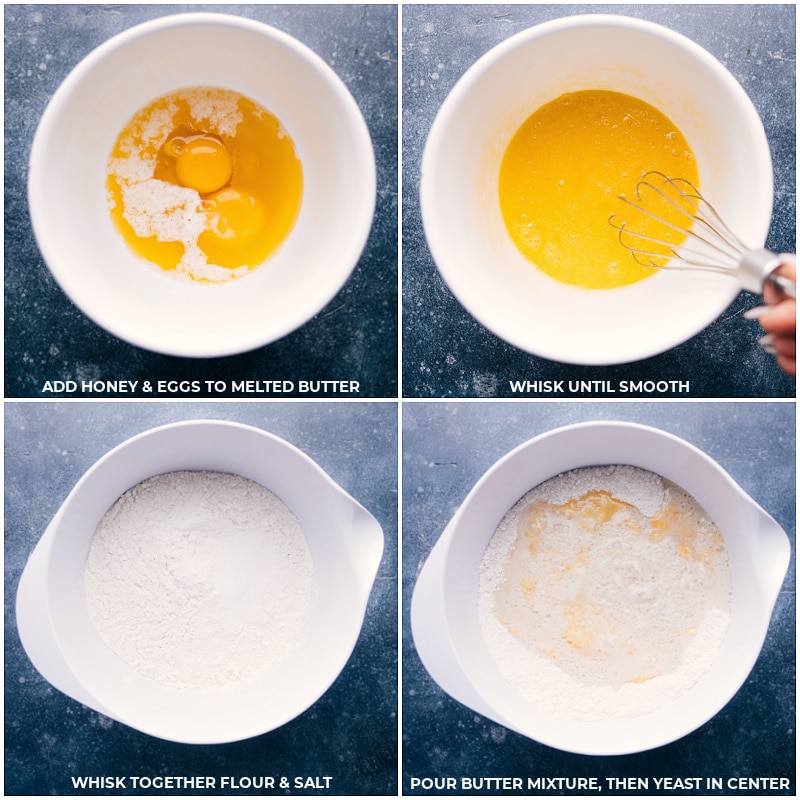
- Mix ingredients: Whisk melted butter, eggs, and honey. In a large bowl, combine flour and salt, then add the butter and egg mixture. Stir with a spatula until a thick, rough dough forms—no kneading required!
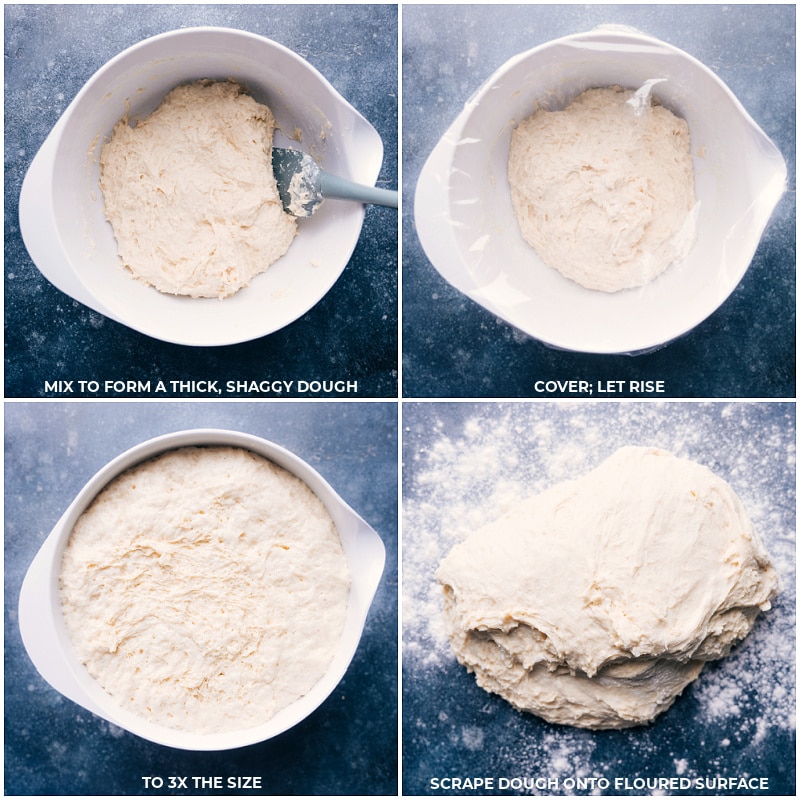
- Let the dough rise: Cover dough and let it rise in a warm spot for 1½ to 2 hours, or until it doubles in size.
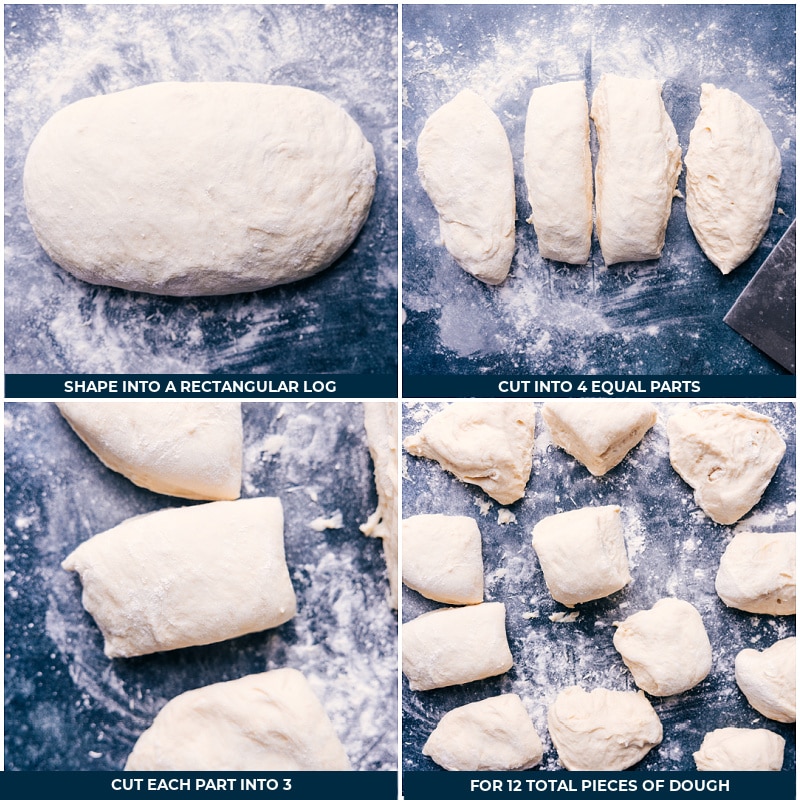
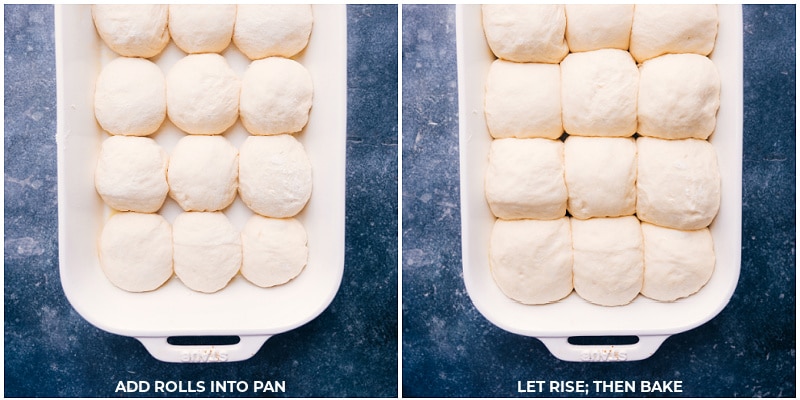
- Shape the rolls: Once risen, shape the dough into a rectangle and cut it into 12 pieces. Roll each piece into a ball and place in a greased 9×13-inch pan. Let them rise again for 30-45 minutes.
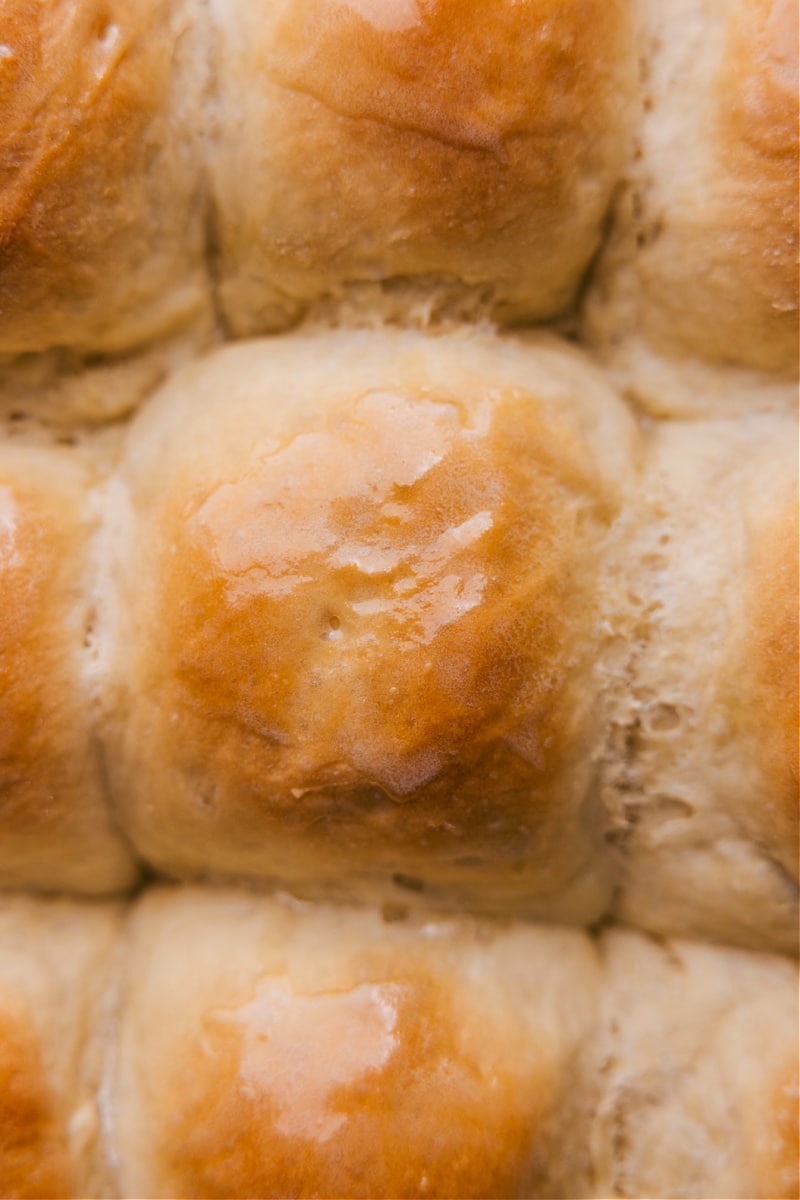
- Bake: Preheat the oven to 350°F. Bake until golden, then brush with melted butter. Enjoy warm!
Quick Tip
Why do they call it ‘proofing’ the yeast? Just think about it: Yeast that doesn’t rise won’t make good bread. So, when you put the water, honey, and yeast together, you’re proving that it’s all fresh. And that’s proof!
Tips for Perfect Dinner Rolls
- Foamy yeast: If your yeast doesn’t get foamy, it could be old, or the water might be too hot. Start over to avoid flat rolls.
- Speed up rising: To help the dough rise faster, place it somewhere warm, like near a low-heat fireplace or in an oven warmed to 170°F and then turned off.
- Best rise temperature: The dough rises best at 70°F. Too hot can kill the yeast, and too cold will slow it down.
- Shape easily: To shape the rolls, pull the dough from the top to the bottom and pinch underneath to make smooth, round rolls.
Variations
These rolls have a light sweetness from the honey, and with jam, they’re perfectly sweet! For a sweet soft dinner roll, add a few tablespoons white sugar to the flour mixture.
Dinner Rolls FAQs
Dinner rolls are small, individual-sized loaves of bread served as a side dish. Originally, they were designed to be easily passed around during meals.
Dinner rolls come in many types—crusty, soft, chewy, or dense, and made with different flours. But classic dinner rolls are usually puffy, with a soft inside, a tender crust, and a light buttery flavor, made with white all-purpose flour.
A few possible culprits:
-inactive/dead yeast
–too much flour
–not enough proofing (rising) time
Want to jazz up your rolls? Try these ideas:
-Brush with butter and sprinkle with fresh herbs like thyme, parsley, oregano, or rosemary.
-Serve with great butter and jam.
-Brush with butter and sprinkle with sea salt flakes.
What To Serve With Dinner Rolls
These soft dinner rolls are perfect for dunking or sopping up sauces!
- Pair them with hearty meals like Shepherd’s Pie, CrockPot Roast, or Spaghetti Bolognese.
- They’re also great for dipping in soups like Broccoli Cheddar Soup, Creamy Vegetable Soup, or Tortellini Soup.
- These are perfect for holiday dinners like Easter, Thanksgiving, and Christmas!
Storing Dinner Rolls
These rolls are best the same day they’re made.
Let them cool completely on a rack for about an hour before storing. Wrap in an airtight bag at room temp (don’t refrigerate or they’ll go stale).
- Freezing: Cool, wrap individually in foil, and place in an airtight bag.
- Thawing: Leave out overnight, then warm in foil for 10 minutes at 300°F. Serve warm.
Note: Rolls will lose some texture and flavor after freezing or on the second day.
Quick Tip
Since this is a slightly different dinner roll recipe, it’s a good idea to watch the quick video tutorial and read through the recipe before getting started!
More Easy Bread Recipes:
- Hawaiian Roll Cinnamon Rolls using packaged rolls!
- Focaccia no kneading
- Herb Bread overnight, artisan-style bread
- French Bread with a crusty exterior and soft, chewy interior
- Easy Cinnamon Roll Recipe no kneading
Dinner Rolls
Equipment
- Large pan 9 x-13-inch, use ceramic if possible
Ingredients
- 5 tablespoons unsalted butter separated
- 3 teaspoons instant yeast or active dry, see note 1
- 3 tablespoons honey separated
- 1-1/2 cups water warm (110℉)
- 2 large eggs
- 4-1/2 cups flour white, all-purpose, plus more for shaping rolls
- 2 teaspoons salt
Instructions
- In a microwave-safe bowl, melt 4 tablespoons of butter. Set aside to cool to room temperature.
- In a medium bowl, combine 3 teaspoons yeast, 1 tablespoon honey, and 1½ cups warm water (see Note 2). Whisk and let sit for 5 minutes or until the mixture looks creamy/foamy. If not, the yeast may be inactive, or the water was too hot, and you'll need to start over.
- In the melted butter bowl, add the remaining 2 tablespoons honey and 2 large eggs. Whisk until smooth.
- In a large bowl, whisk together 4-½ cups flour (615 grams) and 2 teaspoons salt. Create a well in the center. Pour in the butter mixture and yeast mixture. Stir with a strong rubber spatula until a thick, shaggy dough forms, with no dry streaks of flour. Cover with plastic wrap.
- First Rise:Same Day Rolls: Let the dough rise in a draft-free environment (about 70°F) for 90-120 minutes, or until nearly tripled in size (typically 90 minutes).Overnight Rolls: Let the dough rise in a draft-free environment for 30 minutes. Then refrigerate for 8-12 hours. Before shaping, let the dough stand at room temperature for 30 minutes or until tripled in size.
- Shape Rolls: Generously spray a 9×13-inch pan with cooking spray.Flour a large clean work surface and your hands. Dust a spatula with flour and scrape the dough onto the floured surface. Shape the dough into a rectangular log and cut it into 4 equal pieces, then cut each piece into 3 more pieces (to get 12 dough balls). Dust with flour as needed to prevent sticking.Shape each piece into a smooth ball by pulling the dough from the top and pinching it underneath. Place the pinched side down on the work surface and gently roll into a round ball. Place the balls into the prepared pan in 4 rows of 3. Cover with lightly greased plastic wrap.
- Second Rise: Let the rolls rise for 20-30 minutes (up to 45 minutes) or until nearly doubled in size.
- Preheat the oven to 350°F. Once the rolls have risen, remove the plastic wrap and bake for 45-50 minutes until golden brown and hollow-sounding when tapped. Brush the tops with the remaining 1 tablespoon of butter.
- Let the rolls cool slightly before serving.
Video
Recipe Notes
Nutrition
Nutrition information is automatically calculated, so should only be used as an approximation.




I made these yesterday for Father’s Day. They are the recipe I have been questing for!! This will now be my go-to dinner roll recipe. My family loved them and they were as easy as they sounded. Thank you 🙂
I am so thrilled to hear this! Thank you so much Teresa! 🙂
I have passed this recipe on to 3 different friends so far, and it is a HUGE hit for everyone. 🙂
Thank you so much Teresa! I am so thrilled to hear this! 🙂
These were my first ever dinner rolls, and they exceeded my expectations in every way! Easy, fluffy, perfectly browned, and delicious! Thank you for sharing your tips and tricks for this newby to succeed! I’m hooked now. Love these!!!!
I am SO thrilled to hear this! Thanks Tara! 🙂
Can you use sugar vs honey – allergy
I haven’t tried it personally, but don’t see why not!
I used real maple syrup and it worked perfect!
Thanks for sharing Teresa! 🙂
Maybe consider amending the recipe to call for 4 tablespoons of butter, not 5. This recipe requires a lot of reading and it is very easy to forget that you do not need all 5 tablespoons of butter for the recipe.
I agree, the instructions were a bit difficult to follow. I had to sit down and read the recipe thoroughly 3 times. Mine are rising now. I hope they’re delicious!
Thanks for your feedback! I’m always working to simplify my recipes, but dinner rolls are more specific and difficult to adjust, as leaving anything out can affect the outcome. I’ll review it and see what I can do to clarify things!
The ingredients list does not list honey, but the instructions talk about honey. What is the measurement of honey needed?
The ingredient list lists 3 tablespoons separated
In the description above the recipe you talk about warming milk, but the actual recipe calls for warm water. Is one better than the other? Obviously milk (except skim) has more flavor/fat than water, but which one were you intending to use for this recipe?
Thank you.
Sorry Cheryl! The recipe is for water; the post copy had an error, I’ve updated. Thank you so much!
I’ll have my oven set for 350 for Thanksgiving. Can these bake at 350 if they stay in a bit longer? Will that cause any issues?
How long do they last? How do you store them? Can they be frozen ?
Let rolls fully cool before wrapping them all together in foil. Place foil-wrapped rolls in an airtight bag and freeze. To thaw frozen dinner rolls: remove rolls the night before, letting them thaw at room temperature overnight. Loosen foil and then re-warm (in foil) for about 10 minutes in a 300-degree F oven. Serve immediately while warm (they dry out as they cool). Heads-up: Dinner rolls do lose texture and flavor the next day or after being frozen and thawed.