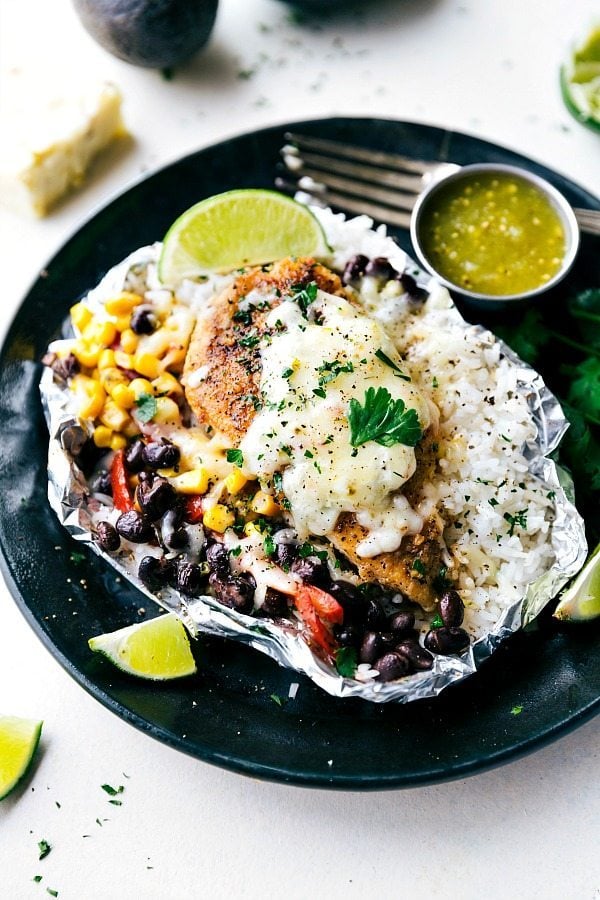
Salsa Verde Chicken and Rice with veggies cook together in a foil packet—no pre-cooking needed! Ready in 10 minutes with bold Mexican flavor.
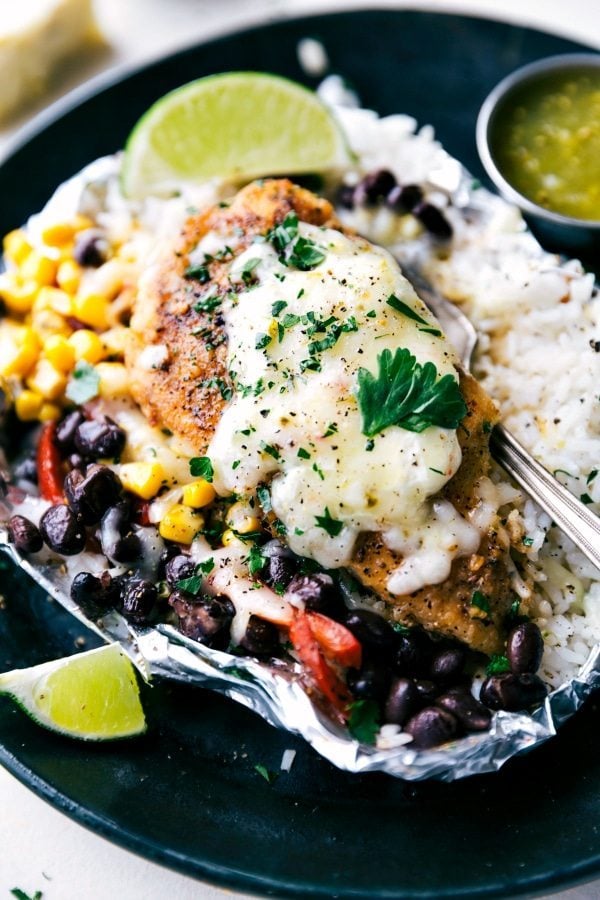
Foil Pack Salsa Verde Chicken And Rice
How fun is this dinner?! Chicken, rice, and veggies all cook in one flavorful foil packet. BAM—dinner’s ready with barely any prep for delicious salsa verde chicken and rice!
Lately, I’m all about tin foil dinners, and I hope you are too because I’ve got two more coming soon! We may or may not have been eating them non-stop for weeks. Though, to be fair, not every meal has been straight from the foil—I’ve been getting creative, like turning the fillings into TACOS. So easy, so good!
Ingredients
- Instant White Rice & Water: Let the rice sit in water for 5 mins before baking so it cooks evenly. Perfect for salsa verde chicken and rice.
- Chicken Breasts: Pound to ½-inch thick so it cooks faster and more evenly, ensuring great chicken and rice.
- Spices: Coat the chicken well so every bite is flavorful.
- Cream Cheese: Slice and place on top so it melts over everything while cooking.
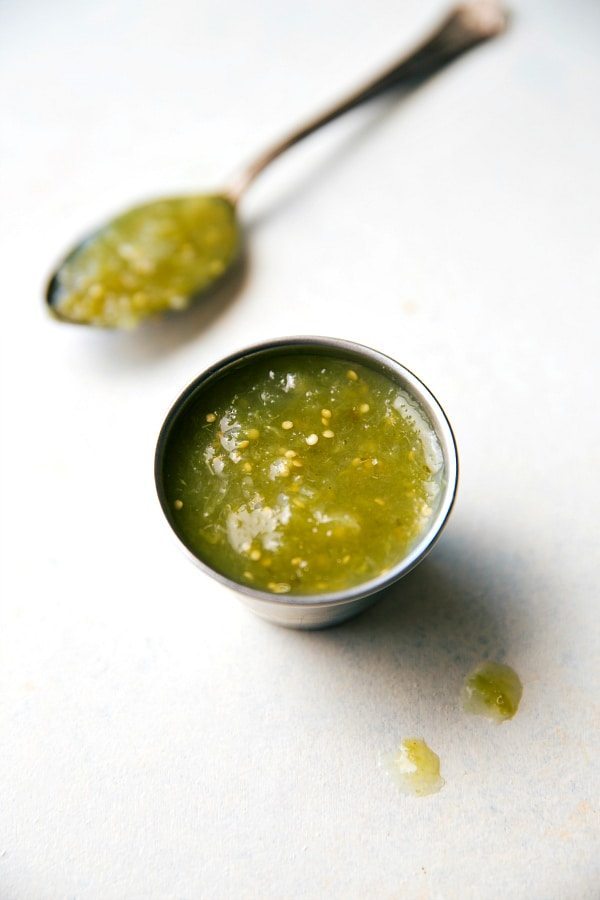
- Salsa Verde: Pour over the chicken before sealing the foil so the flavor spreads.
- Roasted Corn & Black Beans: Drain the beans well so the packets don’t get too watery.
- Pepper Jack Cheese: Add after baking for the best melt.
Salsa Verde Chicken And Rice Tips
- #1 Tip: Trim and pound chicken to ½ inch thick and 7 ounces for even cooking. This helps with making great salsa verde chicken and rice.
- Seal the foil tightly to trap juices, keeping the chicken moist. Loose seals lead to dry chicken.
- Prevent mess: Place a sheet of foil over a pan before baking to catch any leaks—easy cleanup!
- Grease the foil well with nonstick spray to keep the rice from sticking.
- Mix everything after baking to soak up all the juices. Use a fork to spread the cream cheese so it melts evenly.
- Use heavy-duty foil to prevent tearing and leaks.
- Place the oven rack in the middle for even cooking.
- Toppings make it even better! Don’t skip melty pepper jack cheese. Add cilantro, lime, avocado, sour cream, or extra salsa verde for more flavor in your salsa verde chicken and rice.
More Foil Pack Meals
- Hobo Foil Packets with sausage
- Tin Foil Jambalaya with rice
- Shrimp Foil Packets with fast cleanup
- Baked Potato Foil Packs hearty and filling
- Sausage and Potato Foil Packs super simple
Foil Pack: Salsa Verde Chicken & Rice
Equipment
Ingredients
- Cooking spray
- 1 cup instant white rice
- 1-1/2 cups water
- 2 (7 ounce) large boneless, skinless chicken breasts
- 1/2 teaspoon cumin
- 1/2 teaspoon garlic powder
- 1/2 teaspoon salt
- 1/2 teaspoon pepper
- 1 teaspoon chili powder
- 1/8 teaspoon paprika optional
- 1 ounce cream cheese full-fat
- 6 tablespoons salsa verde
- 1/2 cup roasted corn
- 1/2 cup black beans
- 1/2 cup pepperjack cheese
- Serving suggestions see note 1
Instructions
- Preheat the oven to 400°F. Generously grease 2 large sheets of heavy duty foil with cooking spray.
- Weigh your chicken to get two 7-ounce pieces. Pound or slice the pieces to 1/2-inch thickness.
- Toss together the instant rice and water and let stand for 5 minutes.
- In a bowl, toss together all the seasonings: cumin, garlic powder, salt, pepper, chili powder, and paprika. Dredge each chicken breast evenly in the seasonings (both sides).
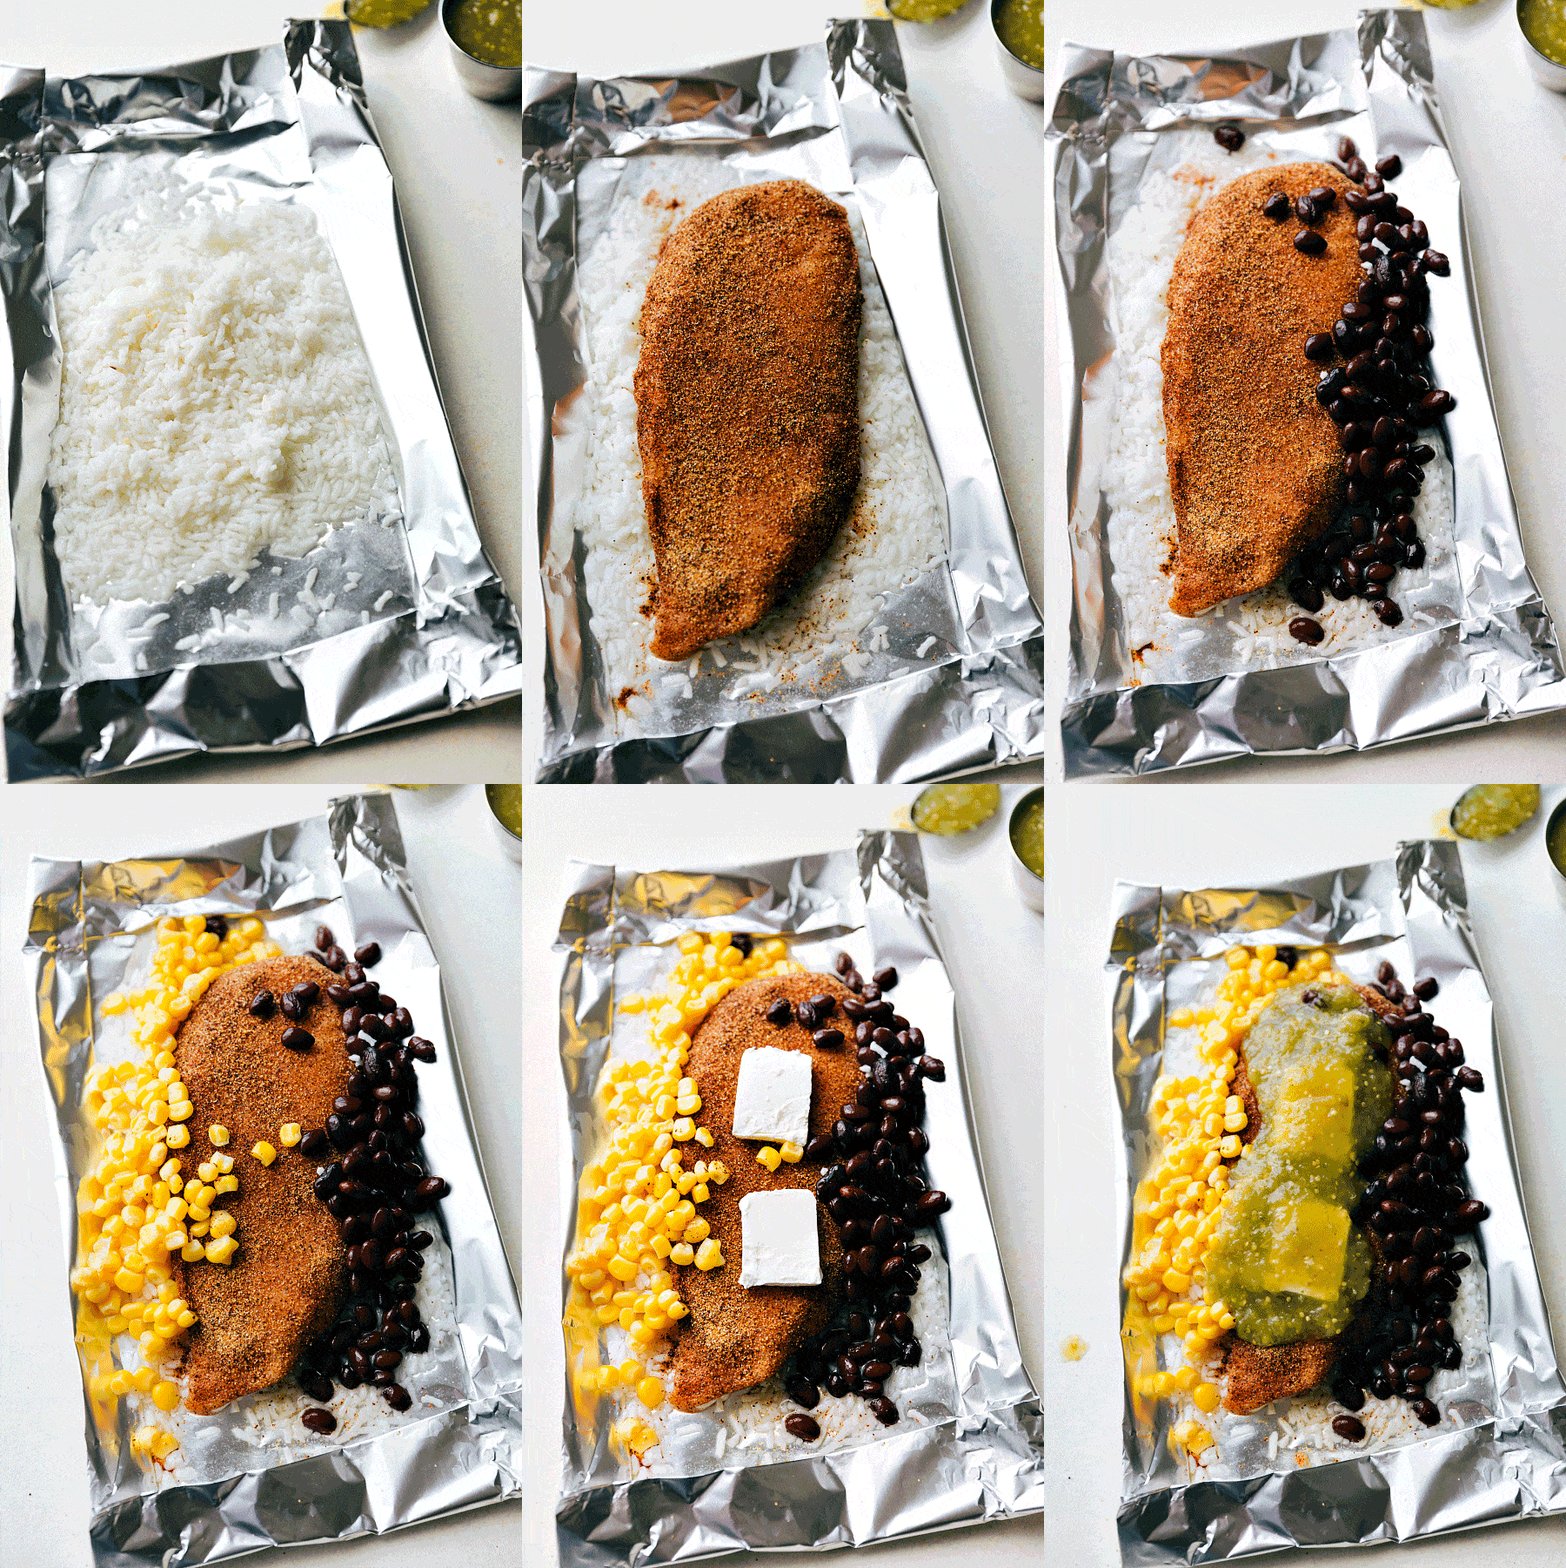
- Divide the rice and water mixture evenly between the 2 foil packets. Place the seasoned chicken on top.
- Slice the cream cheese into 4 equal pieces and place 2 pieces on top of each chicken breast.
- Pour 3 tablespoons of salsa verde on top of each chicken breast.
- Put 1/4 cup corn and 1/4 cup black beans next to each chicken breast. If desired, add a few pieces of thinly sliced red pepper to each packet.
- Seal the packet, allowing for expansion and making sure it is 100% sealed.
- Bake for 30–50 minutes (see note 2) or until the chicken is completely cooked through (registers 165°F).
- Mix everything around in your foil pack and top each with pepperjack cheese.
- Add other optional toppings as desired.
- To Grill: Preheat grill to medium-high heat and allow to heat for 10–15 minutes. Place completely sealed foil packets on grill for 25–35 minutes (or until chicken registers 165°F) flipping once at about 10–15 minutes.
Video
Recipe Notes
Nutrition
Nutrition information is automatically calculated, so should only be used as an approximation.




Absolutely delicious! The only change I made to the recipe was adding chopped red bell pepper in with the corn. At 37 minutes the chicken was perfect! I wish everyrecipe was as specific as this one as to the weight of the chicken breast, they vary so much. Thank you!!
Ahh i’m so glad to hear this Erin! Thank you! I’m so glad you enjoyed! 🙂
made this before work….turned out great. Instead of black beans i used pinto cause my partner does not like black beans…had some fresh ears of corn on hand so i fire roasted them before adding them…also added a few cloves of garlic and slices of onions along with the bell pepper….will defientenly make again…half with the cream cheese and half without (not a big fan of CC, but always willing to try something different)
Sounds awesome! I’m so glad you guys enjoyed!! 🙂
How spicy is this? It looks so good but I want to make sure my kids will eat it 🙂
I’d say it’s mild. It definitely depends on the brands you use though on the salsa verde. If you are worried you can reduce the chili powder or always add it after. Hope it’s a hit!
Fantastic recipe! Wife made it for dinner about a month ago, and I haven’t stopped thinking about those rice and beans since. She used the tomatillo salsa verde from Trader Joe’s and it’s straight up killer! Thanks!!
Love hearing that! Thanks for the comment Luke 🙂
And are the beans canned? Sorry for all the questions!! Thank you it looks so good I can’t wait to try it!
No worries at all! Yes, canned beans 🙂 (drained and rinsed!)
Do you use frozen corn or canned corn? Do you roast it yourself or is there a pre-roasted kind I don’t know about! 🙂 🙂
You can buy roasted canned corn 🙂
I am planning to cook this tonight, but am missing how the corn is roasted. Do you buy it roasted, does it roast in the foil? What am I missing?
If you grill it, it roasts in the foil, but you can also buy canned roasted corn. Enjoy!
My mother used to make a dish very similar to this: suggestions: she brushed the chicken w/ a flavor called “Kitchen–something”–it was brown & gave a nice finish to the (white!) chicken. Also, the first layer was a thick slice of onion. Then the rice was added, etc. I will try yours, as you’ve added more than my mom did. Thanks!!
Barb Caton
Sounds delicious! 🙂 Thanks for the comment!
“Kitchen Bouquet” is probably the product your mom used?
Can these be made ahead and frozen then defrost to cook. I hope so. I have this vision of my freezer packed with these. Love this idea.
I wish I could tell you definitively but I’ve never tried freezing these before cooking them. I don’t see why it wouldn’t work though. Let me know if you give it a try 🙂
I tried this recipe step by step, and it is AMAZING!!!!!!!. Great flavor. My family love it.
So happy to hear it!! Thanks for the comment Trisha 🙂