French bread just got a whole lot easier! This simple recipe delivers a light, fluffy loaf that rivals any bakery.
Once you start making homemade bread it’s hard to stop! Try this no-knead Focaccia, No-Knead Bread, or Honey Whole Wheat Bread next!
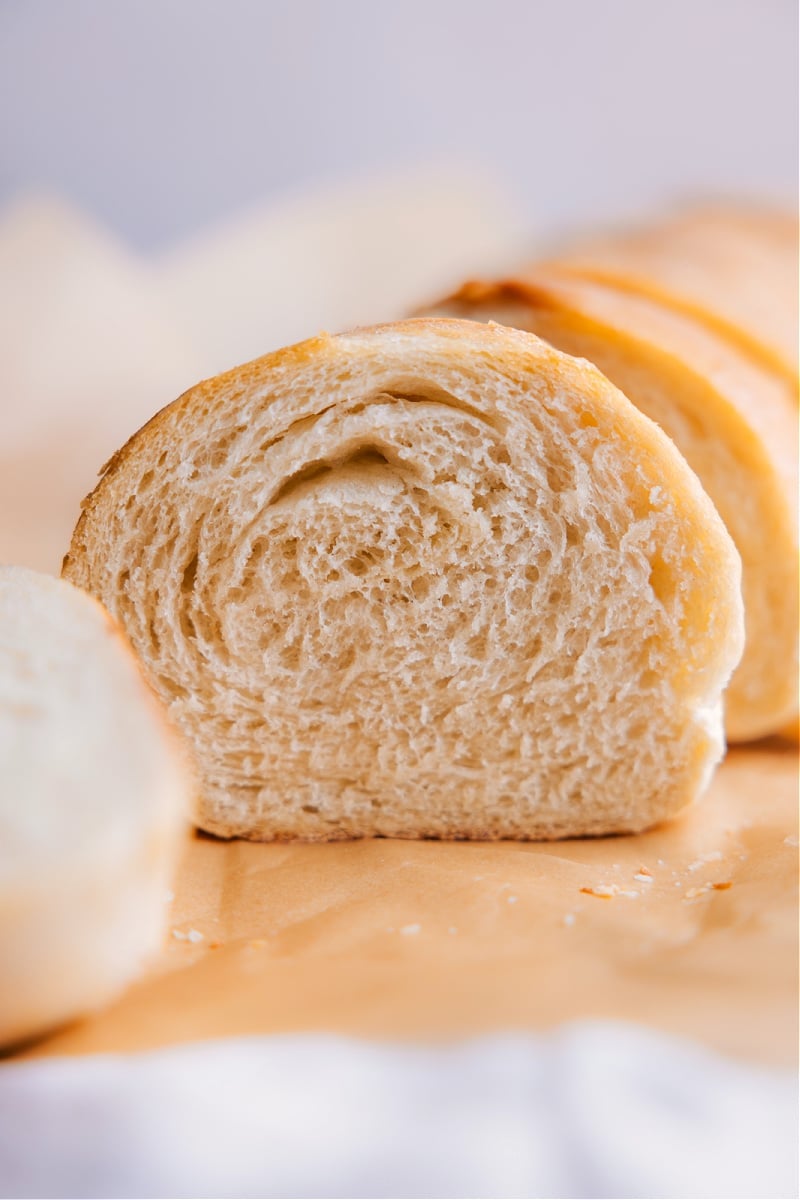
French Bread Recipe
When I was growing up, we always had a loaf of French bread at home. We’d snack on it, turn it into Margherita French Bread Pizza, or dip it into Broccoli Cheddar Soup.
While store-bought French bread is easy to get, homemade is so much better! This recipe is quick and simple, even easier than most bread recipes. Plus, you’ll have everything you need to succeed: a video guide, plenty of notes, and step-by-step photos!
French Bread Ingredients
- Warm water. To check water temperature, use the wrist test: Drop a few drops on your wrist. If it feels comfortably warm, it’s right. If hot or cold, the yeast won’t work.
- Yeast. This makes the dough rise and expand.
- Flour. Use plain all-purpose flour; in a pinch bread flour works too.
- Honey. Helps the yeast grow and provides a subtle sweetness to the French bread.
- Salt. Adds flavor and prevents bland bread.
- Olive oil. Helps the dough rise and boosts the bread’s flavor—just that little bit makes a difference!
- Butter. Makes the crust sweeter and softer when rubbed on after baking.
Quick Tip
Measuring flour can be tricky. Using a food scale is best, but if you don’t have one, fill the measuring cup and level it with a knife. Add flour slowly and look for these signs: the dough should form around the paddle, and it should be a bit sticky, smooth, and tacky but not stick to your finger.
Let’s Chat Yeast
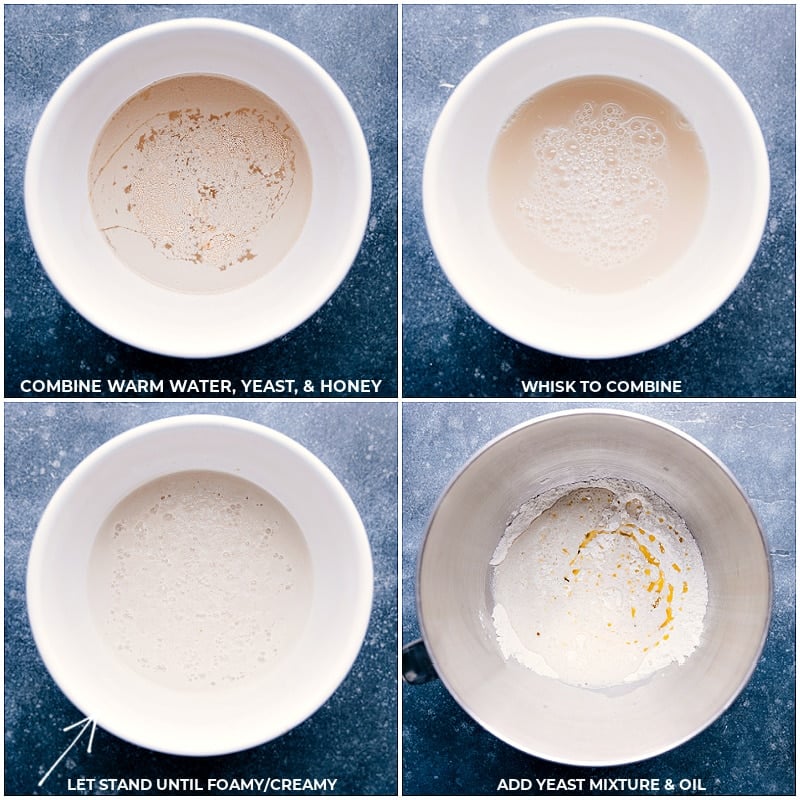
Proofing yeast makes sure it’s alive and working. This recipe works with both active dry and instant yeast.
Make sure the yeast activates before you proceed; otherwise, the bread won’t rise.
Activated yeast: It will bubble, foam, and look creamy.
Why didn’t my yeast activate?
- The yeast might be old.
- The water could be too hot or too cold.
- The environment might be too cold.
How To Make French Bread
- Prepare Yeast: Mix warm water, yeast, and honey. Let it sit until it bubbles.
- Mix Dough: In a mixer, combine flour and salt. Add yeast mixture and oil. Mix until the dough forms and is slightly sticky. Knead for a few minutes.
- First Rise: Shape dough into a ball and let it rise in a bowl until it’s doubled in size.
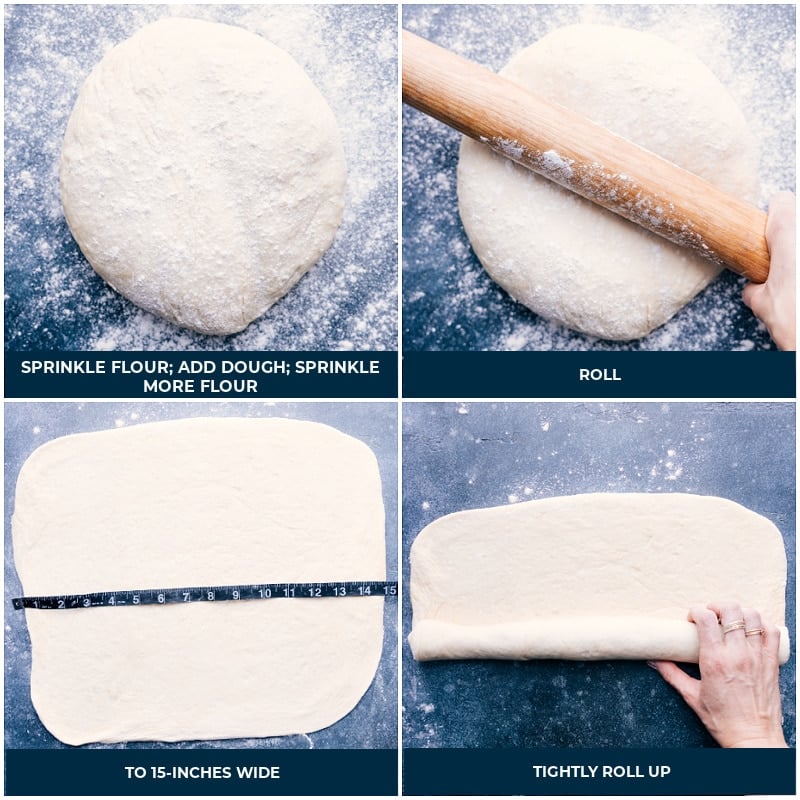
- Shape Bread: Roll dough into a rectangle, then roll it up and place it on a baking sheet. Let rise again.
- Bake: Preheat oven. Make slits on top of the loaf, bake until golden brown, and add ice cubes to the oven for a crispy crust.
- Finish: Brush with butter and cool before slicing.
French Bread Making Tools
These tools aren’t essential but can make baking easier and more enjoyable:
- Dough Scraper/Spatula: Great for scraping the sides and transferring dough from surface to bowl.
- Parchment Paper: Helps with even browning and prevents burning. (Avoid foil or wax paper, which can melt.)
- Lamé or Sharp Knife: Useful for making slits on top of the bread.
- Stand Mixer: Makes mixing dough much easier for French bread.
- Flour Sack Towels: Great for covering dough while it rises.
- Measuring Tape: Ensures the dough is the right size.
Tips For Success
- Create Steam: Throw 5-6 ice cubes onto the oven floor when baking. This generates steam which helps make the French bread crust better.
- Knead Dough: Gradually incorporate flour until the dough is soft and no longer sticky.
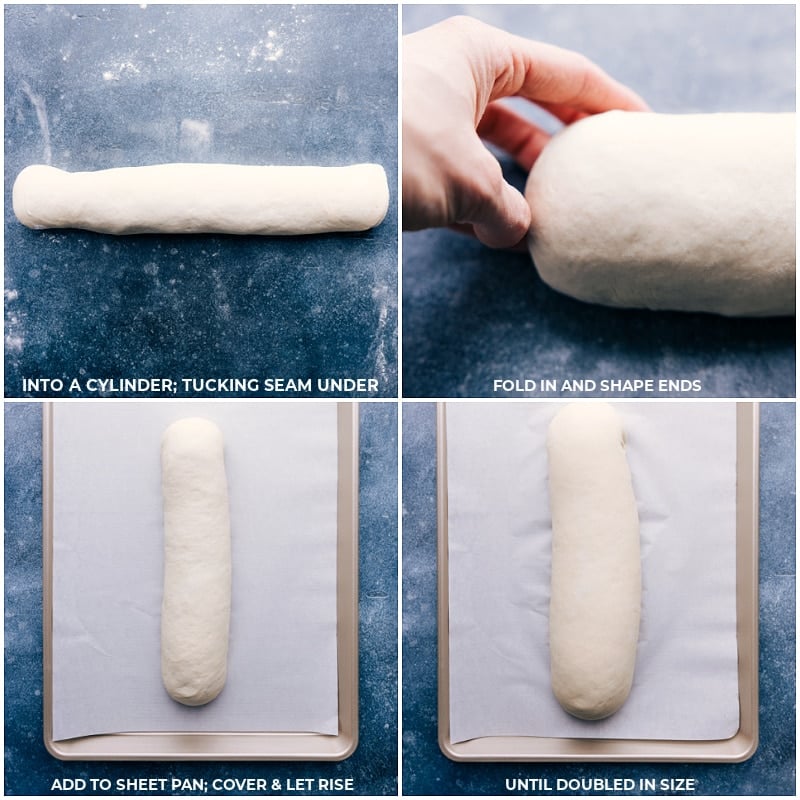
- Shape Loaf: Roll the dough into a loaf, tuck the ends under, and pinch the seams to ensure a good seal.
- Let Dough Rise: Place the dough in a warm location, like a window or on top of the stove.
What To Do With French Bread
- Enjoy It Warm: Best eaten the same day it’s made—my kids would say within 10 minutes!
- Make French Bread Pizza: Use French bread sliced in half as a crust. Try variations like French Bread Taco Pizza or Sloppy Joe Pizza.
- Serve with Meals: Great with One-Pot Spaghetti, Spaghetti Bolognese, or a Caesar Salad.
- Quick Dinner Melts: Perfect for Tuna Melts, Chicken Melts, or topping French Onion Soup.
- Repurpose Stale Bread: Use in Bread Pudding Recipe, French Toast, Homemade Croutons, or breadcrumbs.
Storage
Storing French Bread
Fresh: Best on days one and two. Leave it out uncovered with the cut side down to keep the crust crispy. After that, store it in an airtight bag or container. It may lose its crispiness but is still good when toasted.
Freezing: Slice and wrap each piece. Store in an airtight bag or container in the freezer for up to 3 months. Toast directly from the freezer.
Soups To Dip Bread In
- Creamy Vegetable Soup with Cheddar cheese
- White Bean Soup with lots of veggies
- Vegetable Noodle Soup with Orzo pasta
- Easy Tomato Soup made with canned tomatoes
- Minestrone Soup with ditalini
French Bread
Equipment
Ingredients
- 1 cup water warm (110℉), see note 1
- 1-1/2 teaspoons instant dry yeast or active dry yeast
- 2 teaspoons honey
- 2 cups all-purpose flour plus more as needed, see note 2
- 1-1/2 teaspoons salt
- 1 tablespoon olive oil plus more for greasing bowl
- 5 to 6 ice cubes see note 3
- Salted butter optional, for topping bread slices
Instructions
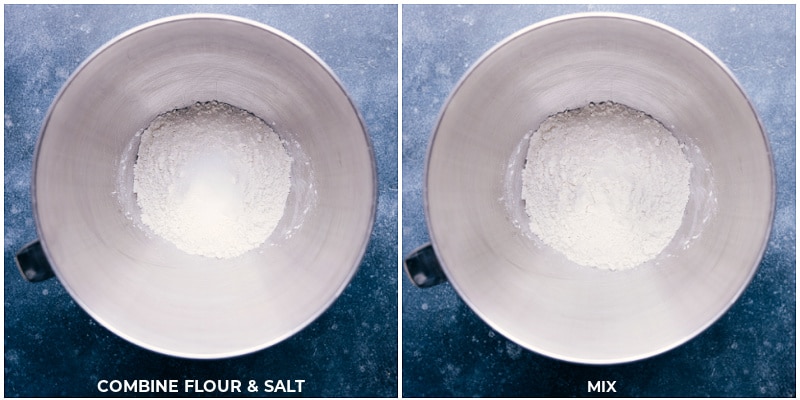
- In a stand mixer, combine the flour and salt. Stir with a rubber spatula to mix.
- In a medium bowl, whisk together the warm water, yeast, and honey. Let sit for 5–10 minutes, until the mixture looks creamy or foamy. If it doesn’t foam, the yeast is dead, and you’ll need to start again.
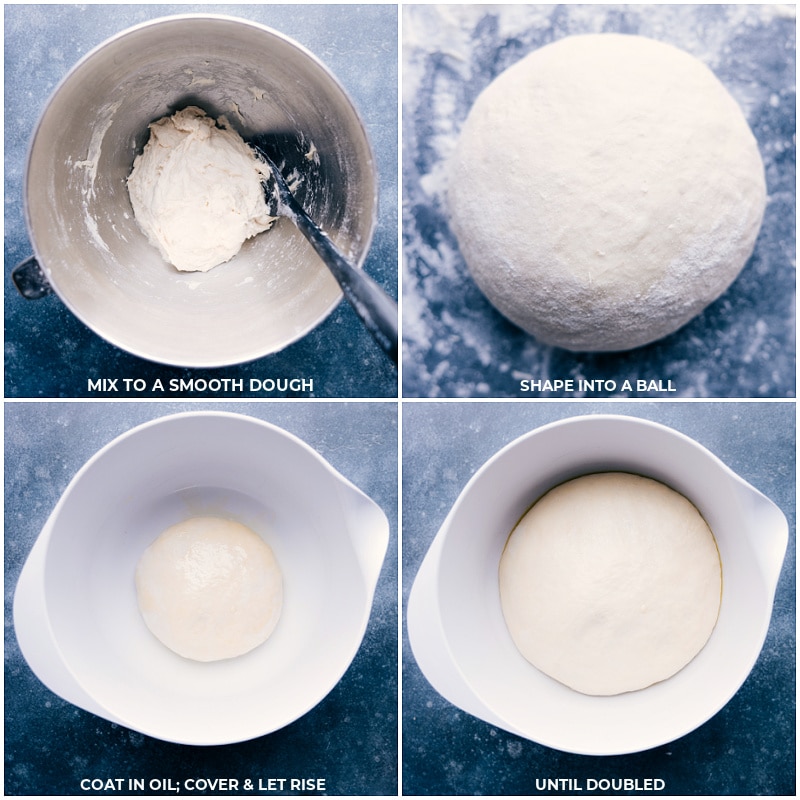
- Scrape the yeast mixture into the flour using a spatula. Add the olive oil. Attach the paddle to the stand mixer and mix on low speed until combined. Gradually add more flour, starting with 1/2 cup (65g) and an additional 1/4 cup (30g) if needed. The dough should gather around the paddle and stop sticking to the sides. It should be smooth and slightly sticky but not overly so. Avoid adding too much flour, as this will make the bread tough. Knead the dough for 3 minutes on medium speed once it gathers around the hook.
- Lightly sprinkle 1 tablespoon flour on a clean work surface. Transfer the dough from the bowl to the floured surface. Sprinkle another tablespoon of flour on top. Knead the dough a few times and shape it into a round ball. Grease the stand mixer bowl with 1 teaspoon olive oil, place the dough back into the bowl seam-side down, and turn it to coat with oil. Cover with a kitchen towel and let rise in a warm spot until doubled in size, about 30 minutes to 1 hour.
- Sprinkle 1 tablespoon flour on a clean surface and place the risen dough on top. Sprinkle another tablespoon of flour on top. Use a rolling pin to roll the dough into a large rectangle, about 15 x 12 inches (38 x 30 cm). Flip the dough and roll it up into a tight cylinder from the long side. Pinch the seams closed, tuck the ends under, and place seam-side down on a parchment-lined sheet pan. Cover with a kitchen towel and let rise for 30 minutes to 1 hour, or until doubled in size.
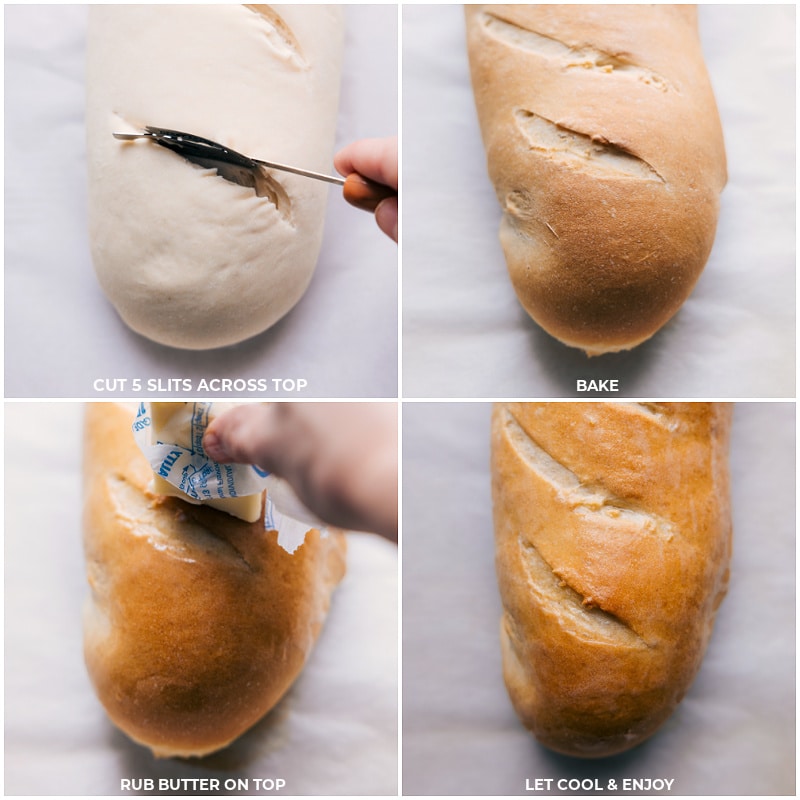
- Preheat the oven to 400°F (204°C). Once the dough has risen, make 5 diagonal slits across the top of the loaf using a paring knife. Place the baking sheet in the oven and quickly toss 5–6 ice cubes into the bottom of your oven. Close the door quickly. Bake for 18–28 minutes, or until the loaf is golden brown. Tap the top of the bread—it should sound hollow. If browning too quickly, cover with foil and reduce the oven temperature to 375°F (190°C).
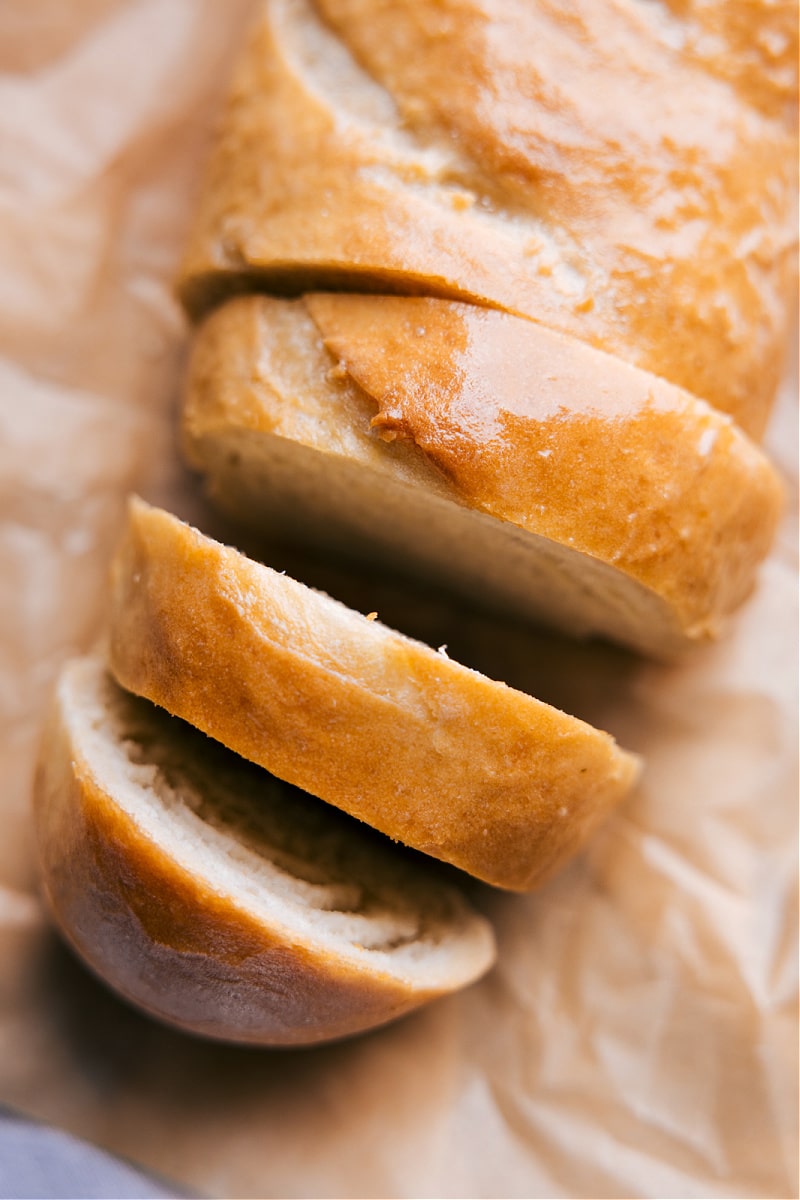
- Remove the bread from the oven and immediately brush the top with 1–2 tablespoons of butter. Let the bread cool for 15 minutes on a wire rack before slicing and serving.
Video
Recipe Notes
Nutrition
Nutrition information is automatically calculated, so should only be used as an approximation.





I was looking for something similar to what you get at grocery store bakeries, the stores here are like russian roulette if the bread will be raw or stale so I don’t buy them anymore, but needed something softer than a traditional baguette and this is perfect! It tasted exactly like I hoped and it worked great for soup. I didn’t have ice so I used boiling water in a pan below the bread and it worked pretty good, not as good, but close! Super quick recipe too. I started it around 1:30 and had the loaf baked before dinner at 5 so, yay!
I am SO thrilled to hear this! Thanks so much Jade! 🙂