Creamy, sweet Nutella Pie has a thick Oreo® cookie crust and fresh whipped cream on top. No baking is required for this easy recipe!
Use leftover Nutella® in strawberry Nutella Crepes or Chocolate Dip for Fruit.
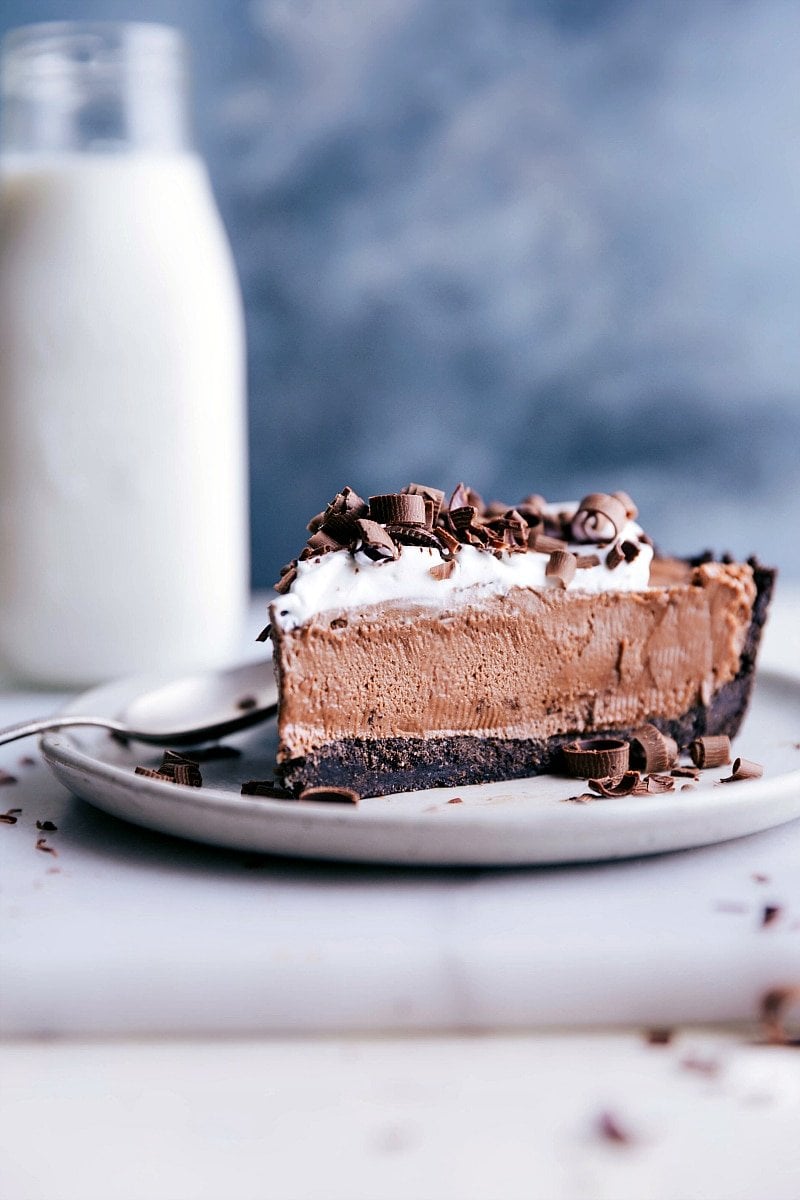
The Best Nutella Pie
This chocolate cream pie is one of my all-time favorites. As a huge Nutella fan, I had to make a version with my favorite spread. A chocolate Nutella pie was the perfect combo, and it didn’t disappoint.
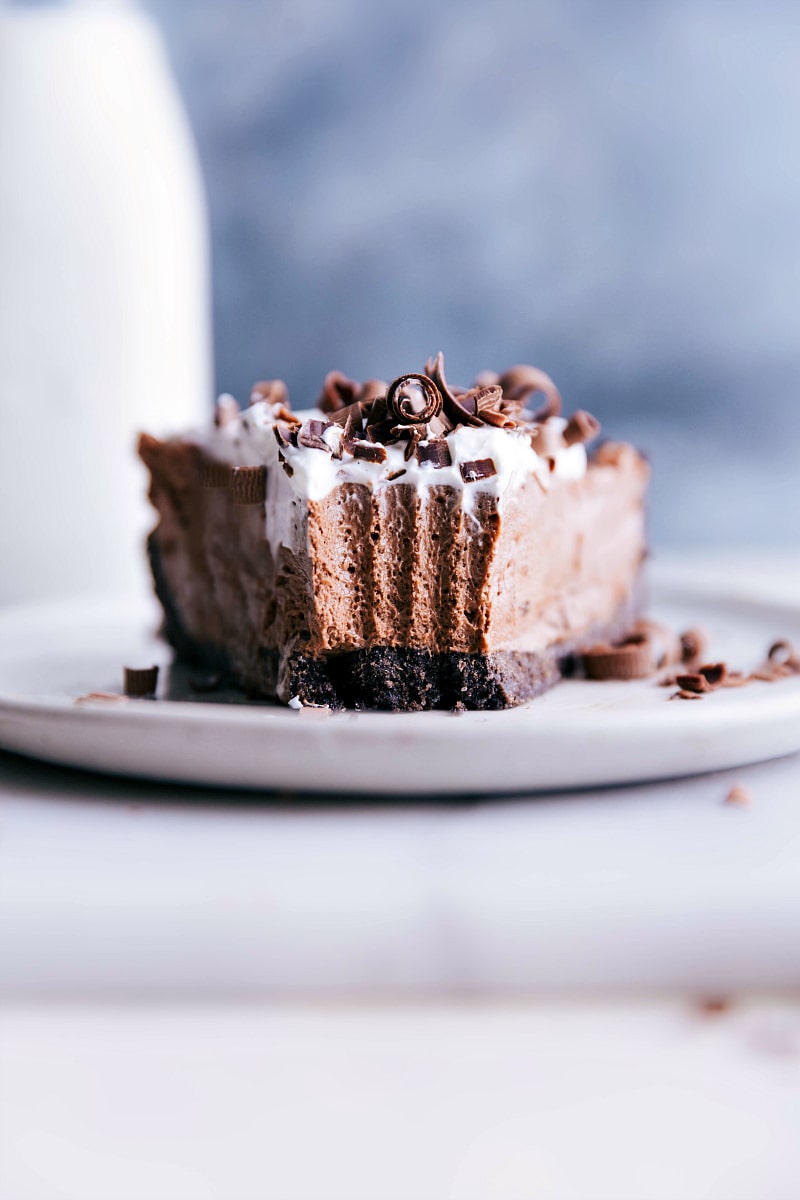
The smooth, rich chocolate filling has a subtle hazelnut flavor from the Nutella. The thick Oreo crust is the perfect base, and the creamy, chocolatey filling has just a hint of tang from the cream cheese. Whipped cream and chocolate curls on top finish it off perfectly.
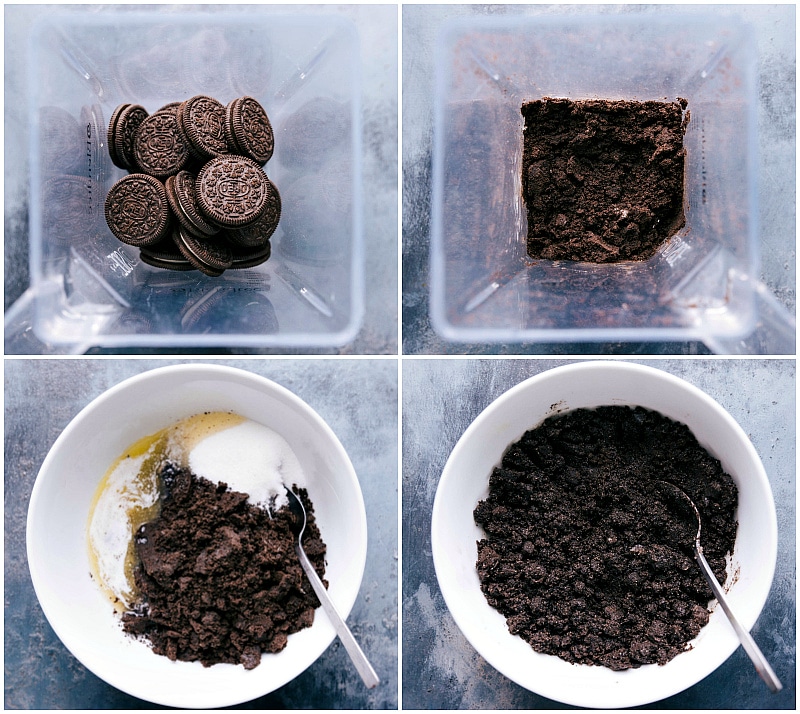
Oreo Crust
The Nutella Pie base is an Oreo crust—so delicious! Just crush the Oreos, mix with sugar and butter, and press into the pan.
Quick tips:
- Make sure the Oreos are crushed completely to avoid uneven slices.
- Let the melted butter cool a bit before mixing to keep the crust from getting greasy.
- Press the crust firmly with the bottom of a metal measuring cup for an even, smooth base.
Quick Tip
If you want to make this quick-and-easy recipe even quicker and easier, you can purchase a pre-made Oreo crust! You’ll find them in the baking goods section of the store, near the other pre-made pie crusts.
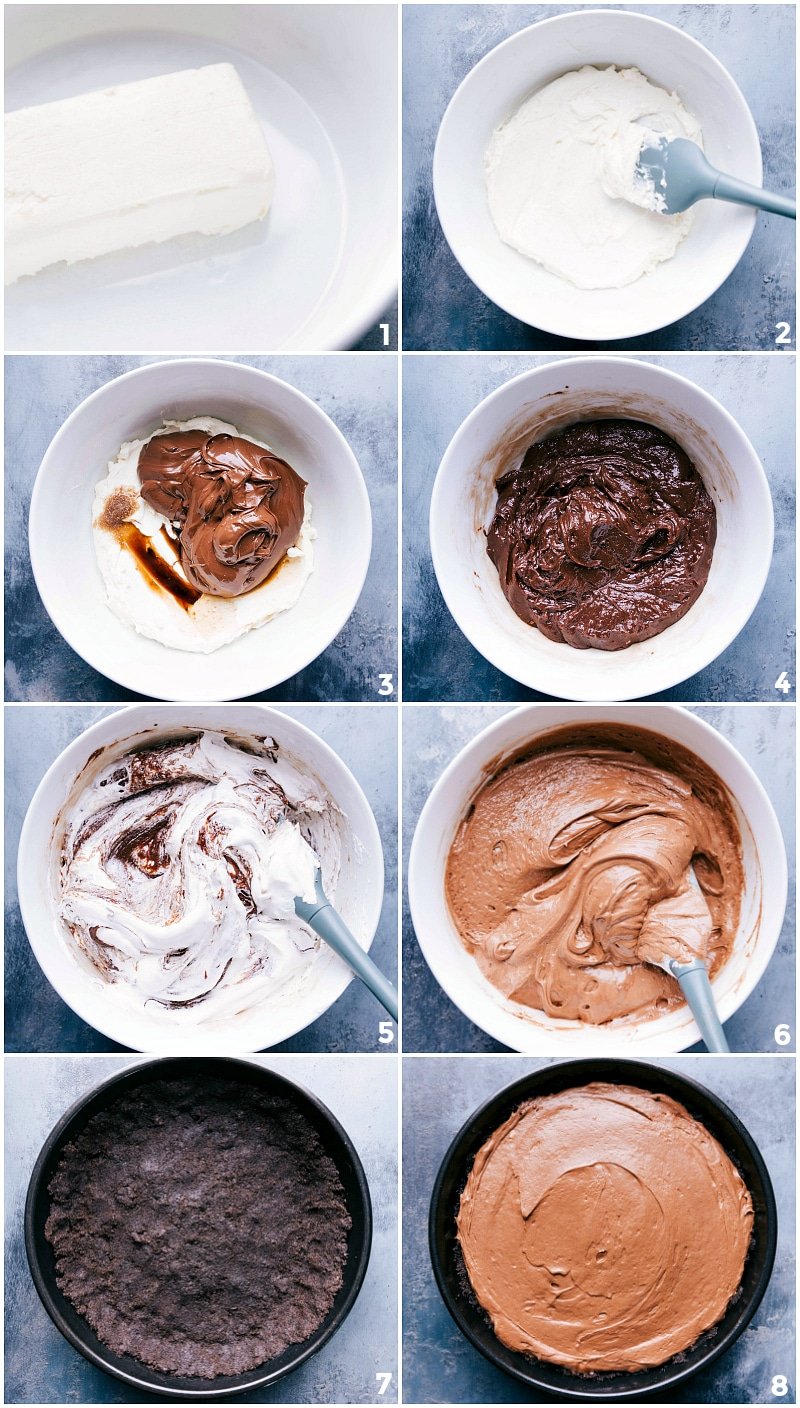
How To Make Nutella Pie
- Make Oreo Crust: Let the butter cool a bit before mixing so the crust doesn’t get greasy.
- Make Nutella Filling: Make sure the cream cheese is soft for a smooth texture.
- Whipped Cream: Start on low speed and gradually go higher to avoid splashing.
- Decorate: Don’t smooth out the whipped cream too much; a little texture looks great.
- Serve and Store: Only top the slices you’re serving right away—whipped cream can get watery if left on too long.
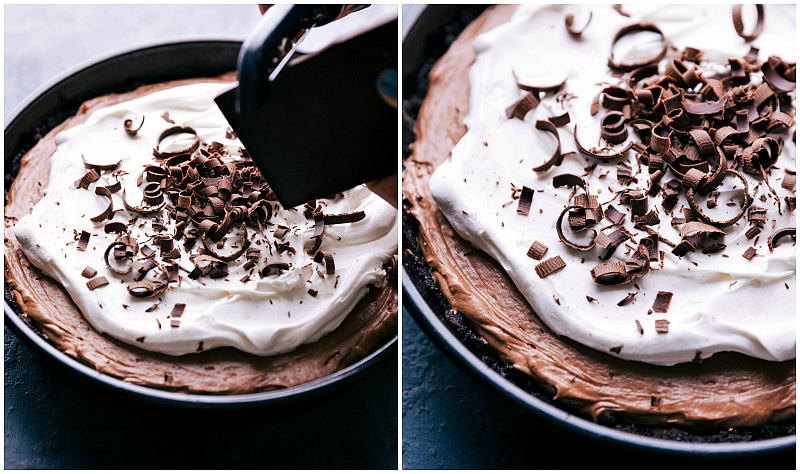
Nutella Pie Chocolate Curls
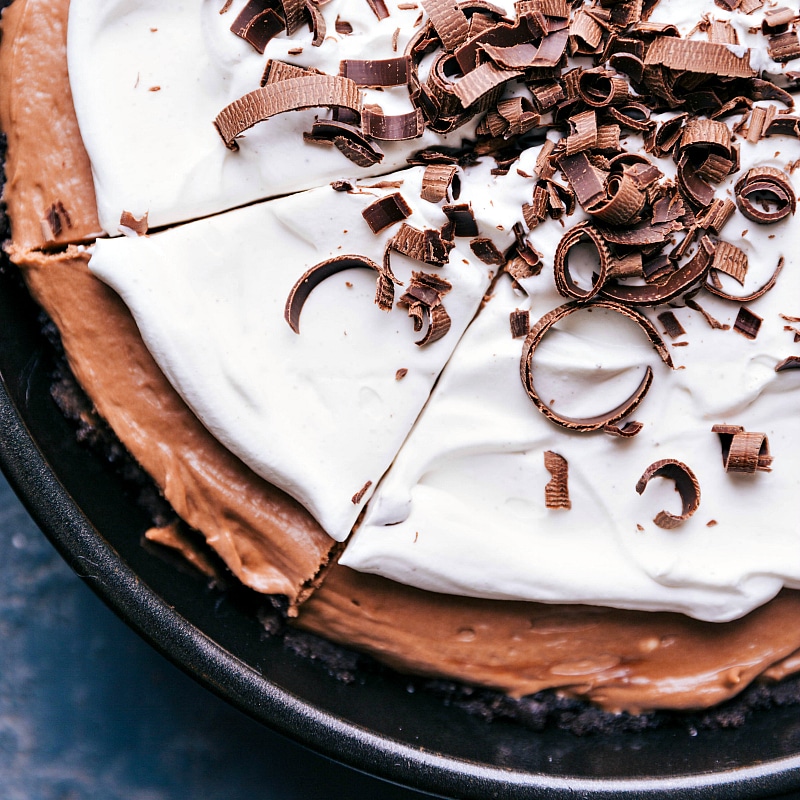
Top the Nutella Pie with chocolate curls—they’re super easy to make!
- Use a chocolate bar—I like Lindt® Dark Chocolate with Sea Salt.
- Unwrap the bar, and with a vegetable peeler, shave the side of the bar directly onto the pie.
Nutella Pie Tips
- Soften the cream cheese to avoid lumps. Unwrap it, then microwave in 10-15 second bursts, flipping each time, for 30-40 seconds. Don’t melt it—just soften.
- Use fully thawed whipped topping. Let it warm up to room temperature, or it won’t mix well into the pie.
- Use real Nutella. It’s the star of this pie, and no other hazelnut spread tastes as good.
Storage
Store leftover Nutella Pie in an airtight container in the fridge for up to 3 days. If you have extra whipped cream on top, remove it before storing to prevent it from getting watery.
More Delicious Desserts
- Brownie Oreo Ice Cream Bars reader favorite recipe!
- Ice Cream Sandwich Cake four ingredients
- Nutella Crepes with strawberries
- Chocolate Dip for Fruit with Nutella
- Ice cream pie three ingredients
Nutella Pie
Equipment
- Pie pan 9-inch
Ingredients
- 25 regular Oreo cookies
- 3 tablespoons granulated sugar
- 4 tablespoons unsalted butter
- 1 (8-ounce) package cream cheese full-fat, softened to room temperature, see note 1
- 1-1/2 cups Nutella hazelnut spread
- 1 teaspoon vanilla extract
- 1/4 teaspoon salt
- 6 ounces frozen whipped topping fully thawed, such as Cool Whip®
- 1/2 cup heavy cream
- 1 tablespoon powdered sugar
- 1 teaspoon vanilla extract
- 1/8 teaspoon salt
- 1 chocolate bar dark or milk chocolate
Instructions
- Oreo Crust: Blend or pulse the Oreos (cookies plus filling) until they resemble fine crumbs. Mix the crumbs with the granulated sugar and cooled, melted butter. Spray a pie pan or spring-form pan (I use a 9-inch pie pan) with cooking spray and press the cookie crust evenly along the bottom and about 1 inch up the sides. Place in the freezer while preparing the filling.
- Nutella Filling: In a large bowl, add softened cream cheese. Beat with a hand mixer until smooth and creamy with no lumps, about 30 seconds to 1 minute. Add Nutella, vanilla extract, and salt. Beat for 1–3 minutes or until combined and smooth. Add in 6 ounces (3/4 cup, not the entire 8-ounce container) of thawed whipped topping. Using a spatula, fold the mixture together gently until all ingredients are incorporated, light, and smooth. Pour this mixture into the Oreo crust. Cover and place in the freezer for 1–3 hours or until firm.
- Whipped Cream: Pour heavy cream, powdered sugar, vanilla, and salt into a chilled bowl (attached to a stand mixer) and whisk on low speed to combine. Gradually increase to high until medium to stiff peaks form, about 1–3 minutes. Watch carefully to avoid overbeating. Near the end of the time, taste and adjust sugar to preference.
- Decorate: Use a spatula to add the stiff whipped cream to the center of the pie and smooth out over the top, covering most of the pie, leaving an edge showing (about 1–2 inches). The whipped cream doesn’t need to be smooth; use the spatula to create dimension and texture. Using a vegetable peeler, peel the side of a chocolate bar right on top to make curls. Place pie in the freezer for 10 minutes (uncovered) and slice into pieces and serve. Do not top the pie with whipped cream if there will be leftovers—the cream will become watery. If you plan to only serve a few pieces, top individual pieces with the cream after slicing.
Recipe Notes
Nutrition
Nutrition information is automatically calculated, so should only be used as an approximation.





You can never have too much chocolate! I love a good no bake treat!
Death by chocolate kind of cake is always the best kind 🙂 And a frozen Nutella version?? Count me in!!
Oh wow that looks fabulous! Just the right amount of chocolate 🙂 Looks like the perfect dessert for a hot summer day!
I have to make this for Father’s Day, my father and also father in law are staying with us now, so them men will feel the love with so much chocolate, my husband and little boy would definitely appreciate this dessert.
Hi Chelsea! This recipes seems really simple to do and is so perfect for summer! The no bake thing is a big deal especially when is very hot outside and you need to make a cake or a dessert… I think I will use this recipe to make a birthday cake. Do you think that I can put some melted chocolate on top after frozen it for a while? Or it will melt? I’ll try to do that, and then I’ll put it again in the freezer for some hours, it should work!
Thanks for the good idea!
Have a nice day!
Oh wow I can’t get over how gorgeous this pie looks, Chelsea! Nutella is my weakness and I’m loving that you made it into a frozen treat. It sounds SO good! Pinned!
THIS. CAKE. IS. AMAZINGGGGG
so chocolatey!!!
You also had me at Nutella! And those chocolate curls make this almost too pretty to eat (except I would totally devour this in 2 seconds).
You had me at nutella!
Yummy! This cake looks fantastic!