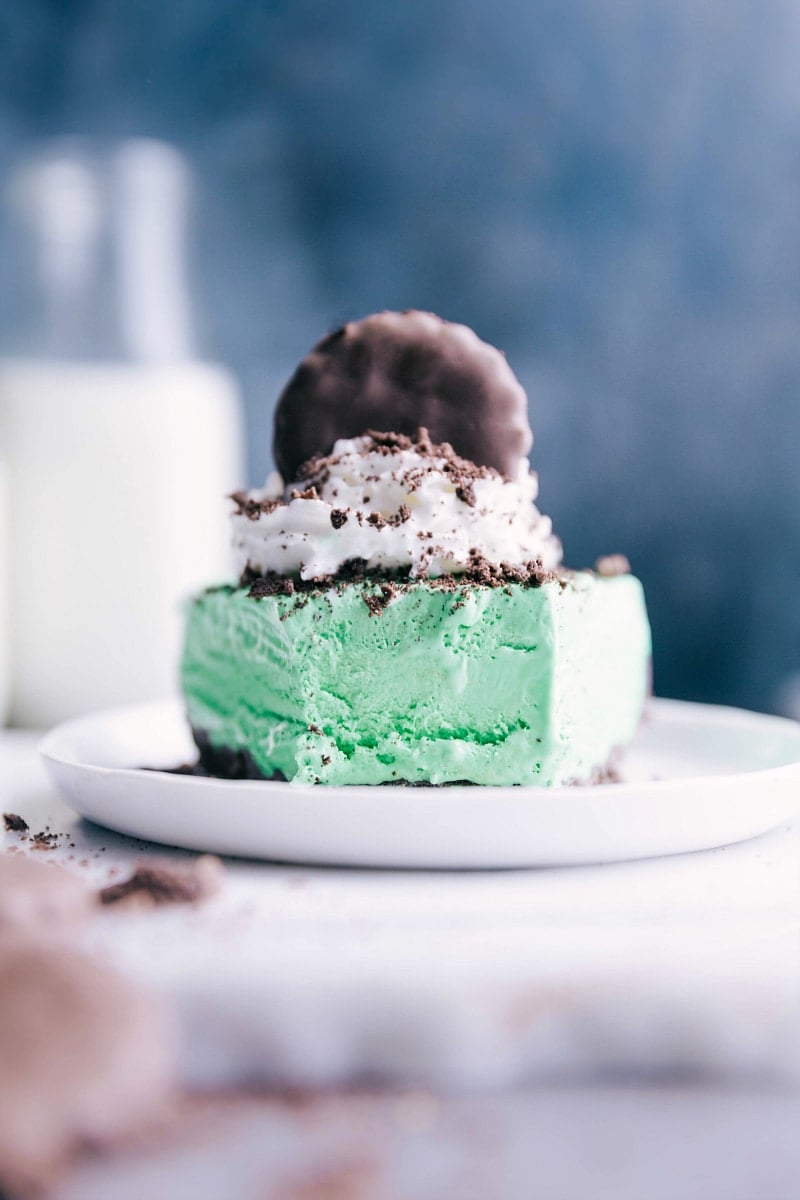
Just picture it: Girl Scout Cookie Thin Mint Cheesecake. This cheesecake has a thin mint crust with a minty cheesecake and ice-cream-like filling. And to send it over the top, we garnish it with whipped cream and more cookies.
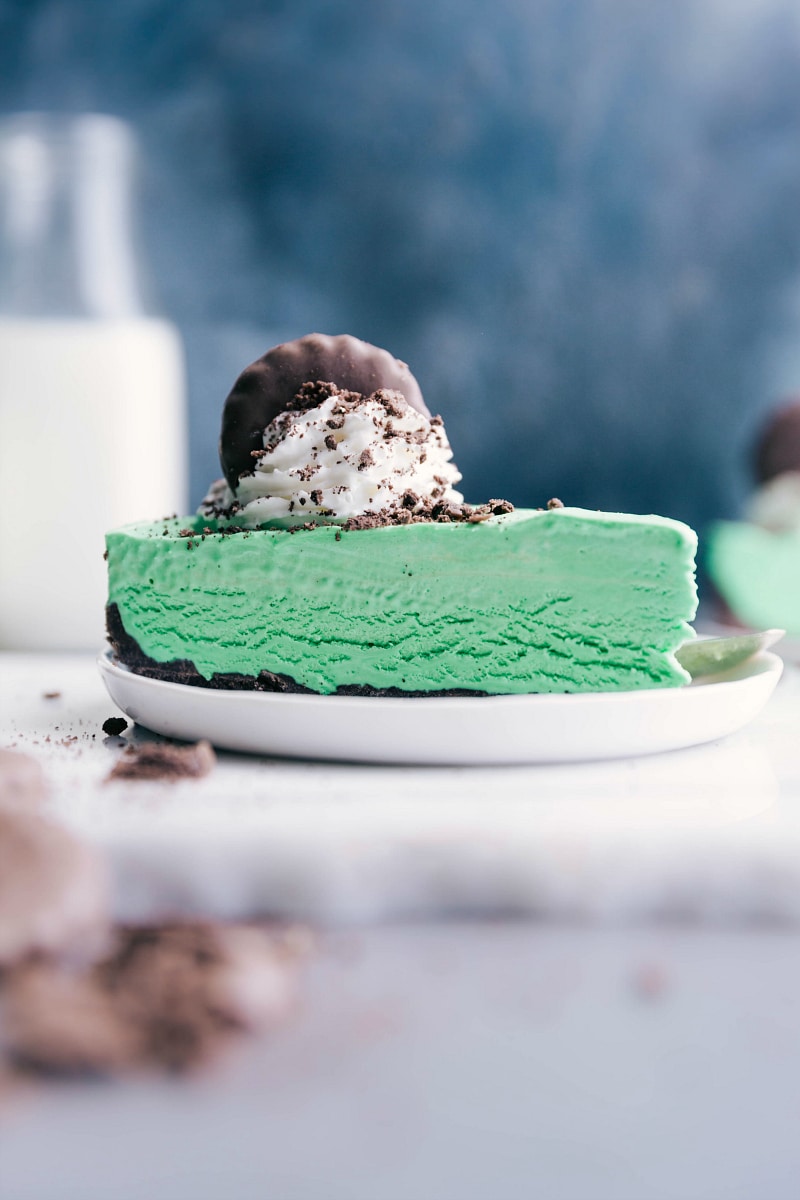
A great way to use Girl Scout Cookies!
I’m obsessed with Girl Scout Cookies® and so is my family. Our top favorites are Samoas and Thin Mints! And after making these Samoa-filled brownie ice cream bars, I knew I had to make another frozen dessert with our other favorite Girl Scout cookie — Thin Mints.
These Thin Mint Cheesecake bars are smooth, creamy, minty, and sweet. The consistency is a mix of soft ice cream and a no-bake cheesecake. It’s also incredibly quick and easy to assemble; the only hard part is waiting for it to set up overnight in the freezer!
Thin Mint crust
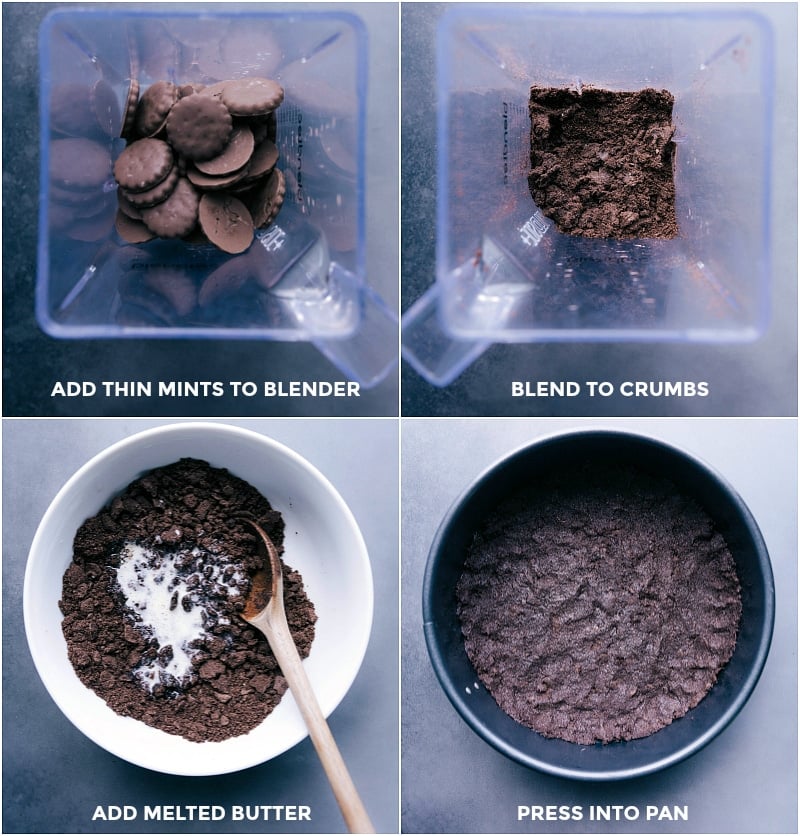
The base for Thin Mint Cheesecake is a crust made out of (naturally!) delicious chocolate-mint cookies. Girl Scout Thin Mints are the industry standard, but you’ll find similar thin mint cookies under many other brand names.
A few quick tips:
- Make sure the cookies are completely broken down. Large chunks will make the crust difficult to cut and serve properly.
- Let the melted butter cool a bit first. Don’t add hot melted butter to the cookies; it will create a greasier crust.
- Press the crust down firmly. I like to use the bottom of a metal 1-cup measuring cup to evenly press the crust down and slightly up the sides of the pan.
- Line the pan for easy removal. This helps the cheesecake slices come up easier and look better. The recipe card calls for coating the pan with nonstick spray, but lining the pan with parchment paper on the bottom adds extra insurance.
- Thin Mint cookies differ from brand to brand (and I’ve found even from box to box), some being drier than others. If needed, add an extra 1-2 tablespoons of butter if the cookies aren’t coming together or pressing into a crust nicely.
Don’t have access to Thin Mints? Oreo® cookies would work just as well. Make our Oreo Pie Crust instead!
Thin Mint Cheesecake tips
- Allow the cream cheese to come to room temperature. If you use cold cream cheese or try to soften it in the microwave, you will end up with unpleasant chunks in your cheesecake. Give it at least an hour sitting at room temperature (or in a warmish environment).
- Allow plenty of time for the filling to set up. The filling takes a good 8 hours to freeze completely; don’t rush this or the consistency won’t be right.
- Be sure to use peppermint extract, not mint extract: Mint extract has more of a “toothpaste” flavor. It goes without saying that nobody wants toothpaste-flavored cheesecake! On the same note, different brands of extracts differ in strength; add the peppermint extract gradually and to taste if you’re concerned about the strength of the extract. (I use McCormick® peppermint extract in this thin mint cheesecake).
- Use a sharp knife for cutting slices. I like to run the knife under hot water, quickly dry it off, and then make a cut. Repeat for each cut; this cheesecake is pretty sticky!
- Return leftovers of this cheesecake promptly to the freezer. This cheesecake begins softening very quickly at room temperature.
- Go with full-fat products. Reduced-fat cream cheese and low-fat/sugar-free/fat-free whipped topping will cause a wet and melty cheesecake that might not set up properly; I don’t recommend any of these ingredients.
Quick Tip
Cover cheesecake tightly with plastic wrap and then foil to avoid freezer burn.
Homemade “Cool Whip”
This cheesecake calls for one 8-ounce container of Cool Whip®. If you’d like a healthier alternative, you can try TruWhip®. Or make your own whipped topping (recipe below) to use in place of the container of frozen whipped topping. Just FYI, Cool Whip is a non-dairy product, and of course, that isn’t the case with the homemade version.
- 1 cup heavy cream
- 1/2 cup powdered sugar
- 1/2 teaspoon vanilla extract
In a mixing bowl attached to a stand mixer (with a whisk attachment) add in the 1 cup heavy cream, 1/2 cup powdered sugar, and 1/2 teaspoon vanilla extract. Beat to combine and then increase the speed and whip until firm peaks form, about 2-4 minutes. Now you’ve got homemade whipped topping to add to this Thin Mint Cheesecake!
More Dessert Recipes
- Vanilla Cheesecake Bars with a berry sauce
- Coconut Cream Pie with a graham cracker crust
- Frozen Hot Chocolate Cheesecake with an Oreo® cookie crust
- Ice Cream Pie only 3 ingredients
- Twix Cheesecake Bars with actual Twix® candies mixed throughout
Thin Mint Cheesecake
Equipment
- 9 inch springform pan
- Food processor or blender
Ingredients
- Cooking spray
- 1 (9-ounces) package Thin Mint Cookies off-brand/store-bought works great! Plus some for garnish if desired
- 4 tablespoons unsalted butter melted
- 1 (8-ounce) package cream cheese softened
- 1 (14-ounce) can sweetened condensed milk
- 2 teaspoons peppermint extract not mint extract
- Green food coloring
- 1 (8-ounce) container frozen whipped topping completely thawed, see note 1
- Whipped topping spray optional, to garnish
Instructions
- Lightly spray a 9-inch springform pan with cooking spray. Set aside.
- In a food processor or blender, pulse the entire package of thin mint cookies until they are fine crumbs. Melt butter and let stand until slightly cooled (don’t add hot butter to cookie crumbs). Add to cookie crumbs and stir until combined. Press mixture into the bottom of the prepared spring form pan and slightly up the sides. Press firmly with the back of a 1-cup measuring cup.
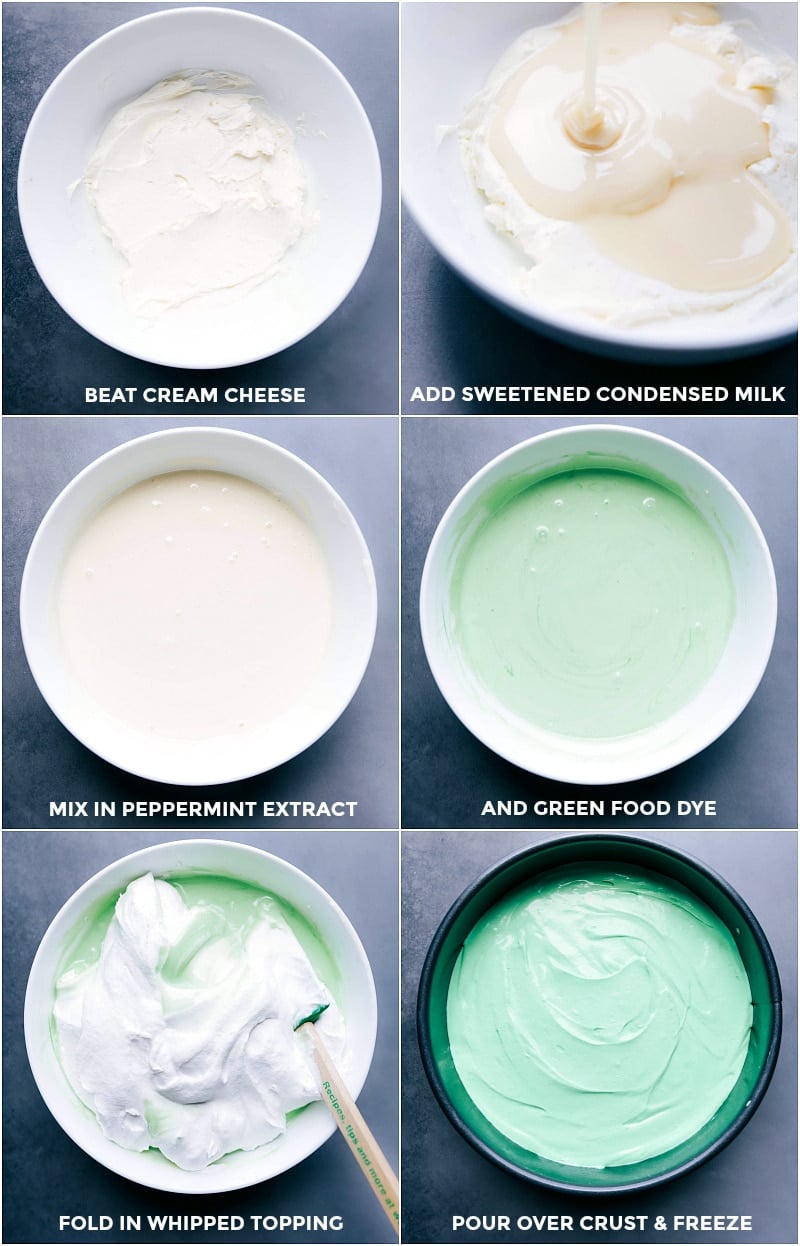
- In a large bowl, add the room temperature cream cheese. Using a hand mixer, blend the cream cheese about 3–4 minutes or until completely smooth and creamy. Slowly add sweetened condensed milk and continue to mix another 2–3 minutes. Use a spatula to scrape down the sides while mixing.
- Mix in peppermint extract and food coloring. Add as much food coloring as you want until you reach the desired color. With the spatula, fold in the whipped topping until it is completely incorporated. Be careful to not overmix. Pour the mixture into the crust and smooth the top with a spatula.
- Cover the spring form pan and place in the freezer. Freeze overnight or for at least 8 hours.
- Serve cheesecake directly from the freezer and return to the freezer as soon as you are finished serving. It will melt easily and quickly!
- Optionally garnish individual slices with spray whipped topping. Cut some thin mints in half and stick the cookies into the whipped cream and/or crush additional thin mints over the whipped cream.
Recipe Notes
- 1 cup heavy cream
- 1/2 cup powdered sugar
- 1/2 teaspoon vanilla extract
Nutrition
Nutrition information is automatically calculated, so should only be used as an approximation.




What is it with guys and being awesome at math? My fiance is the same way. Its fine…we’ll just win the kitchen over! Girl Scout Cookies + Cheesecake = win in a my book!
This is so pretty ! I love how springy it looks! Pinning!
Chelsea this is flat-out gorgeous!! I love that you froze it, that’s one of my favorite ways to enjoy no-bake cheesecakes. love the pi day timing too 🙂
This is SO pretty, Chelsea!! The color is just perfect! I bet I could eat the Thin Mints crust all by itself, haha. But of course it would be so much better with a whole slice. Preferably a large one. 🙂 Love the whipped cream and Thin Mints on top!
I’ve never had frozen cheesecake before but I think one made with Thin Mints would be a good place to start.
This is so cool! Looks like it goes together very easily too. My kind of dessert!
I want it for breakfast– right now!
Haha! That would make one awesome breakfast! Thanks Lori 🙂
This cheesecake looks and sounds amazing! Plus it’s perfect for St. Patty’s day and Pi day! Double win right there! haha Hope you have a great weekend friend!
thin mint cheesecake! Sounds like the best thing ever and it’s so photogenic!
Thank you Chloe! 🙂
Umm….hello favorite recipe alert! Thin mints are my life…and so is cheesecake.
Love frozen cheesecakes since they are SO EASY. I wish I had heard about Pi day before yesterday…such a fun idea! Pinning!
Haha!! Crack me up! Thanks for the pin Taylor! Hope you’ve had a great weekend so far!