Honey Whole Wheat Bread is a classic homemade favorite, perfect for sandwiches and toast. This recipe makes a soft, chewy loaf with a deliciously buttery crust.
Next, try my White Bread recipe or these amazing no-knead Dinner Rolls!
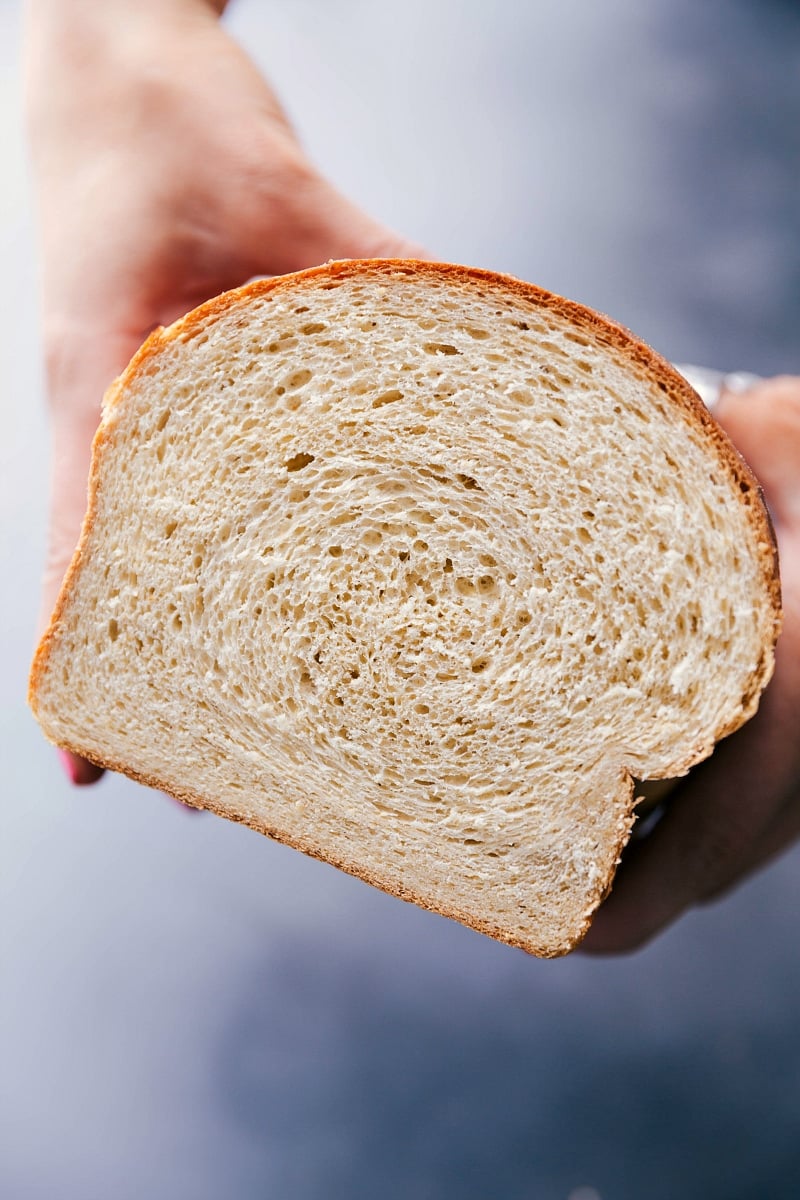
Honey Whole Wheat Bread
This recipe is inspired by the honey-wheat bread from the restaurant where I used to work. They were famous for the mini loaves, and their Crème Brûlée, they’d give out while you waited to order. I begged and they shared their recipe with me, but it made about 600 mini loaves!
After some serious spreadsheet work to scale down the quantities and a lot of testing, I’ve finally perfected the recipe I’m sharing today. It might taste a bit different from the restaurant’s bread, but honestly, we like it even better!
Ingredients
- Milk and water: Warm milk and water activates the yeast.
- Yeast: This makes the dough rise and expand.
- Sugar: Feeds the yeast to help it grow and sweetens the bread.
- Honey: Adds sweetness and moisture, keeping the bread soft.
- Whole wheat flour: The MVP! Whole wheat flour is loaded with vitamins and fiber and tastes delicious!
- Flour: I love using bread flour here but all-purpose will works as well!
- Salt: You can’t make flavorful bread without salt.
- Melted butter: Adds richness, flavor, and tenderness to the bread.
- Olive oil: Greases the bowl to prevent sticking.
Quick Tip
How to tell your milk is at the right temperature? Use the wrist test! Drizzle a few drops of the warmed milk onto the inside of your wrist. It will be perfect for the yeast if it’s warm and comfy on your wrist. If it is not warm and instead feels hot, it will be too hot for the yeast. Too cold and the yeast will simply remain dormant.
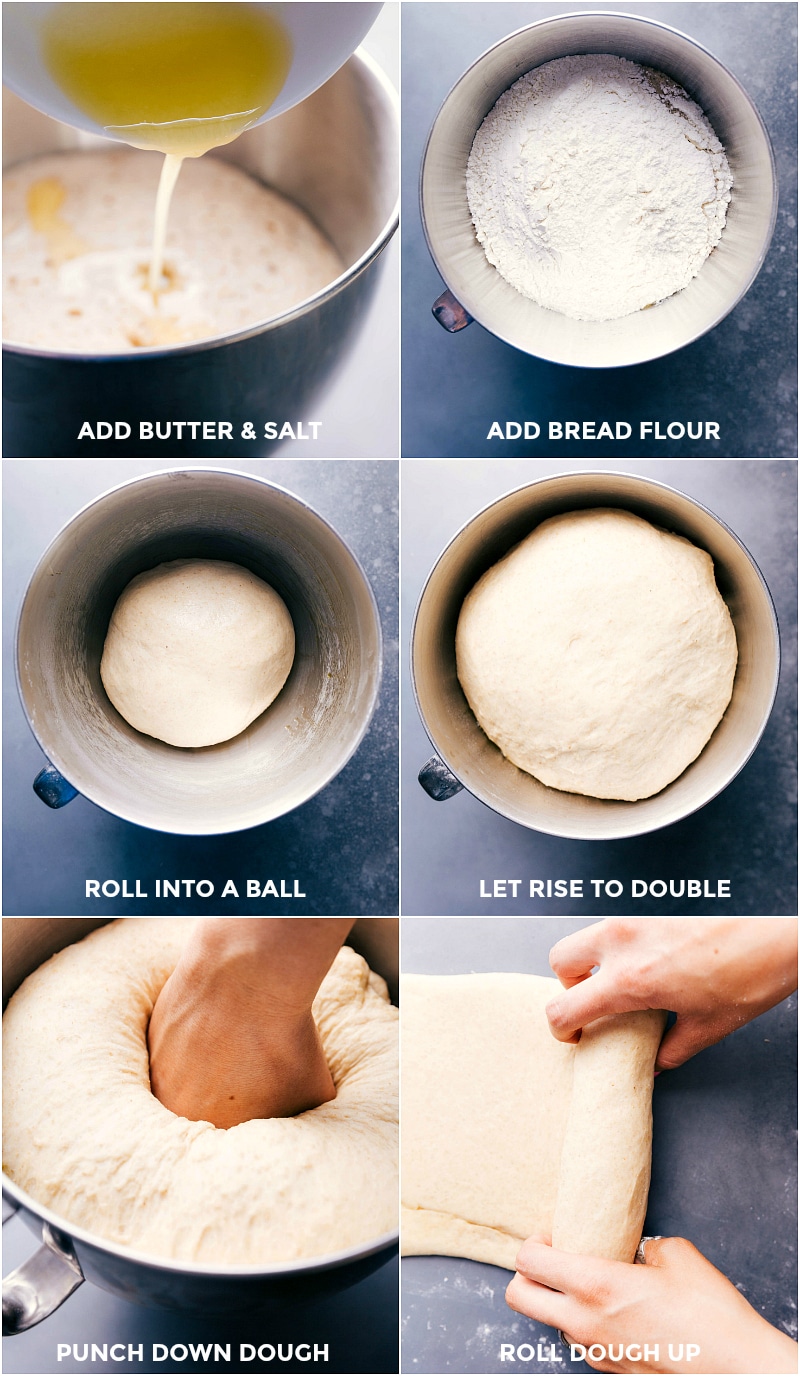
How To Make Honey Whole Wheat Bread
- Mix: Combine warm milk and water in a bowl. Sprinkle yeast and sugar on top. Let sit until foamy.
- Add: Stir in honey and whole wheat flour. Let sit for 10 minutes.
- Combine: Melt butter, mix with salt, then add to the yeast mixture. Gradually mix in bread flour until dough forms.
- Knead: Knead the dough until smooth and elastic, adding flour as needed.
- Rise: Grease a bowl. Shape dough into a ball, place in bowl, cover, and let rise until doubled in size.
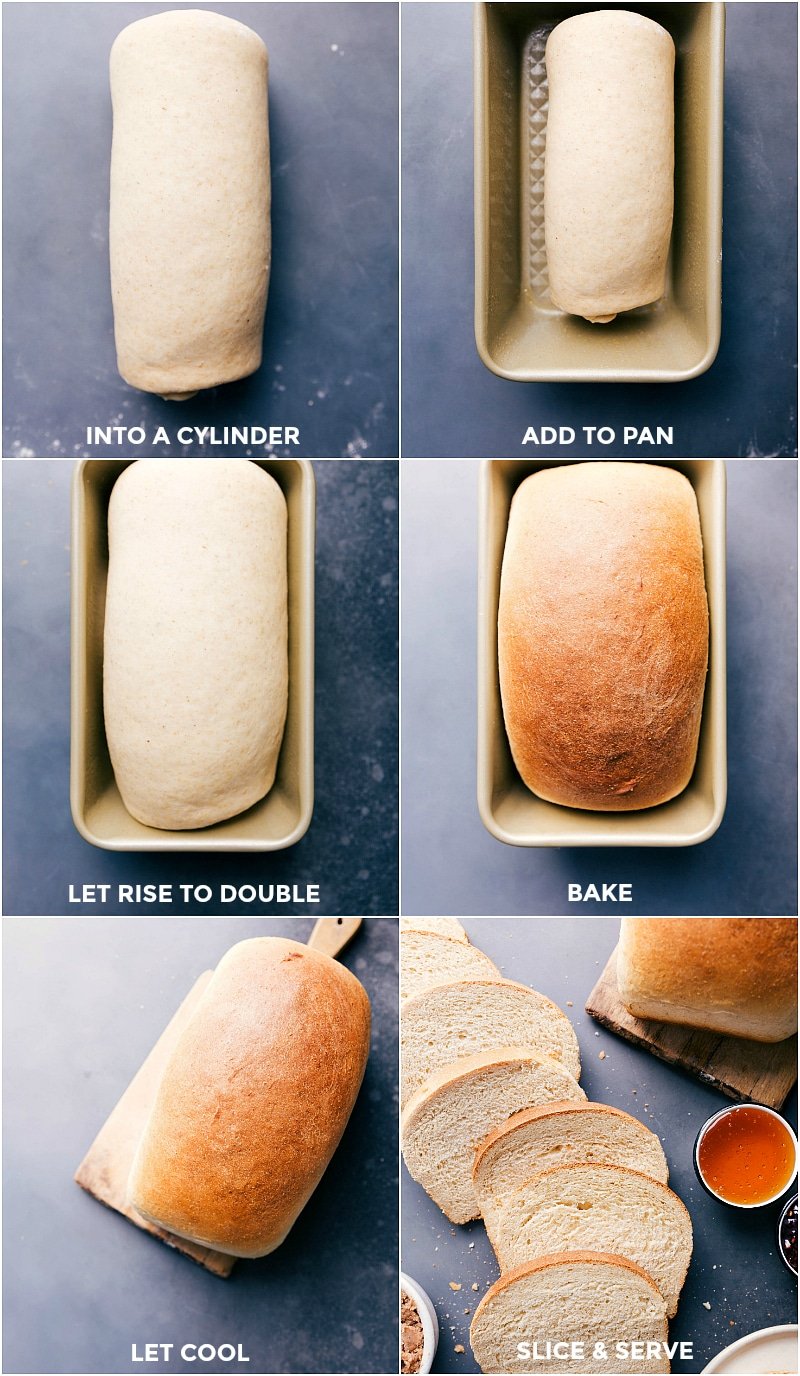
- Shape: Punch down dough, divide into two parts, shape into loaves, and place in greased pans. Let rise until doubled again.
- Bake: Preheat oven and bake loaves. Brush tops with butter after baking.
Tips For Success
- Rising: Don’t rush the rising times. Avoid over-proofing to prevent crumbly, gummy texture.
- Flour Amount: Start with 1/2 cup less flour than the recipe calls for. Add more gradually until dough is not overly sticky but still moist.
- Kneading: Avoid flouring the surface. Use a dough scraper or metal spatula for sticky areas. Coat hands and counters with cooking spray instead.
- Measuring Flour: Spoon and level the flour to avoid excess. Don’t press the flour into the measuring cup.
- Yeast Freshness: Ensure your yeast is fresh, check out this post to check yours.
- Grinding Wheat: Let freshly ground flour cool to room temp before use to avoid killing the yeast.
Honey Whole Wheat Bread FAQs
I recommend using active dry yeast for this recipe, but instant yeast will also work.
Dense bread can result from several issues, most commonly:
-Yeast may not have proofed long enough or could be dead.
–Adding too much salt or putting it directly on yeast can kill it.
–Proofing in too cold or warm conditions can hinder yeast development.
–Using inactive/dead yeast leads to a dense loaf.
–Low-protein flour can result in density; bread flour is recommended.
–Visual Check: The bread should have a golden-brown, firm, and dry crust.
–Internal Temperature: The center of the loaf should be 190-200°F.
–Tap Test: Turn the loaf upside down and tap the bottom. If it sounds hollow, the bread is done. If not, try again in 5 minutes.
–When in Doubt: Over-bake slightly rather than under-bake. Consistent issues might indicate an oven temperature problem.
Storage
Storing Honey Whole Wheat Bread
Store Honey Whole Wheat Bread at room temperature in a cool, dry place for up to 2-3 days. Avoid the refrigerator as it makes the bread stale. Use an airtight plastic bag to keep it soft.
Freeze the bread for up to 3 months. Slice before freezing and take out individual slices as needed.
More Baking Projects
- Homemade Cinnamon Rolls with cream cheese glaze
- French Bread fool-proof
- Chewy Chocolate Chip Cookies reader favorite
- Easy Banana Bread with Greek yogurt
- Edible Brownie Batter no eggs and heat-treated flour
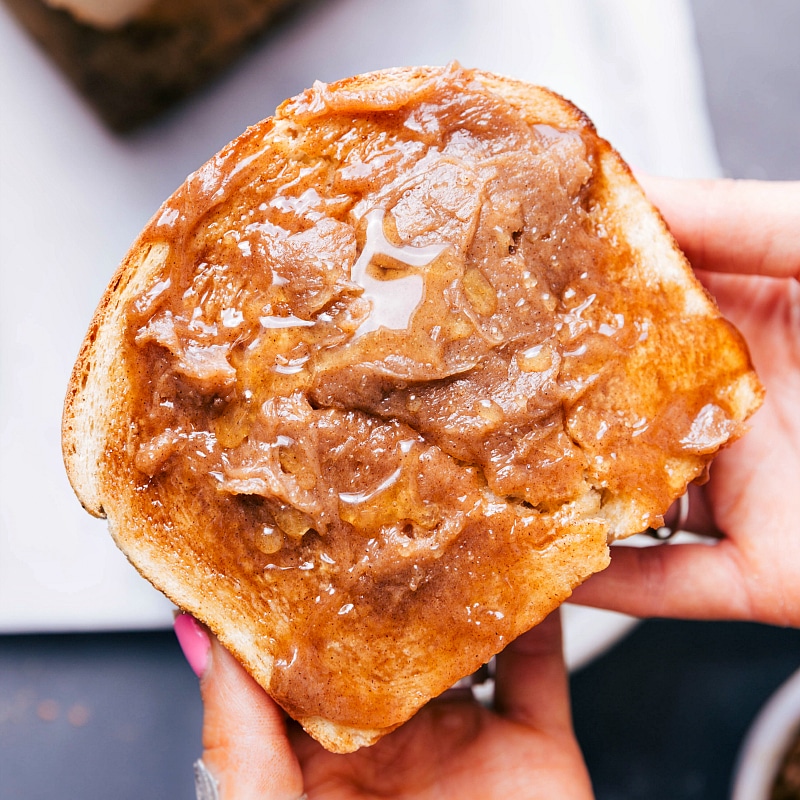
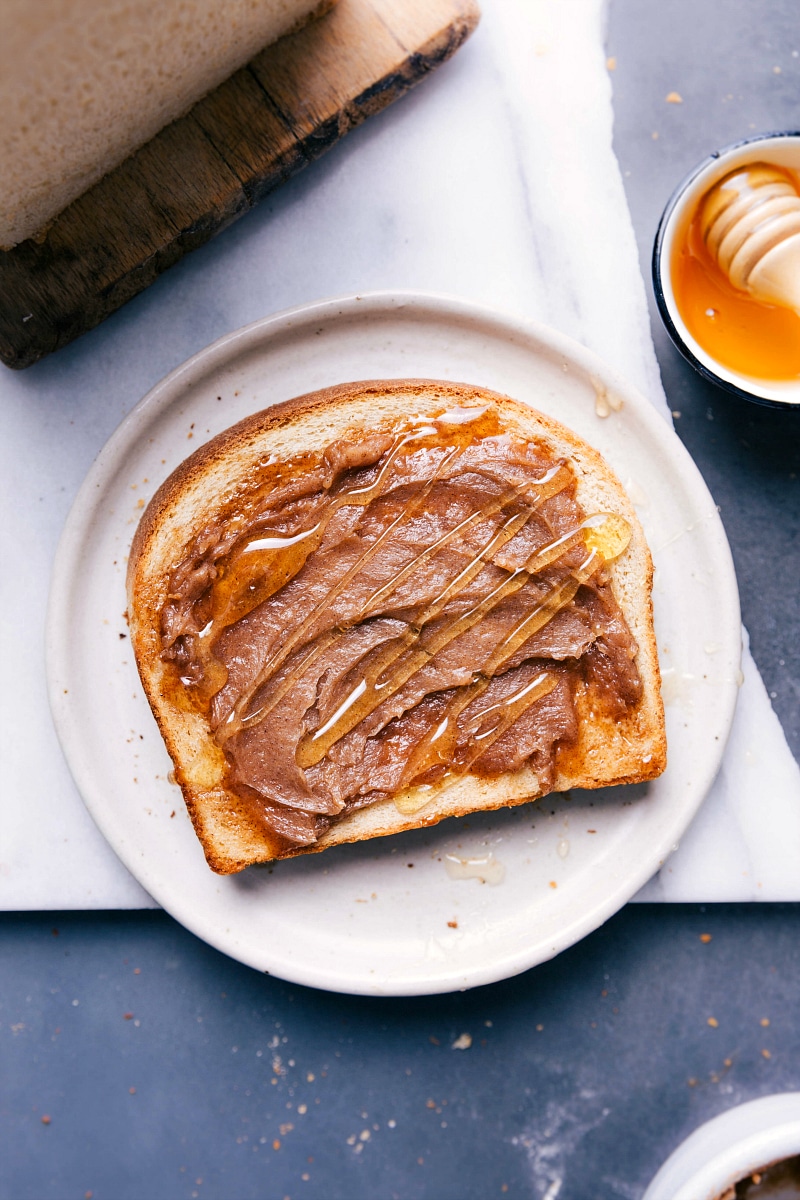
The only thing that can make this bread better? Slathering it in lots and lots of Honey Butter!

Honey Whole Wheat Bread
Equipment
- Stand mixer with paddle attachment
Ingredients
- 1 cup whole milk warm (110℉)
- 1 cup water warm (110℉)
- 1 tablespoon instant yeast or active dry yeast
- 1 teaspoon sugar
- 1/2 cup honey
- 2 cups whole wheat flour
- 4 cups bread flour or all-purpose flour, plus extra as needed, see note 1
- 1 tablespoon salt
- 6 tablespoons melted butter
- 1/2 tablespoon olive oil
- Unsalted butter optional, for topping bread slices
Instructions
- In a stand mixer bowl, combine warm milk and water. Sprinkle yeast over the liquids, then sprinkle sugar on top. Whisk together briefly and let stand for 5–10 minutes, until foamy. If no foam forms, you’ll need to start again (either yeast is too old or liquid too warm).
- Pour honey into the yeast mixture and add whole wheat flour. Use the beater attachment to stir until just combined. Let this mixture sit for 10 minutes.
- While the mixture sits, melt butter and let it cool to room temperature. Stir salt into butter. Set aside.
- After 10 minutes, switch to the dough hook. Gradually add 4 cups of bread or all-purpose flour. Add the butter and salt mixture, using a spatula to scrape it all into the dough. Mix on low (speed 2) until the dough comes together around the hook (about 2–3 minutes). If the dough sticks to the bowl, add more flour, 1 tablespoon at a time, up to 1/2 cup extra, until it gathers around the hook.
- Once dough has gathered around hook, increase speed to medium (speed 4–6) and knead for 10 minutes. Keep an eye on your mixer—it may move. If kneading by hand, knead for about 10–12 minutes.
- Grease a large bowl with olive oil. Shape the dough into a ball and place it in the bowl, turning to coat it in the oil. Cover with a damp cloth and let rise in a warm place until doubled in size, about 1 hour.
- Punch down the dough and divide it into 2 equal parts (a food scale can help). Shape each half into a loaf (see note 2) and place in greased 8×4-inch bread pans. Cover with a damp cloth and let rise for another hour, or until doubled in size.
- Preheat oven to 375°F. Bake the loaves for 30–35 minutes. Brush the tops with butter as soon as they come out of the oven. Let the bread cool in the pans for 15 minutes, then transfer to a wire rack to cool for at least 30 minutes before slicing.
Video
Recipe Notes
Nutrition
Nutrition information is automatically calculated, so should only be used as an approximation.








I’ve made this recipe more than 5 times since finding it a couple months ago. It’s a huge hit and we have stopped buying sandwich bread for my husband and daughter’s lunches.
The only trouble is that turning up the speed on my Professional HD KitchenAid to 4 for 10 minutes has damaged the shaft and causes the motor to get alarmingly hot (so much so that the shaft is warm and so is the dough). All KitchenAid manuals advise to not exceed speed 2 with the dough hook to protect the motors. Today, I’m keeping the speed on 2 and kneading for 15 minutes instead. Will follow up with results.
So thrilled to hear this! I’m so sorry about your KitchenAid! Let me know what you figured out.
Thank you for posting this. My kitchenaid also couldn’t handle it. I will keep it in low for next time!
So welcome! Thanks Nicole!
I don’t typically sit around eating bread and butter but this bread is so so good! No notes. Replacing my store bought honey wheat bread with this!
I am so thrilled to hear this! What a compliment! Thanks Michele!
Loved it
Thanks Amy!
This recipe broke my darn kitchen aid. 🙁 I am so upset.
So sorry to hear that! There isn’t anything about this recipe that would be different from making any bread in your KitchenAid, so hopefully, you can get it fixed and give this one another chance—it’s delicious!
Thank you! This turned out wonderful. I used the metric option for the measurements as it removes the question of -was it exactly one cup or about one cup? I will make again! I did use bread flour, and whole wheat flour. Could you possibly share how do I yield a slightly taller loaf like you get at the grocery store?
A Pullman pan may help. That’s what I use to bake my bread.
Well I was so excited to make this bread. I read all the directions before starting. Measured out all ingredients. First, I had trouble with the yeast, had to do it three times before it really foamed. Second problem was that I had to hold the mixer the whole 10 minutes while it did its thing. I have a kitchenaid 600 professional mixer and it was getting a workout! You were serious when you said it will move around. At this point, I was getting anxious. I proceeded. My next bump in the road came when I put the damp towel on the two proofing loaves and was waiting the hour to be done. The damp towel, now dry, stuck to the dough. That was a mess and I think it did something to the rising process cause they don’t look right. Popped in the oven anyway. It definitely does not look like yours but it looks ok and tastes great! I’ll give it another try, cause clearly, these problems were not the recipe but the cook.👩🍳
I’m so glad you stuck with it! Making bread can be scary but it’s so worth it once you get the hang of it! Thanks for your comment Susan!