Italian Sliders are quick and simple, made with ham, salami, pepperoni, roasted red peppers, and Provolone cheese—they’re always a crowd pleaser!
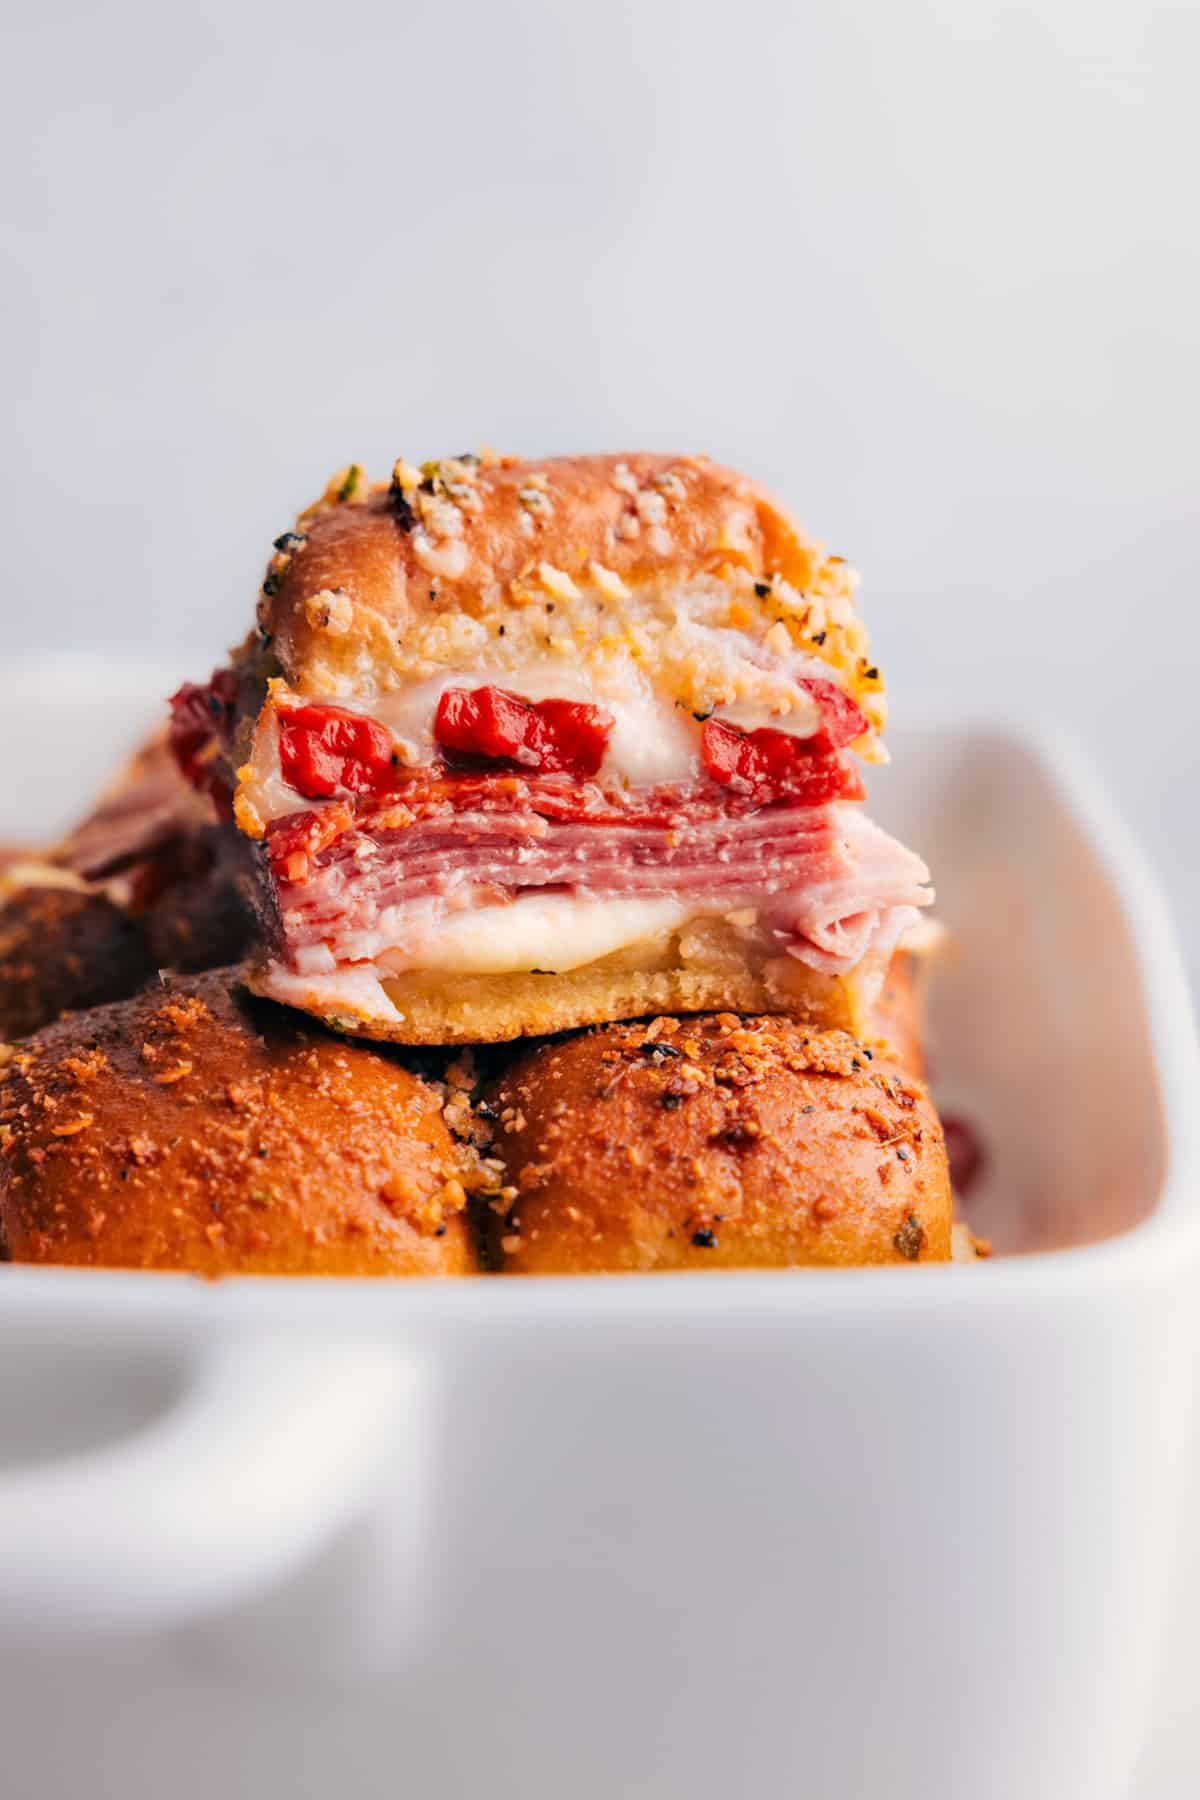
The Best Italian Sliders
Sliders are always the first thing I think of when I’m hosting, especially during the holidays when things are hectic, and people are coming and going.
They’re one of those meals everyone loves, they’re easy to make, and they don’t break the bank. I love making a couple of batches and just setting them out for everyone to help themselves.
This year, I made these Italian Sliders for an after-Christmas party, and they were such a hit I didn’t make enough! Everyone was raving, so I knew I had to grab more ingredients to make them again the next day.
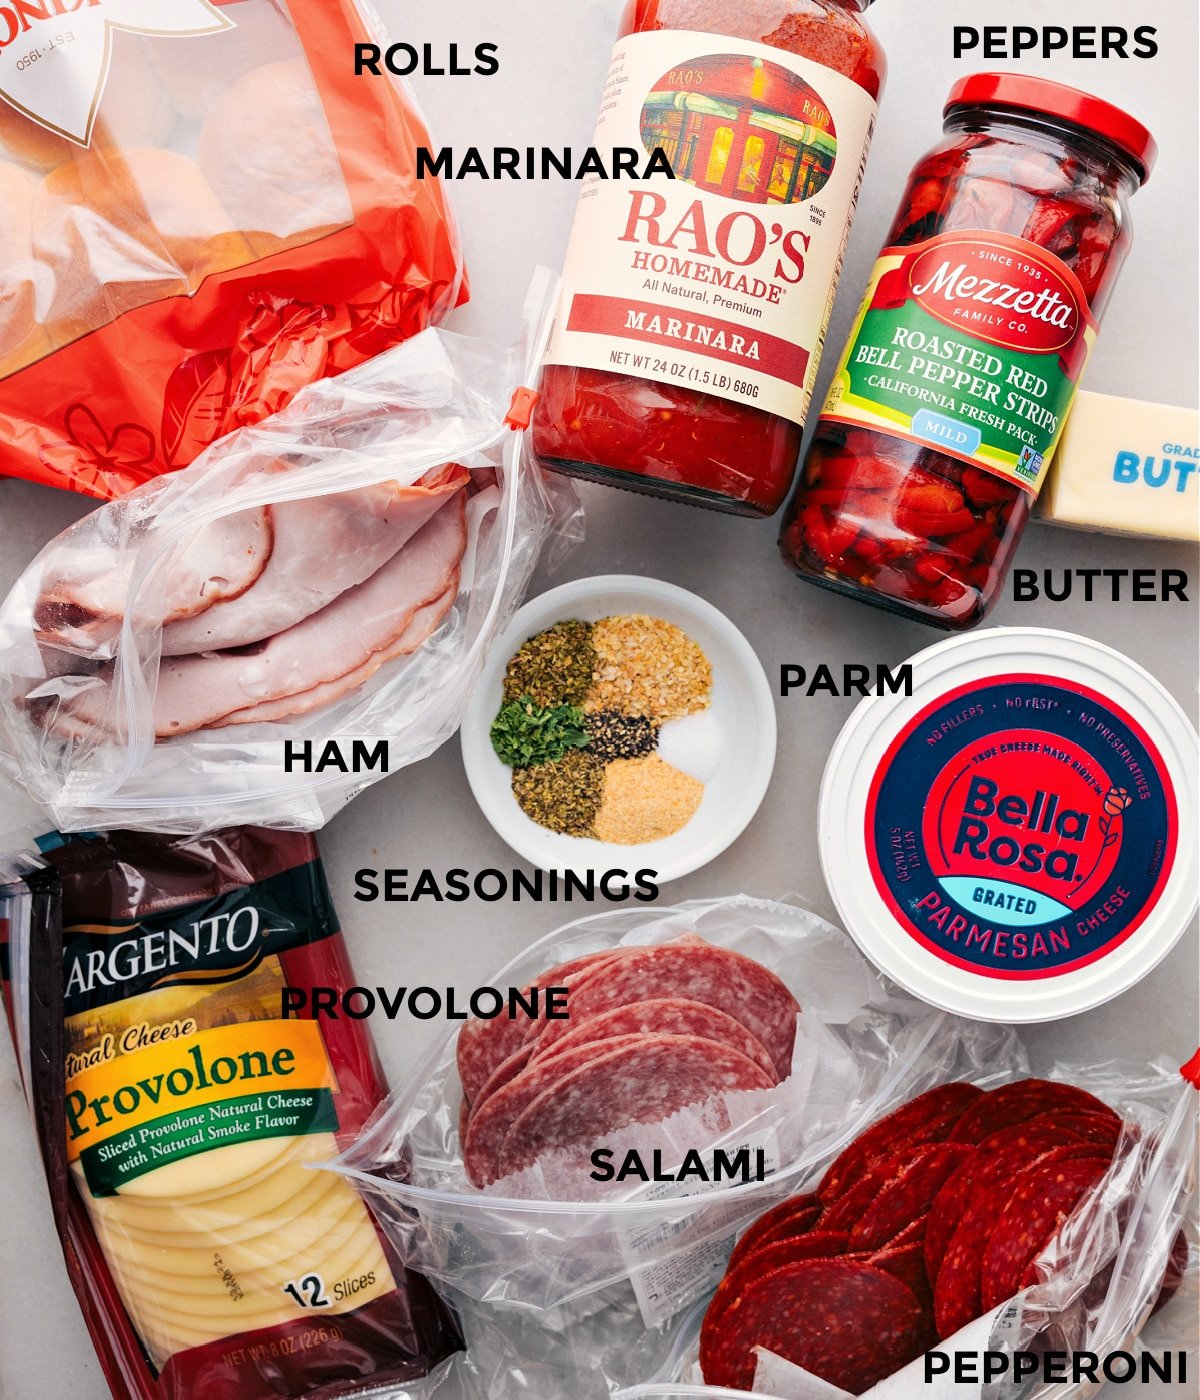
Italian Slider Ingredients
- Hawaiian Rolls: Choose a soft package and keep the rolls together.
- Provolone Cheese: Swap half with mozzarella if you like.
- Ham, Salami, & Pepperoni: Use deli or pre-sliced meat, but make sure it’s thin.
- Roasted Red Peppers (Optional): Dry them well to avoid soggy sliders.
- Parmesan Cheese (Optional): Sprinkled on top for a golden, cheesy crust.
- Butter Topping: Spread lots on top and sides for extra crunch.
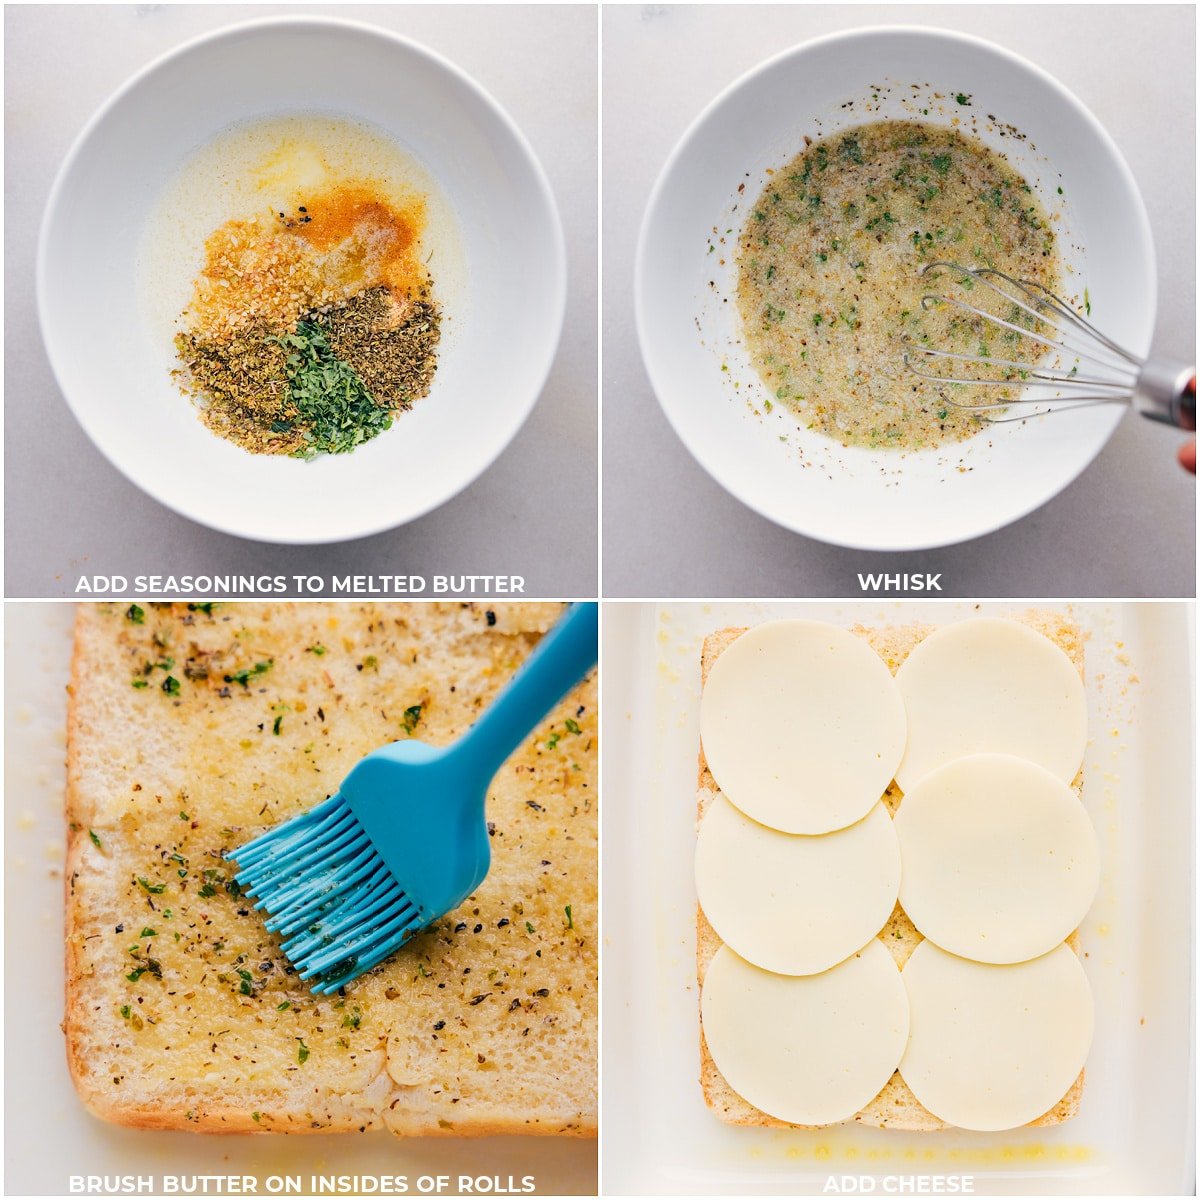
How to Make Italian Sliders
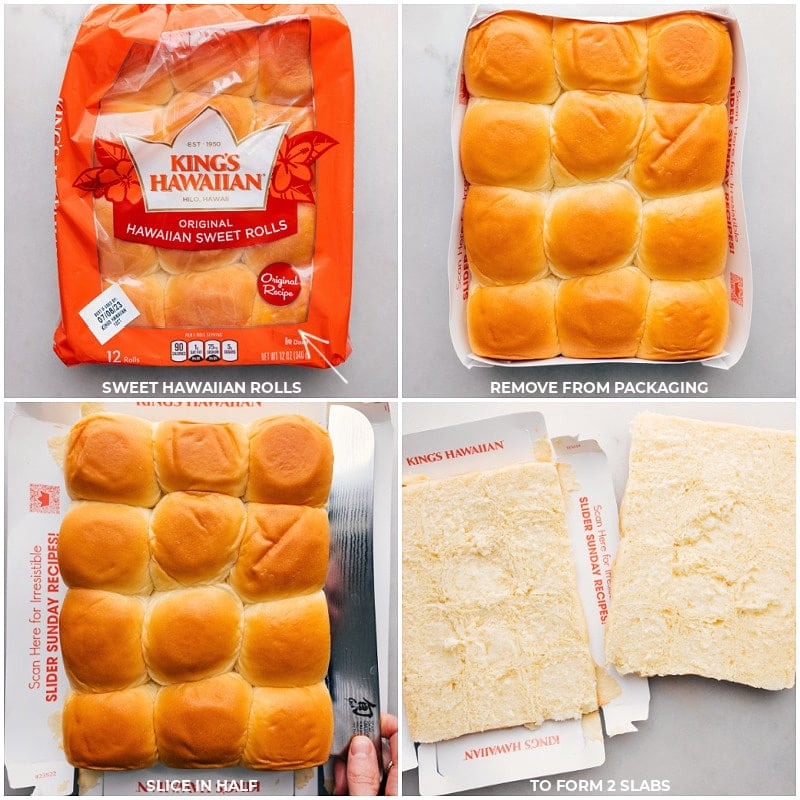
- Cut the Hawaiian rolls in half and spread some seasoned butter on them.
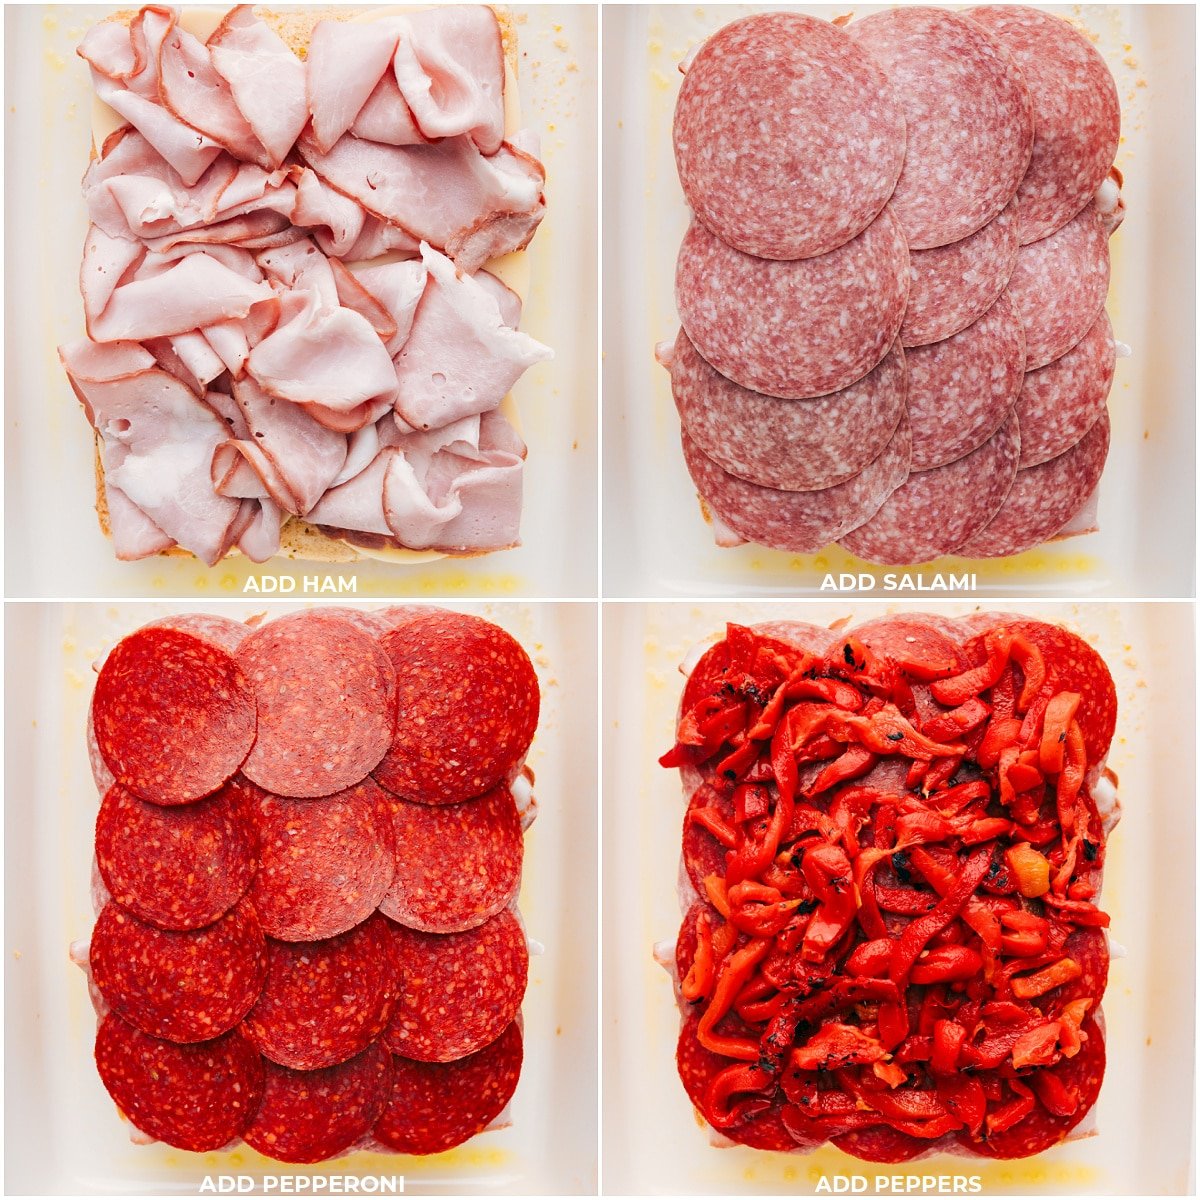
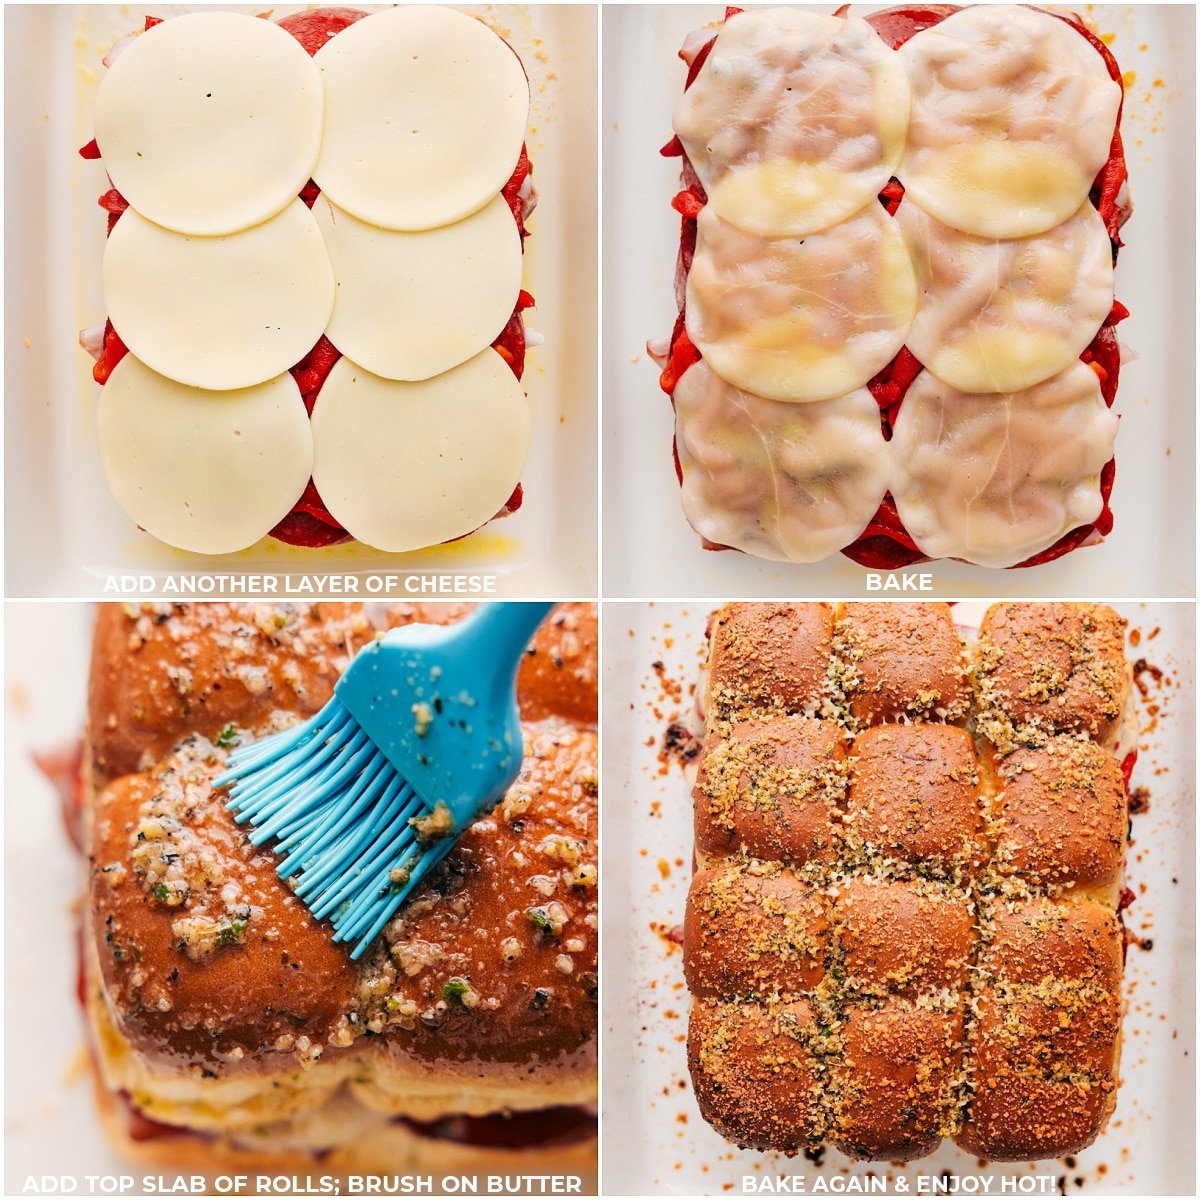
- Add layers of cheese, meats, red peppers, and more cheese on the bottom half.
- Bake the bottom part for 10 mins.
- Put the top half of the rolls back on, spread more butter, and bake again.
- Take off the cover, bake until golden and melty, then cut and serve warm!
Quick Tip
Use a sharp bread knife with a serrated edge to cut the Hawaiian rolls. Keep the rolls together and slice straight through to make a top and bottom layer.
What To Serve With Italian Sliders
- Salad: A simple garden salad with a light vinaigrette.
- Veggie sticks: Carrots, celery, and bell peppers for crunch.
- Pasta salad: Tossed with Italian dressing for extra flavor.
- Potato chips: Classic, crunchy, and easy.
- Olives and pickles: Offer as a side to eat or add to the sliders.
- Soup: Tomato basil or minestrone pairs perfectly.
- Italian skewers: Mozzarella, cherry tomatoes, and olives on a stick.
Storage
Leftovers?
- Cool down: Let the sliders cool completely to room temp.
- Package: Place them in an airtight bag or container.
- Refrigerate: Store in the fridge for up to 3 days.
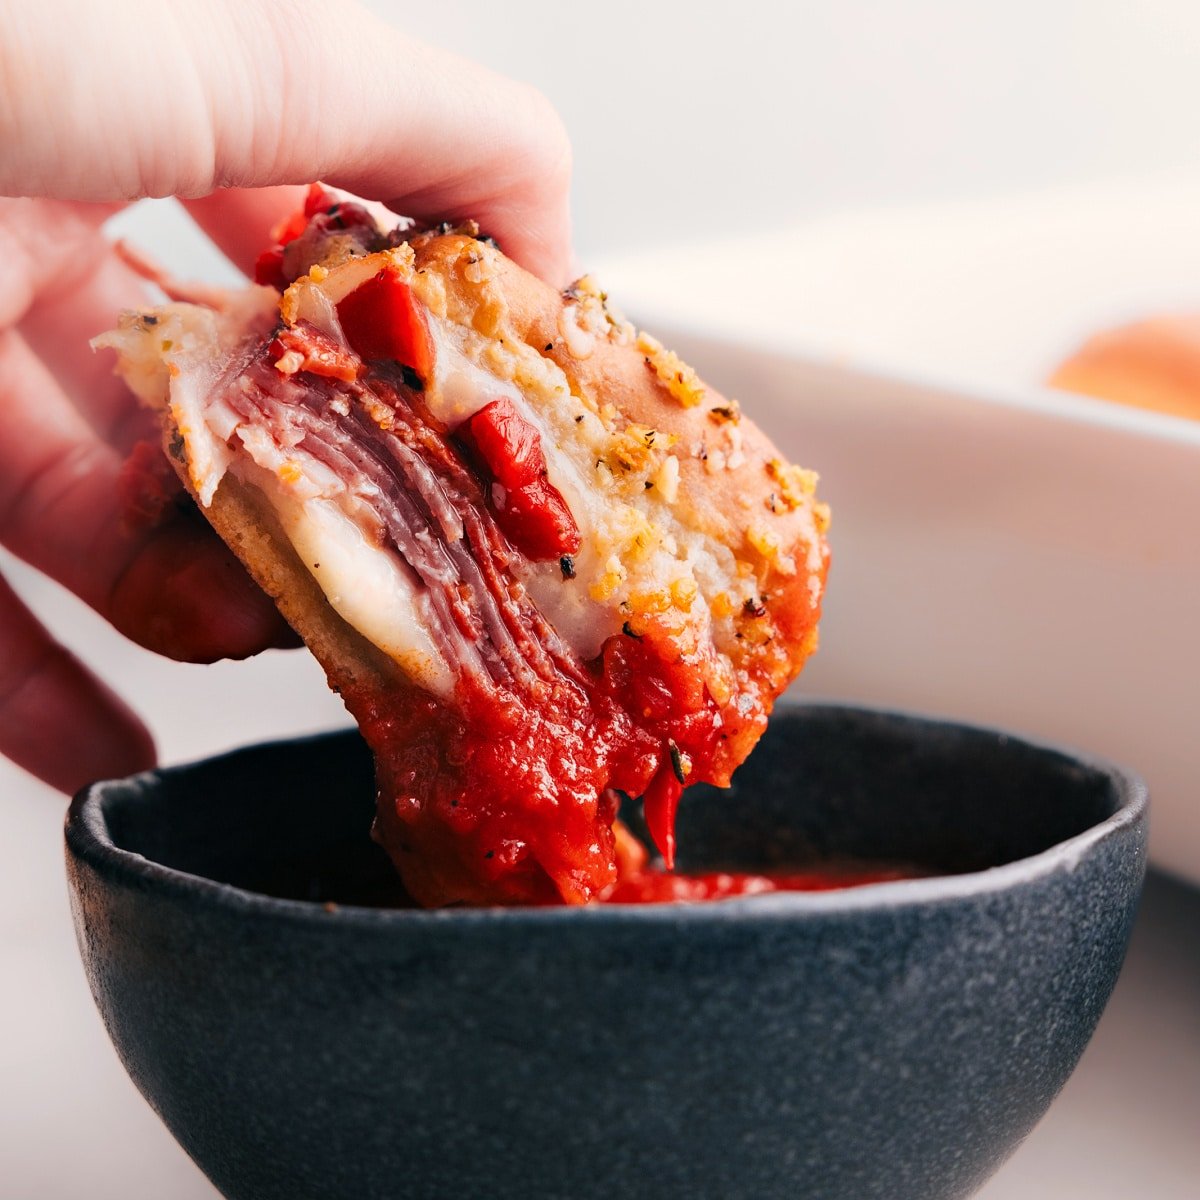
- Reheat: Warm in the oven at 350°F for about 10 mins, covered with foil to keep them from drying out.
More Slider Recipes
- French Dip Sliders loved by many with tons of 5-star reviews
- Ham and Cheese Sliders easy to make and so tasty
- Turkey Sliders great for using holiday leftovers
- Italian Beef Sliders with a yummy butter topping
- BBQ Chicken Sliders using pre-cooked chicken
Italian Sliders
Equipment
- Baking pan 9 x 13-inch
Ingredients
- Cooking spray
- 12-count package Hawaiian/soft rolls see note 1
- 12 slices provolone cheese divided
- 5 ounces thinly sliced deli ham 12 slices
- 2 ounces salami 12 large slices, see note 2
- 2 ounces pepperoni 12 large slices or 24 smaller
- 8 ounces roasted red pepper strips optional, see note 3
- 1 tablespoon grated Parmesan cheese optional
- Warmed marinara optional, for serving
- 8 tablespoons unsalted butter
- 1-1/2 teaspoons dried minced onion
- 1 teaspoon garlic powder
- 1/2 teaspoon dried oregano
- 1/2 teaspoon dried parsley
- 1/2 teaspoon Italian seasoning
- 1/4 teaspoon salt
- 1/4 teaspoon pepper
Instructions
- Preheat oven to 350°F (175°C). Generously grease a 9×13-inch baking pan. Line pan with parchment paper.
- In a microwave-safe bowl, melt the butter. Let it cool slightly, then whisk in the remaining ingredients listed under “butter.”
- Using a serrated bread knife, carefully slice the entire block of Hawaiian rolls in half horizontally, keeping the individual rolls attached (see note 1 for pictures). Place the bottom half of the rolls in the prepared pan.Brush 2 tbsp of the butter mixture on the cut sides of both the top and bottom halves of the rolls (using 4 tablespoons in total).
- Layer in the following order: 6 slices of cheese, ham, salami, pepperoni, red pepper strips (if using), and 6 remaining slices of cheese. Do not add the top slab of rolls yet. Bake, uncovered, for 10 minutes.
- Remove pan from oven and place top half of the rolls onto the sliders. Brush the top and sides of the rolls generously with the remaining butter mixture. If using, sprinkle grated Parmesan on top. Cover pan with foil and bake for 20 minutes. Remove foil and bake an additional 5–10 minutes, or until the top is golden brown and the cheese has melted.
- Serve hot, cutting into individual sliders. Serve with warmed marinara sauce.
Video
Recipe Notes
 Note 2: I prefer deli-sliced pepperoni and salami. Since deli slices are larger, you’ll only need about 12 slices. If using smaller, packaged meats, you’ll need about 24. Adjust the quantity to your preference.
Note 3: If you’re not a fan of red peppers, feel free to omit them. 8 oz is roughly 1 cup. Thoroughly drain and squeeze out extra moisture with a paper towel. Ensure they’re very dry before adding to sliders.
Storage: Let the sliders cool completely to room temp, then store them in an airtight bag or container in the fridge for up to 3 days.
Note 2: I prefer deli-sliced pepperoni and salami. Since deli slices are larger, you’ll only need about 12 slices. If using smaller, packaged meats, you’ll need about 24. Adjust the quantity to your preference.
Note 3: If you’re not a fan of red peppers, feel free to omit them. 8 oz is roughly 1 cup. Thoroughly drain and squeeze out extra moisture with a paper towel. Ensure they’re very dry before adding to sliders.
Storage: Let the sliders cool completely to room temp, then store them in an airtight bag or container in the fridge for up to 3 days.Nutrition
Nutrition information is automatically calculated, so should only be used as an approximation.





I’ve made these several times for parties and they are always a hit!! And multiple people ask for the recipe.
So thrilled to hear this! Thanks Charlotte!
Took these to our Elks Lodge weekend football party and oh man! Now it has been commanded that I bring these to every party! They were amazing and EVERYONE loved them!
Yay! So glad to hear these were a hit! Thank you for the comment 🙂
Everyone loved them! Thank you so much! I even added another type of salami!
So glad to hear that! 🙂
absolutely loved this and so easy to make
I’m so happy you loved these sliders! Thanks Cheryl! 🙂
My boyfriend made these the other night. Forgot the roasted red peppers. Turned out perfect and oh so delicious. I am making them today and can’t wait to eat.
Thank you ????
You’re so welcome! Thanks for the comment and glad you enjoyed these sliders!
These sliders are delicious! I have made your roast beef sliders and your ham & cheese sliders, and everyone loves all of your slider recipes! I am not sure which is my favorite because they all taste like heaven!
Yay! So thrilled you’ve enjoyed the slider recipes, thanks so much Erika! 🙂
Thank you.
I made the Italian sliders – they were awesome! I used focaccia bread instead of Hawaiian rolls- just split it horizontally. I toasted the bottom half to prevent the bottom of the sandwich from getting soggy- it worked. Will make again.
Genius! Sounds amazing! So happy you enjoyed it! 🙂