Ice Cream In A Bag is homemade, quick, and fun—no machine needed! Just a few ingredients, ice, and rock salt for a creamy treat in minutes.
, you're going to churn out a creamy, dreamy dessert that's sure to be a hit. Recipe via chelseasmessyapron #dessert #best #quick #easy #simple #toppings #favorite #treat #nochurn #icecreaminabag #icecream")
No Ice Cream Maker Needed!
No fancy machine or long wait—this ice cream is ready fast! It’s more than a recipe—it’s a fun experiment and a treat in one.
I made this in science class and on hot summer days, so I had to share it with my kids. It’s smooth, creamy, and easy to change up. Stick with classic vanilla or chocolate, or mix in crushed cookies, caramel, or fresh berries.
And don’t forget the toppings! Once it’s thick and creamy, pile on sprinkles, whipped cream, or hot fudge—whatever you love!
, you're going to churn out a creamy, dreamy dessert that's sure to be a hit. Recipe via chelseasmessyapron #dessert #best #quick #easy #simple #toppings #favorite #treat #nochurn #icecreaminabag #icecream")
How Does Ice Cream In A Bag Work?
The Ice Cream in a Bag method works because of two science ideas: freezing point lowering and heat transfer:
- Freezing point lowering: Rock salt makes ice colder by lowering the temperature at which it melts.
- Heat transfer: The warm ice cream mix touches the cold ice-salt mixture, loses heat, and starts to freeze.
Shaking the bag spreads the cold evenly, helping the mix freeze. After 5-10 minutes, it turns into soft ice cream. For firmer ice cream, freeze for 30 minutes—but not too long, or it’ll get too hard!
, you're going to churn out a creamy, dreamy dessert that's sure to be a hit. Recipe via chelseasmessyapron #dessert #best #quick #easy #simple #toppings #favorite #treat #nochurn #icecreaminabag #icecream")
Supplies Needed
- Large zipper bag: Holds ice and rock salt. Must not leak and should close tightly.
- Small zipper bag: Holds the ice cream mix. Needs to be leak-proof and seal well.
- Rock salt: Makes ice colder so the mix can freeze. Table salt won’t work the same. Find it in the spice aisle, usually on the bottom shelf.
- Ice: Helps freeze the mix. Crushed ice works best because it cools faster than big cubes.
, you're going to churn out a creamy, dreamy dessert that's sure to be a hit. Recipe via chelseasmessyapron #dessert #best #quick #easy #simple #toppings #favorite #treat #nochurn #icecreaminabag #icecream")
Ingredients
- Half-and-half or heavy cream: Makes the ice cream creamy. Heavy cream is richer, half-and-half is lighter.
- Sugar: Adds sweetness. You can adjust, but flavors taste milder when frozen.
- Vanilla extract: Gives vanilla flavor. Pure vanilla works best.
- Salt: A small pinch of fine sea salt makes the flavors pop.

How To Make Ice Cream In A Bag (Tips)
- Close both bags tightly so saltwater stays out and ice cream stays in.
- Squeeze out extra air before sealing to help the ice touch the mixture.
- Keep shaking and move the ice around the mixture.
- Wear oven mitts or wrap in a towel to keep hands from getting too cold.

Variations
Ice Cream In A Bag Flavor Ideas
- Chocolate: Mix in 2 tbsp hot fudge.
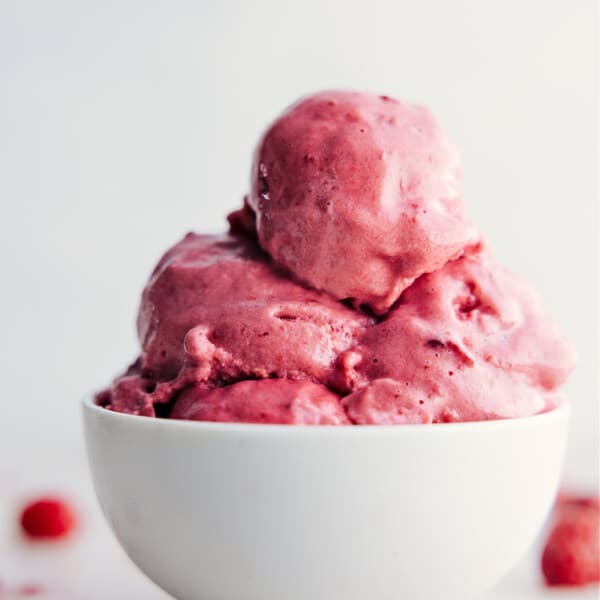
- Strawberry: Add chopped fresh strawberries or crushed freeze-dried ones.
- Mint Chip: Stir in 1/8 to 1/4 tsp peppermint extract, a little green food coloring (optional), and mini chocolate chips.
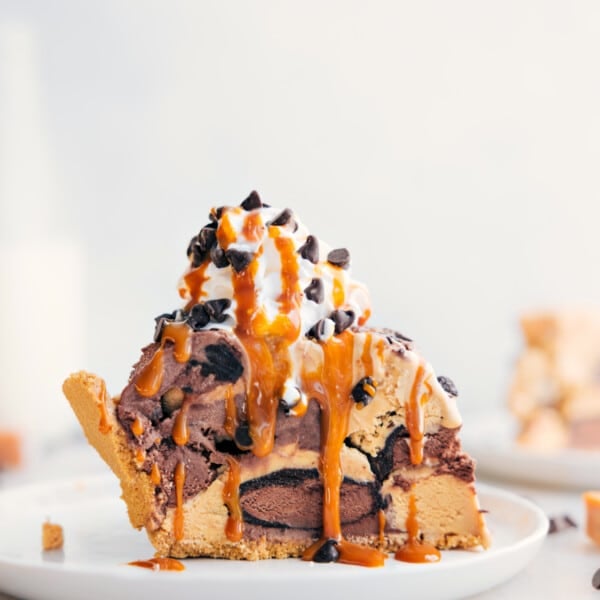
- Caramel Swirl: Mix in 2 tbsp caramel sauce; add toffee pieces for crunch.
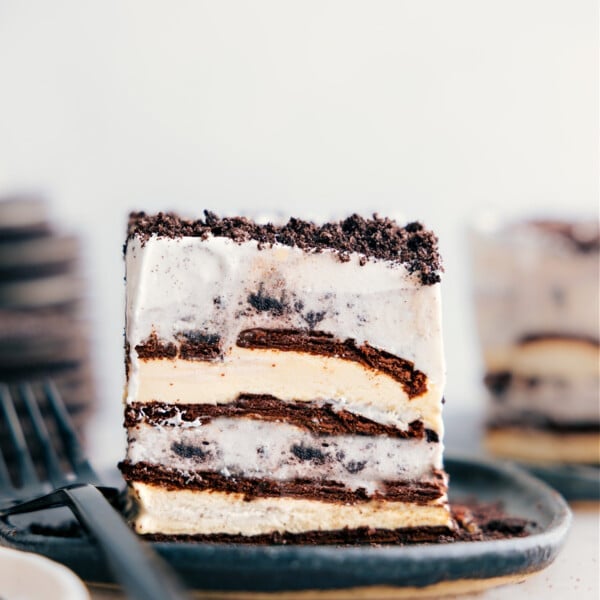
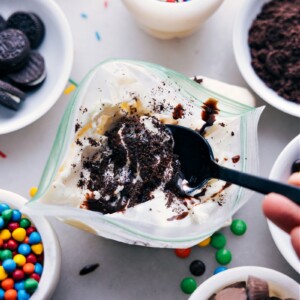
- Cookies & Cream: Stir in crushed Oreos.
- Peanut Butter: Mix in 1 tbsp peanut butter; top with chopped PB cups.
, you're going to churn out a creamy, dreamy dessert that's sure to be a hit. Recipe via chelseasmessyapron #dessert #best #quick #easy #simple #toppings #favorite #treat #nochurn #icecreaminabag #icecream")
Topping Ideas
- Chocolate or caramel sauce: Drizzle on top for extra sweetness.
- Whipped cream: A light, fluffy classic.
- Berries & graham crackers: Mix in chopped berries and sprinkle crushed graham crackers.
- Chopped nuts: Use roasted almonds, pecans, pistachios, or peanuts for the best taste.
- Sprinkles, candy, or chocolate chips: A fun, colorful touch—chop candy for extra crunch.
- Crushed cookies or brownie: Add Oreos, graham crackers, or brownie chunks for more texture.
More Easy Dessert Recipes:
- Chocolate Chip Cookie Icebox Cake only four ingredients
- Mint Oreo Truffles made with mint Oreos
- No-Bake Cookies chocolate and peanut butter oat cookies
- Buncha Crunch made with three ingredients!
- Sugar Cookie Fruit Pizzas with store-bought sugar cookies
Ice Cream In A Bag
Equipment
- 1 freezer gallon-sized resealable plastic bag
- 1 sandwich-sized resealable plastic bag
Ingredients
- 1/3 cup rock salt also called ice cream salt; see note 1
- Ice crushed or cubed
- 1/2 cup heavy cream or half-and-half; see note 2
- 1 tablespoon granulated sugar
- 1/2 teaspoon vanilla extract
- 1/8 teaspoon salt
- 2 tablespoons chocolate syrup optional, for chocolate ice cream
- Toppings as desired see note 3
Instructions
- Prepare any toppings you’ll be using. You’ll want to eat the ice cream quickly once it’s ready! Also, consider chilling the ice cream bowl(s) in the freezer to get them nice and cold.
- Carefully add heavy cream, sugar, vanilla, and salt to the smaller plastic bag. Add chocolate syrup if making a chocolate version. Seal the bag, removing as much air as possible, and smoosh around to combine ingredients. Set aside for now.
- Fill the gallon bag halfway with crushed ice. Add the rock salt to the ice and smoosh together to integrate.
- Place the small ice cream bag into the larger bag and seal, removing as much air as possible. Wrap the bag in a towel (or use oven mitts) and shake or toss the bag for 5–10 minutes or until the ice cream reaches a soft-serve consistency.
- Remove the smaller bag from the larger bag and squeeze the ice cream into a bowl. Add toppings and enjoy! Remember to eat quickly, as the ice cream melts fast!
Video
Recipe Notes
Nutrition
Nutrition information is automatically calculated, so should only be used as an approximation.