Cheesecake In A Jar is a fun, no-bake dessert that is delicious and easy to customize! Serve with your favorite toppings like fresh berries, berry sauce, chocolate sauce, or caramel.
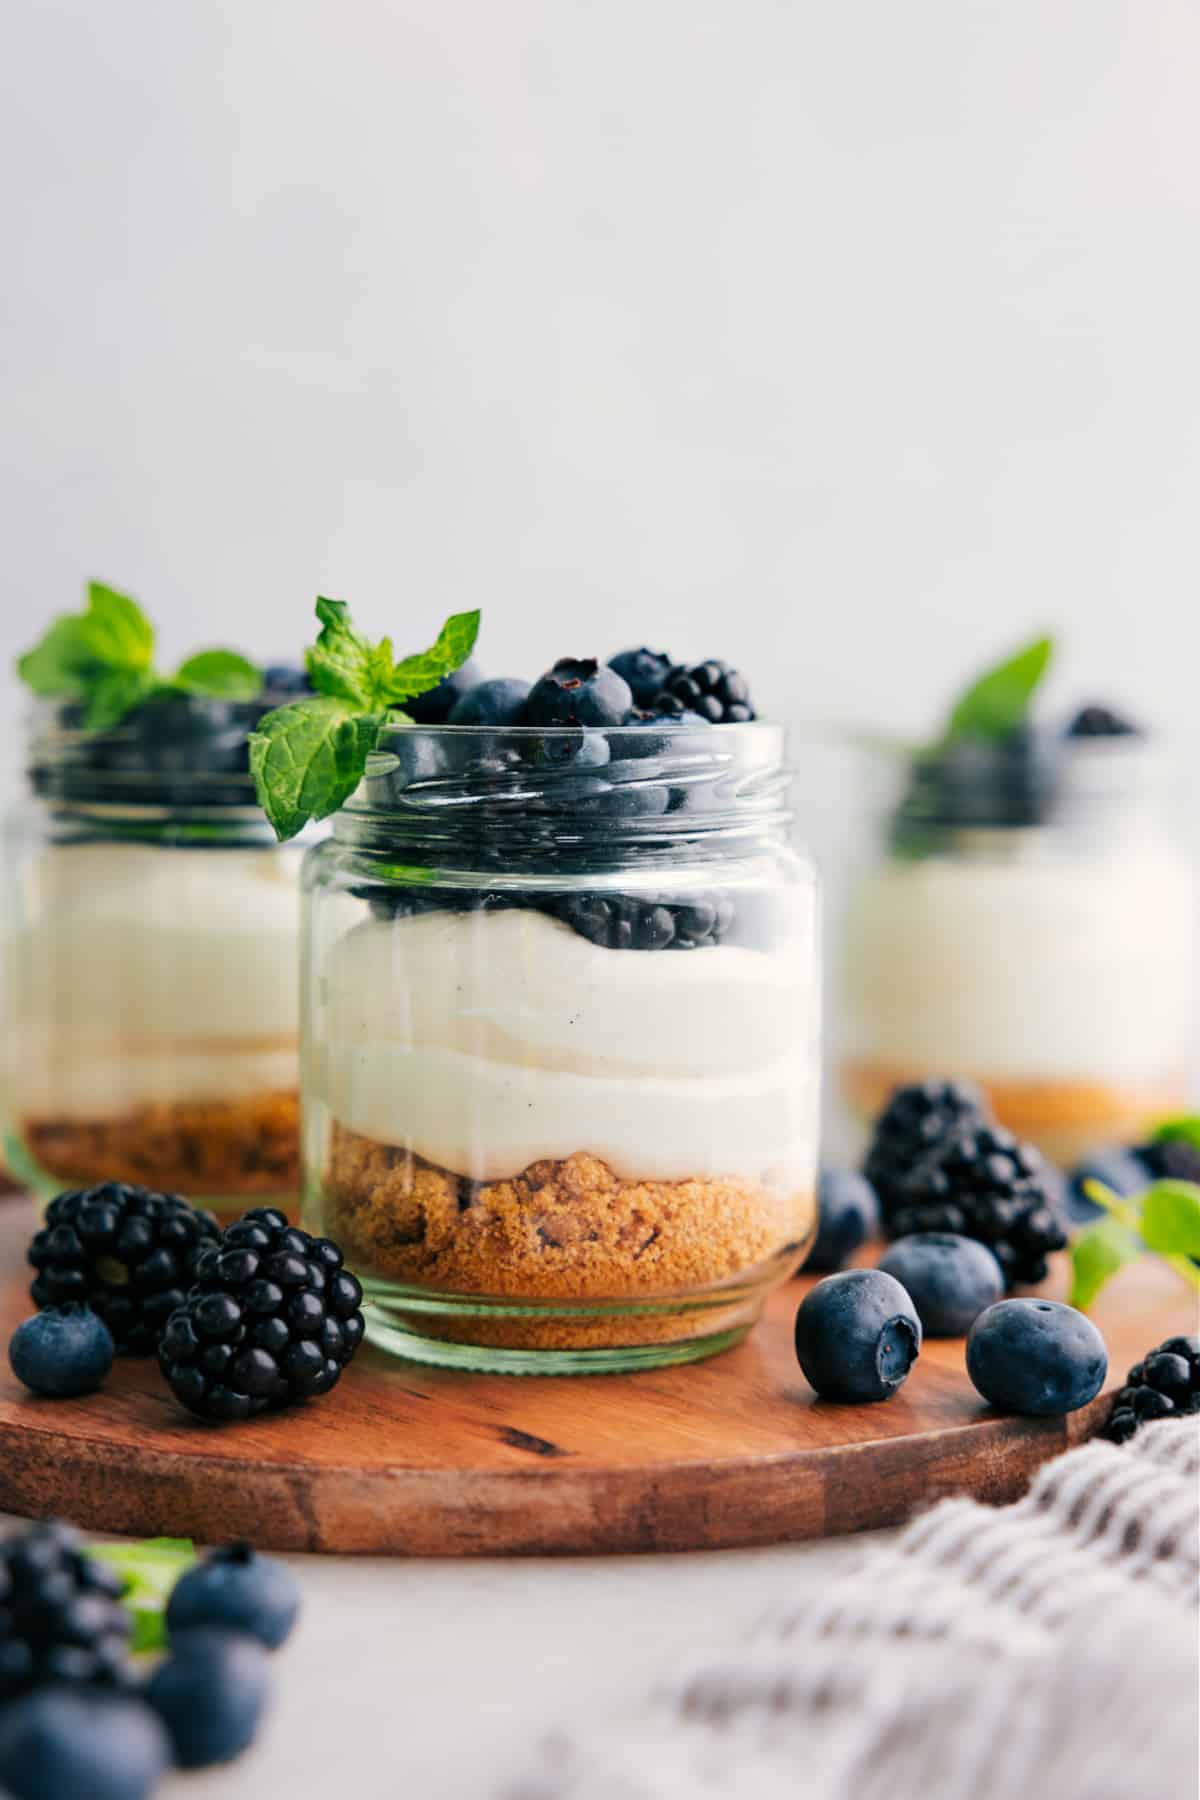
Cheesecake In A Jar
I love a good cheesecake! As a chocolate lover, my favorite will always be chocolate cheesecake, but these vanilla cheesecake bars are also truly amazing!
Often, I crave cheesecake but don’t want the hassle of a water bath or baking. That’s when no-bake cheesecake is perfect! I’m obsessed with how light, creamy, and sweet no-bake cheesecakes are. And the variety of toppings? The best!
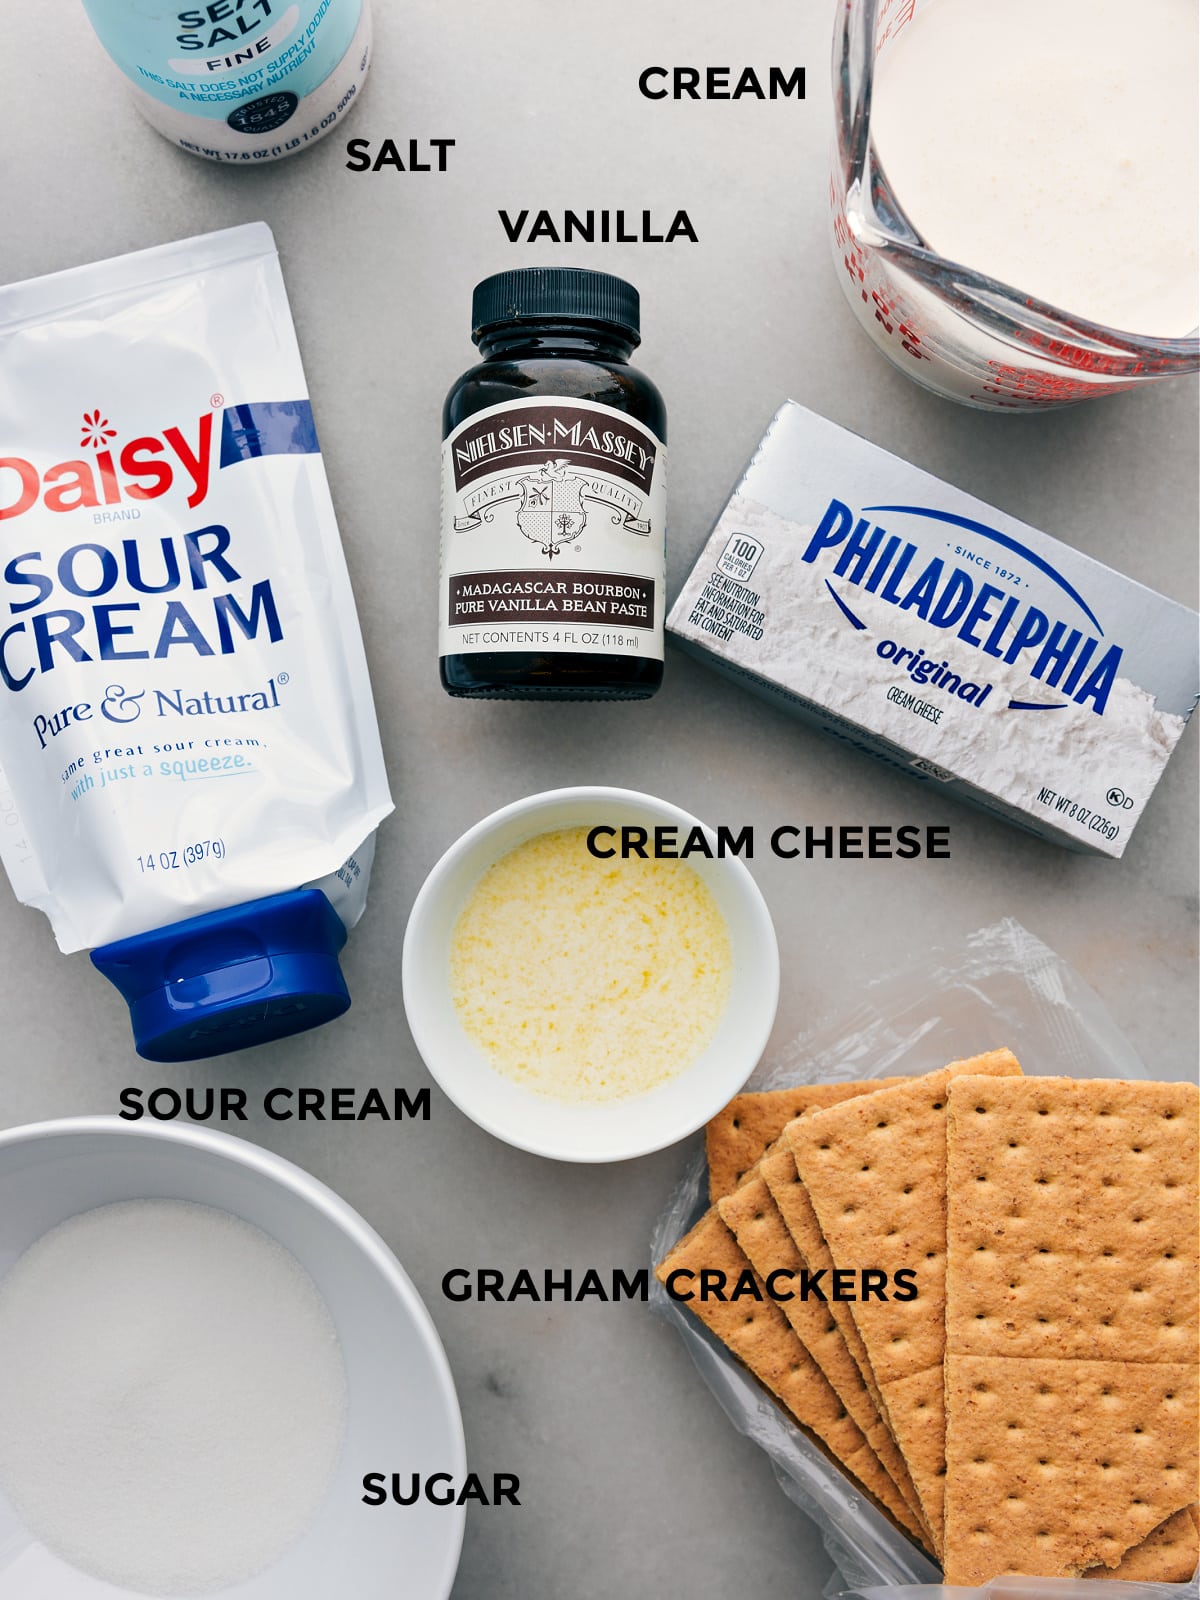
Ingredients
There are 3 parts to this Cheesecake in a Jar recipe; here’s what we’ve got going on:
Crust:
- Unsalted butter: Melt fully, but let slightly cool. Hot butter can melt the sugar and make the crust greasy.
- Graham crackers: Use a food processor or high-powered blender to crush to fine crumbs.
- White sugar: Adds sweetness. Feel free to use brown sugar.
- Salt: Brings out the flavors.
Cheesecake:
- Full-fat, brick-style cream cheese: Make sure it’s soft for a smooth cheesecake texture.
- White sugar: Makes the cheesecake sweet.
- Full-fat Greek yogurt or sour cream: Adds a creamy texture and more flavor.
- Salt: Balances the sweetness.
- Vanilla extract: Use pure vanilla for the best flavor.
- Heavy whipping cream, whipped to stiff peaks: Chill the bowl and beaters to make whipping faster!
Toppings:
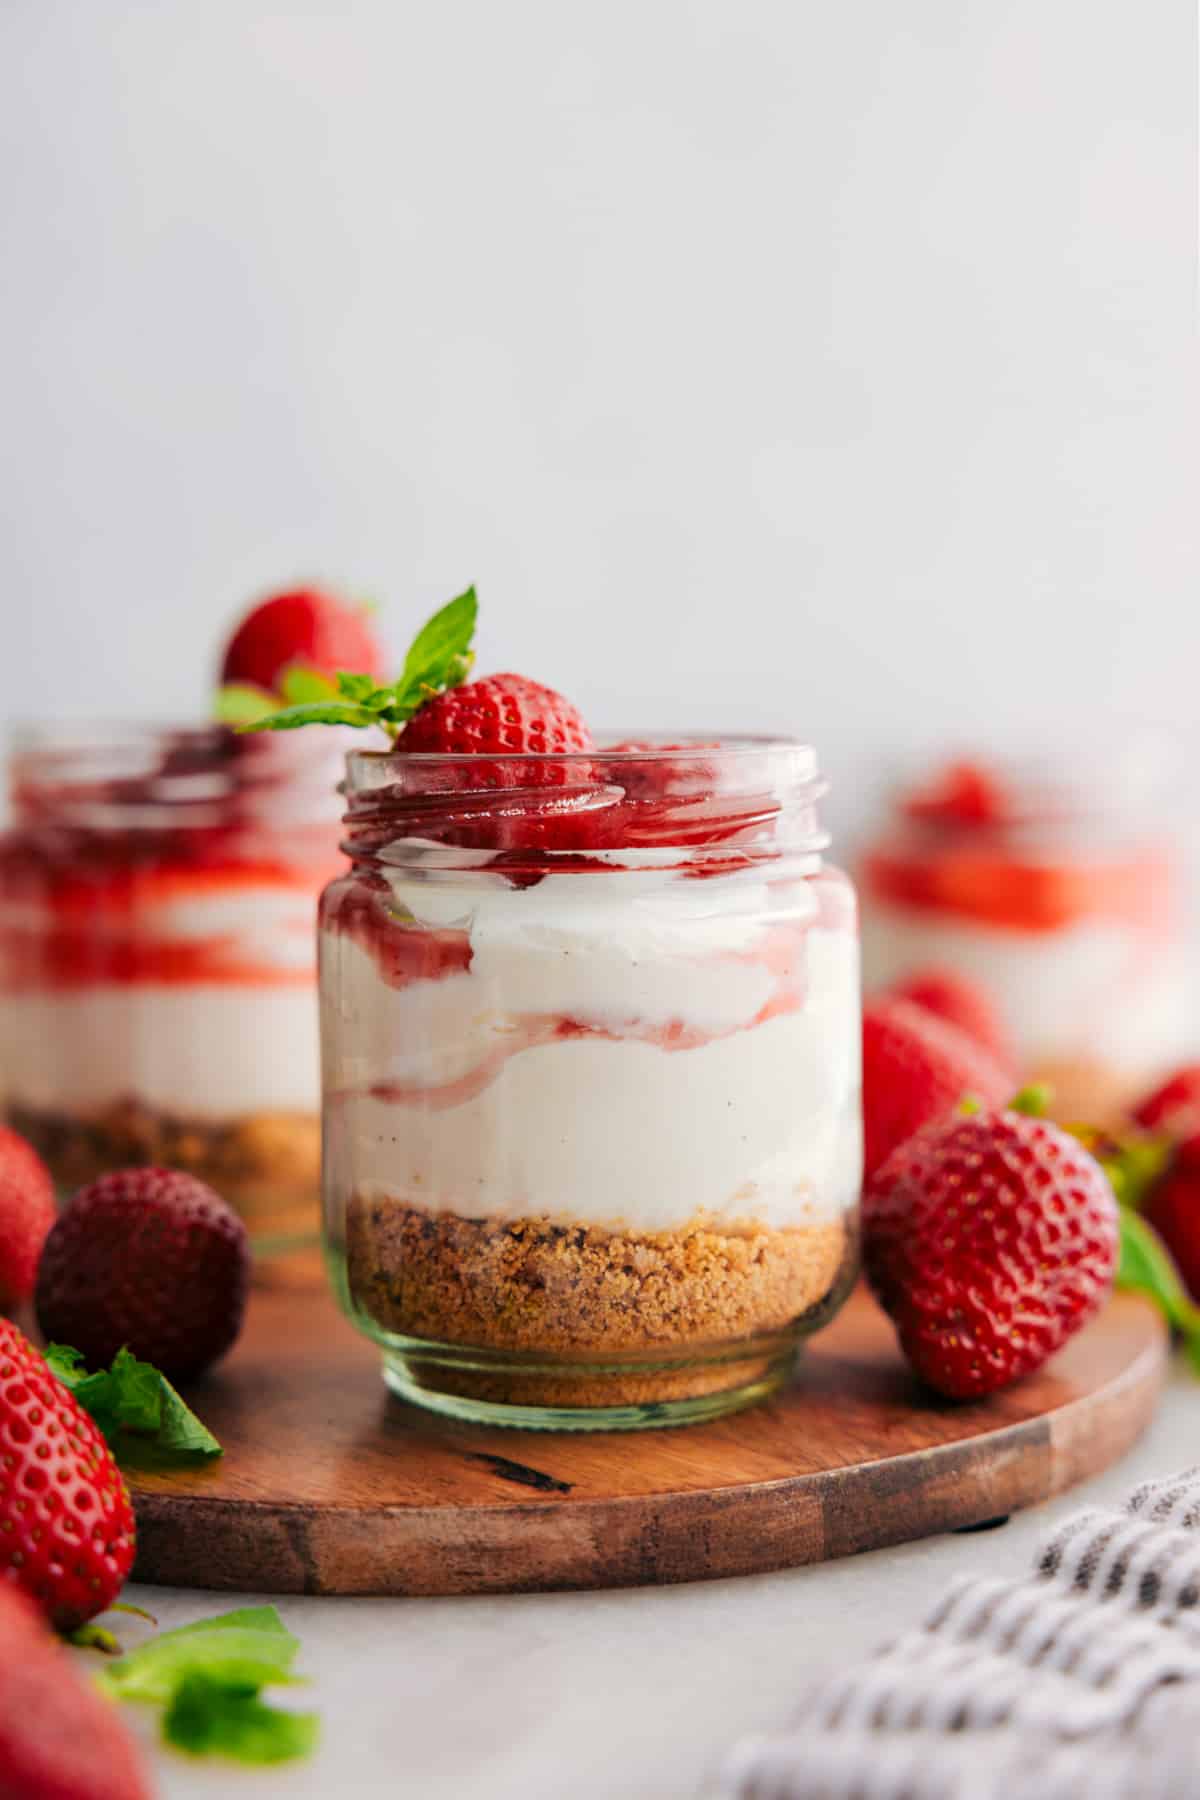
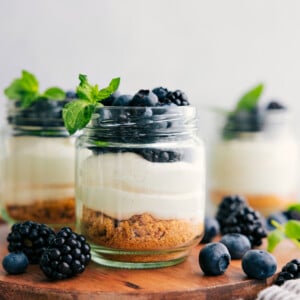
- Fresh berries or berry sauces: Good, ripe berries are the best! Make or buy your own berry sauces like a strawberry topping, blueberry syrup, or lemon curd.
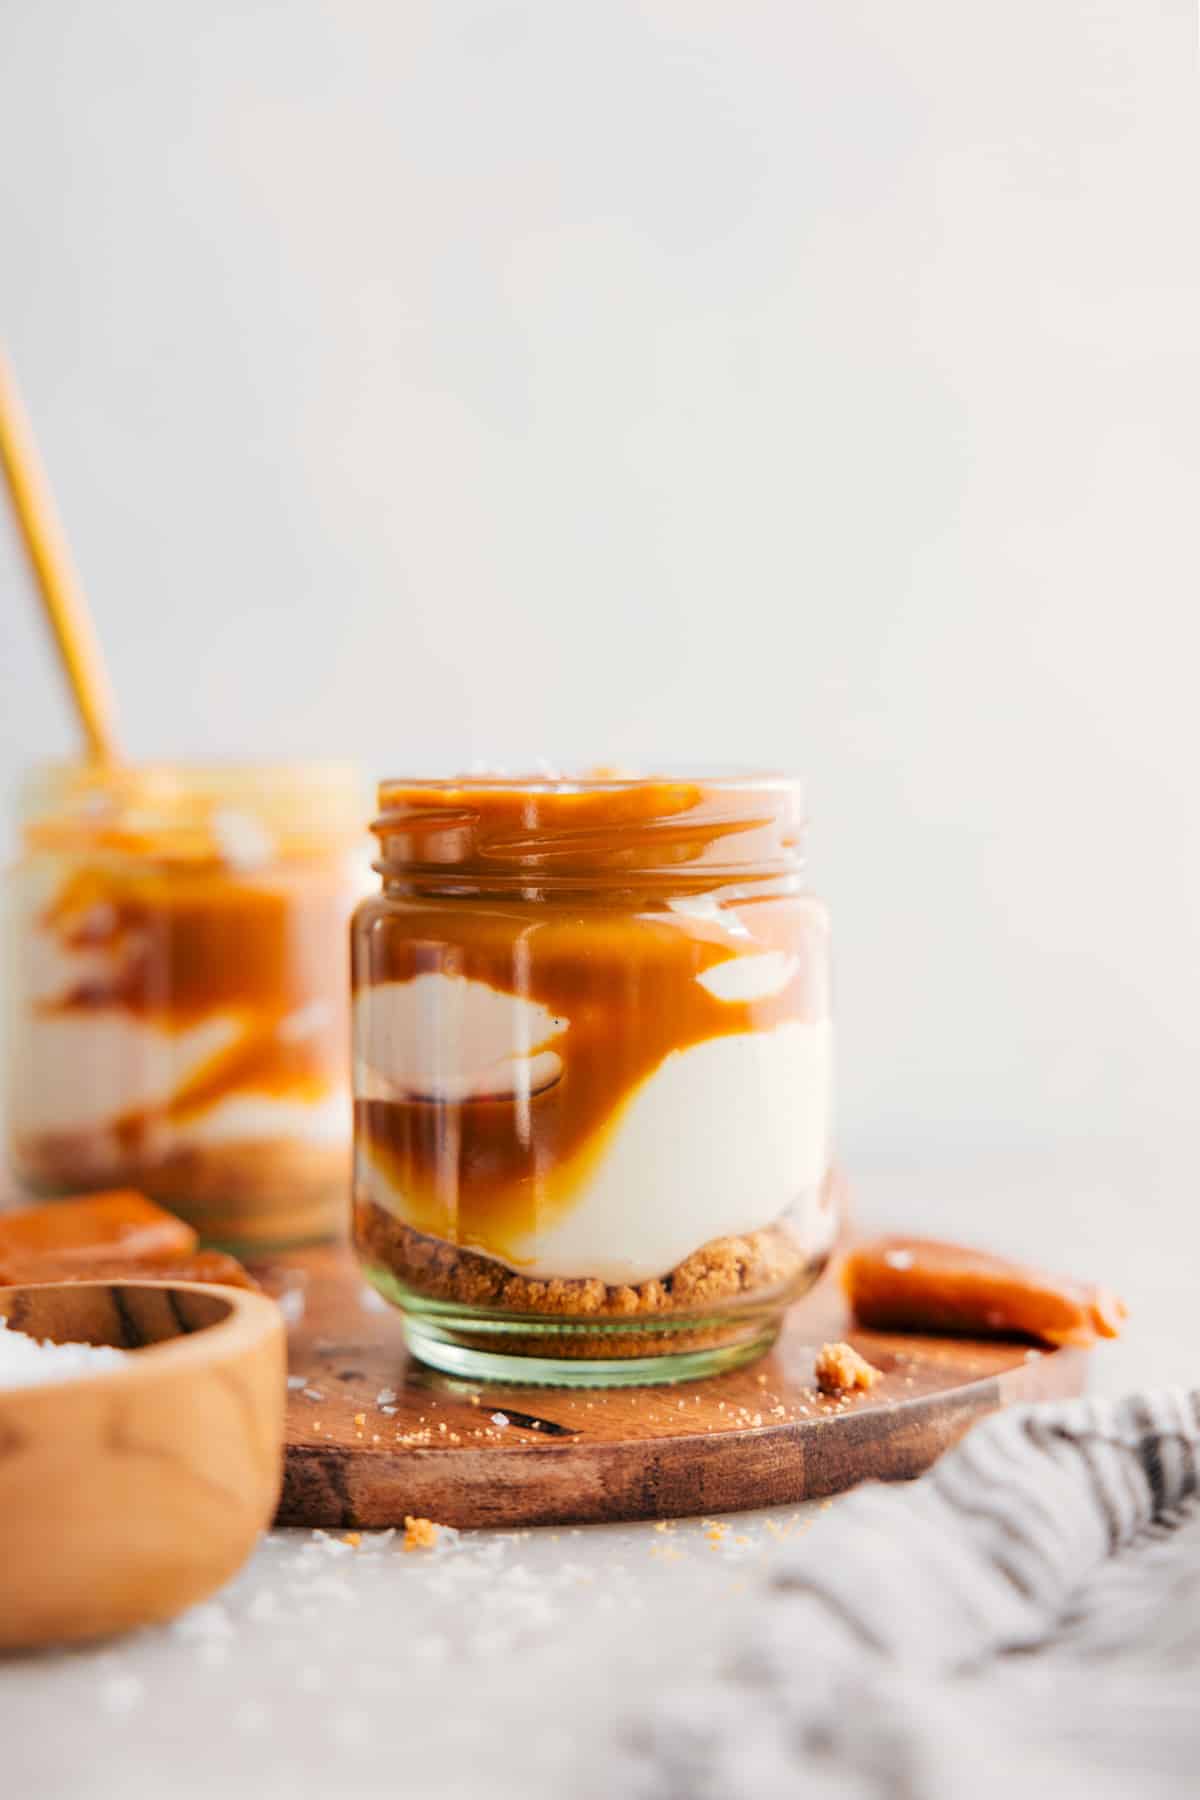
- Chocolate ganache, fudge sauce, or caramel sauce: Use store-bought or make your own.
- Garnishes: Think sprinkles, chopped candied nuts, fresh mint, shredded coconut, etc.
How I Like To Serve Cheesecake In A Jar
These cheesecakes in a jar are the perfect dessert for serving guests or hosting an event. I love making them for bridal or baby showers or girls’ nights. Everyone always loves them — not only are they delicious, but they’re also so cute and fancy.
You can arrange the jars (without toppings) on a table and serve all kinds of toppings on the side so guests can add whatever they’d like. This makes for such a fun party dessert.
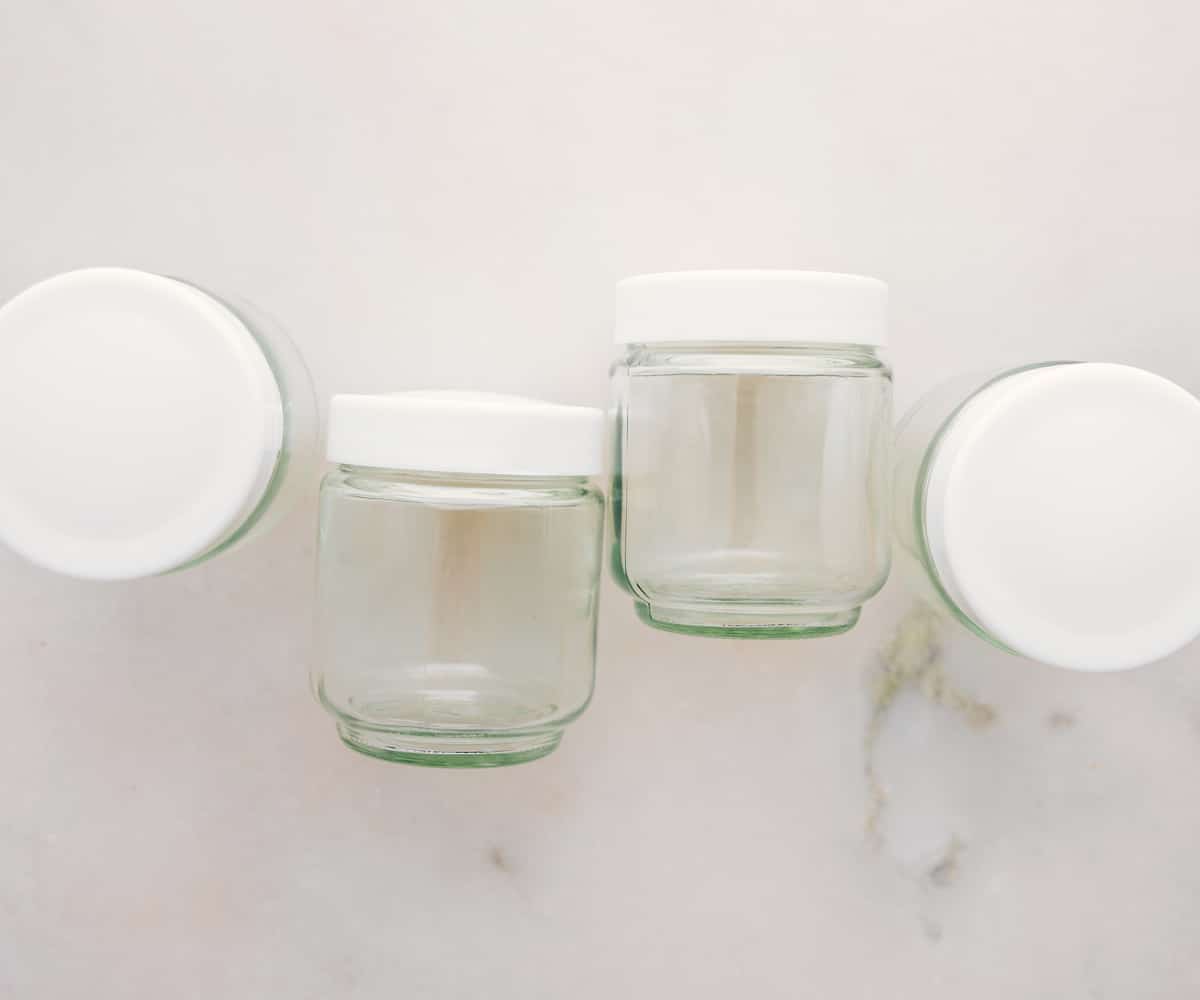
I like these mini jars best!
How To Make Cheesecake In A Jar
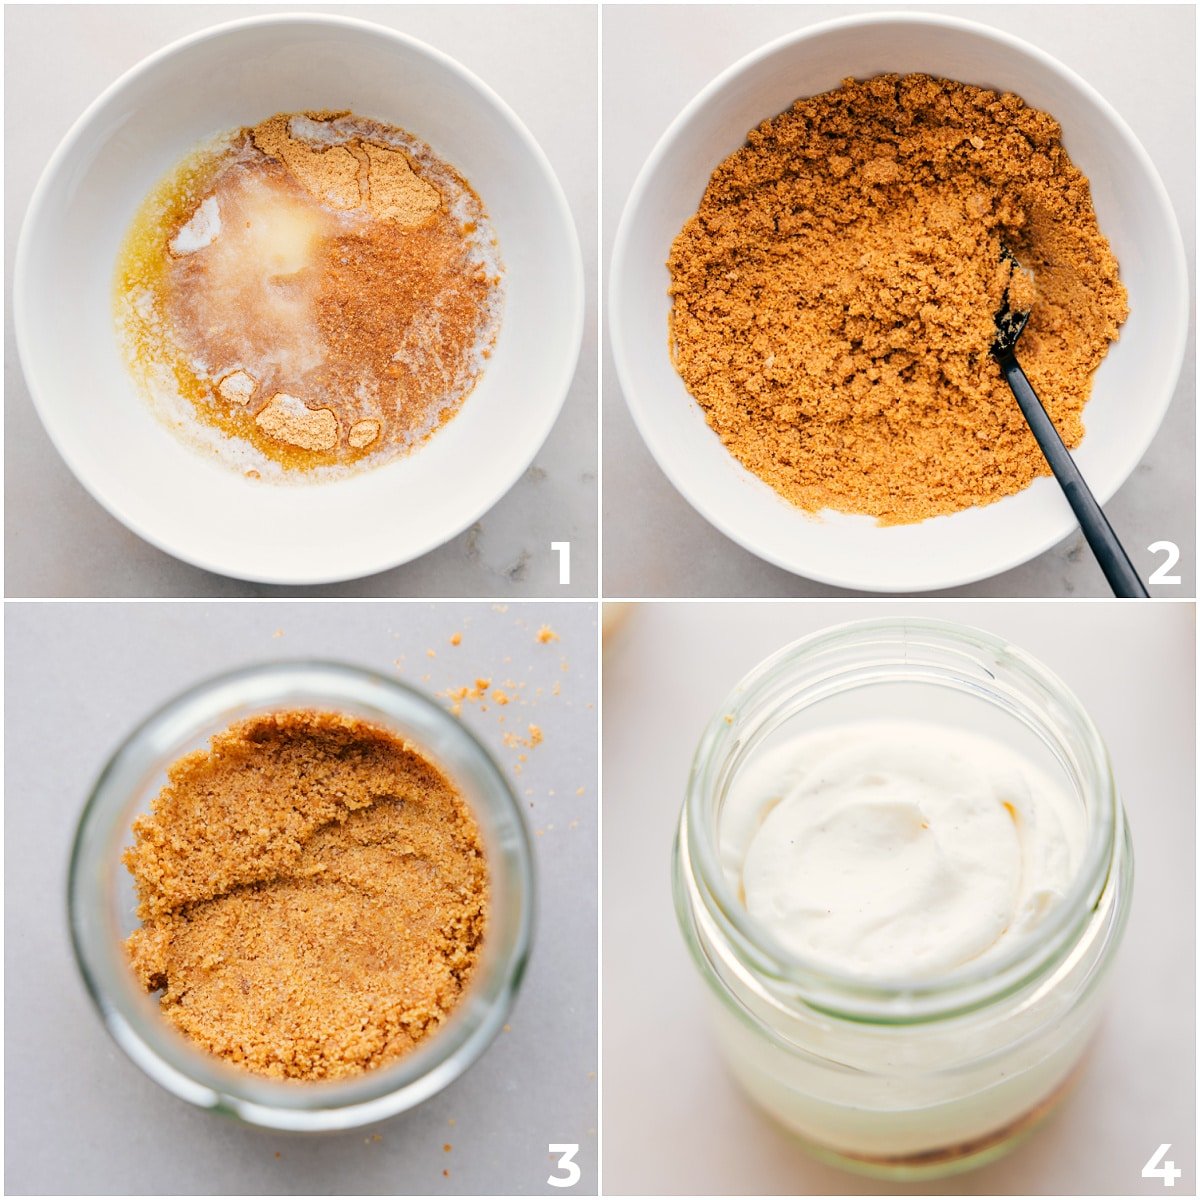
- Melt Butter: Melt butter in the microwave and let it cool a bit.
- Crush Crackers: Break graham crackers into crumbs using a blender.
- Mix Crust: Combine crumbs, melted butter, sugar, and salt.
- Press Crust: Divide the mixture among mason jars and gently press down with a milk bottle cap. The crust should be loose, not firm like a traditional Graham Cracker Crust.
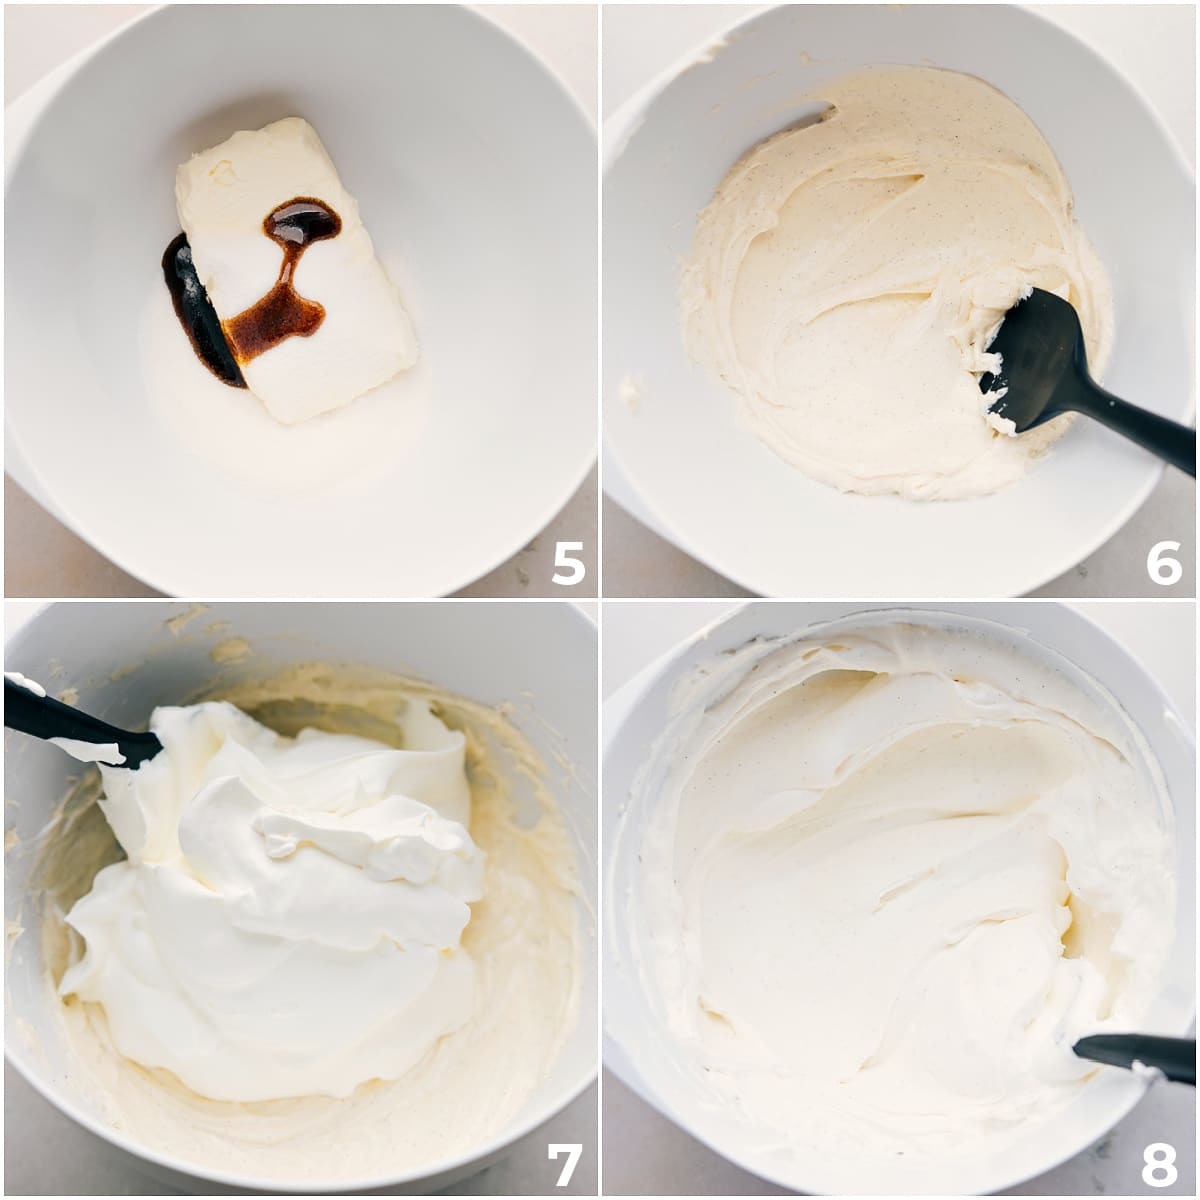
- Make Filling: Beat softened cream cheese, sugar, sour cream, salt, and vanilla until smooth.
- Whip Cream: Whip heavy cream to stiff peaks, then gently fold into the cream cheese mix.
- Fill Jars: Divide the cheesecake filling evenly among the jars, leaving space for toppings. Chill or add toppings.
- Add Toppings: If eating right away, add your favorite toppings like fresh berries, berry sauce, chocolate sauce, or caramel. If not eating right away, skip the toppings for now and refrigerate until ready to eat.
- Serve: Serve right away!
Cheesecake In A Jar Recipe Tips
- Soften Cream Cheese: Leave cream cheese out at room temperature for at least an hour to avoid lumps.
- Press Lightly: Don’t press the crust too firmly into the jars. A light press keeps the crust from being too dense.
- Fold Gently: When folding whipped cream into the cream cheese mix, do it gently to keep the filling light and fluffy.
- Fridge: If you’re not serving immediately, refrigerate the jars (with the lid on) to help the cheesecake set and maintain its texture.
Storage
Storing And Making Ahead
- Make Ahead: Prepare the filling in jars up to 2 days before serving. Add toppings just before serving.
- Fridge: Chill jars (covered but without toppings) for at least 30 minutes or up to 2 days. Add toppings when ready to serve.
- Freeze: Not recommended; dairy can break when frozen and thawed.
- Store Leftovers: Cover and store in the fridge for 3-5 days. Texture may change depending on the toppings added.
More No-Bake Dessert Recipes Perfect For A Party:
- Fruity Pebbles Rice Krispies Treats loaded with marshmallows
- No Bake Cookies chocolate and peanut butter
- No Bake Peanut Butter Cheesecake with an Oreo crust
- Peanut Butter Bars with a chocolate topping
- Monster Energy Balls with mini M&Ms
Cheesecake in a Jar
Equipment
- 10 mason jars 6-ounce
- Blender
- Hand mixer
Ingredients
Crust
- 3 tablespoons unsalted butter melted
- 9 full graham cracker sheets
- 1 tablespoon sugar
- 1/16 teaspoon salt
Cheesecake
- 1 (8-ounce) package cream cheese full-fat, room temperature
- 1/3 cup sugar
- 2 tablespoons Greek yogurt or sour cream
- 1/16 teaspoon salt
- 1 teaspoon vanilla bean paste or 1-1/2 teaspoon vanilla extract
- 1 cup heavy cream whipped
Toppings
- Toppings as desired see note 1
Instructions
- Melt butter in the microwave and set aside to slightly cool. Coarsely break up graham crackers into a blender then blend until they become fine crumbs. You should get about 1 cup crumbs. Combine melted butter, graham cracker crumbs, sugar, and a tiny pinch of salt. Stir until the mixture is evenly coated and resembles moist sand. Divide the crust mixture evenly among 10 mason jars. Use the cap of a milk bottle to gently press down the crust. It shouldn't be firm!
- Using a hand mixer or a stand mixer fitted with a whisk attachment, beat the softened cream cheese, sugar, Greek yogurt (or sour cream), salt, and vanilla together on medium-high speed until completely creamy and lump-free. If making a berry cheesecake jar, add 1/4 teaspoon lemon zest and 1-1/2 teaspoon lemon juice.
- In a separate bowl, using a hand mixer or stand mixer fitted with a whisk attachment, whip cold heavy cream into stiff peaks on medium-high speed. This takes about 2-4 minutes.
- Using a rubber spatula, gently fold the whipped cream into the cheesecake mixture until combined. Be careful not to deflate the mixture. Divide the cheesecake filling evenly among the jars, leaving space at the top for toppings. Transferring the cheesecake filling to a piping bag and cutting off about an inch makes it easier to pipe the filling into the jars.
- You can top cheesecakes and eat now or cover with the lid and chill for an hour in the fridge. Do not add toppings until ready to eat these cheesecakes!
- Spoon your chosen toppings and garnishes on top of the cheesecake filling. Enjoy immediately!
Video
Recipe Notes
- Fresh berries or berry sauces—good, ripe berries are the best! Make or buy your own berry sauces like a strawberry topping, blueberry syrup, or lemon curd.
- Chocolate ganache, fudge sauce, or caramel sauce, use store-bought or make your own.
- Garnishes—think sprinkles, chopped candied nuts, fresh mint, shredded coconut, etc.
Nutrition
Nutrition information is automatically calculated, so should only be used as an approximation.


So easy! And so delicious! Wonderful to make in the summer when I do not like to turn on the stove Thank you!
So happy to hear you enjoyed these no bake recipes! Thanks Eileen 🙂
Wow!! I just bookmarked this because I most definitely want to try all of them 😉
I hope you love them! 🙂
Those no bake bars are definitely on my to-make list! They look so good and I love peanut butter and chocolate!
Thank you Liz! 🙂