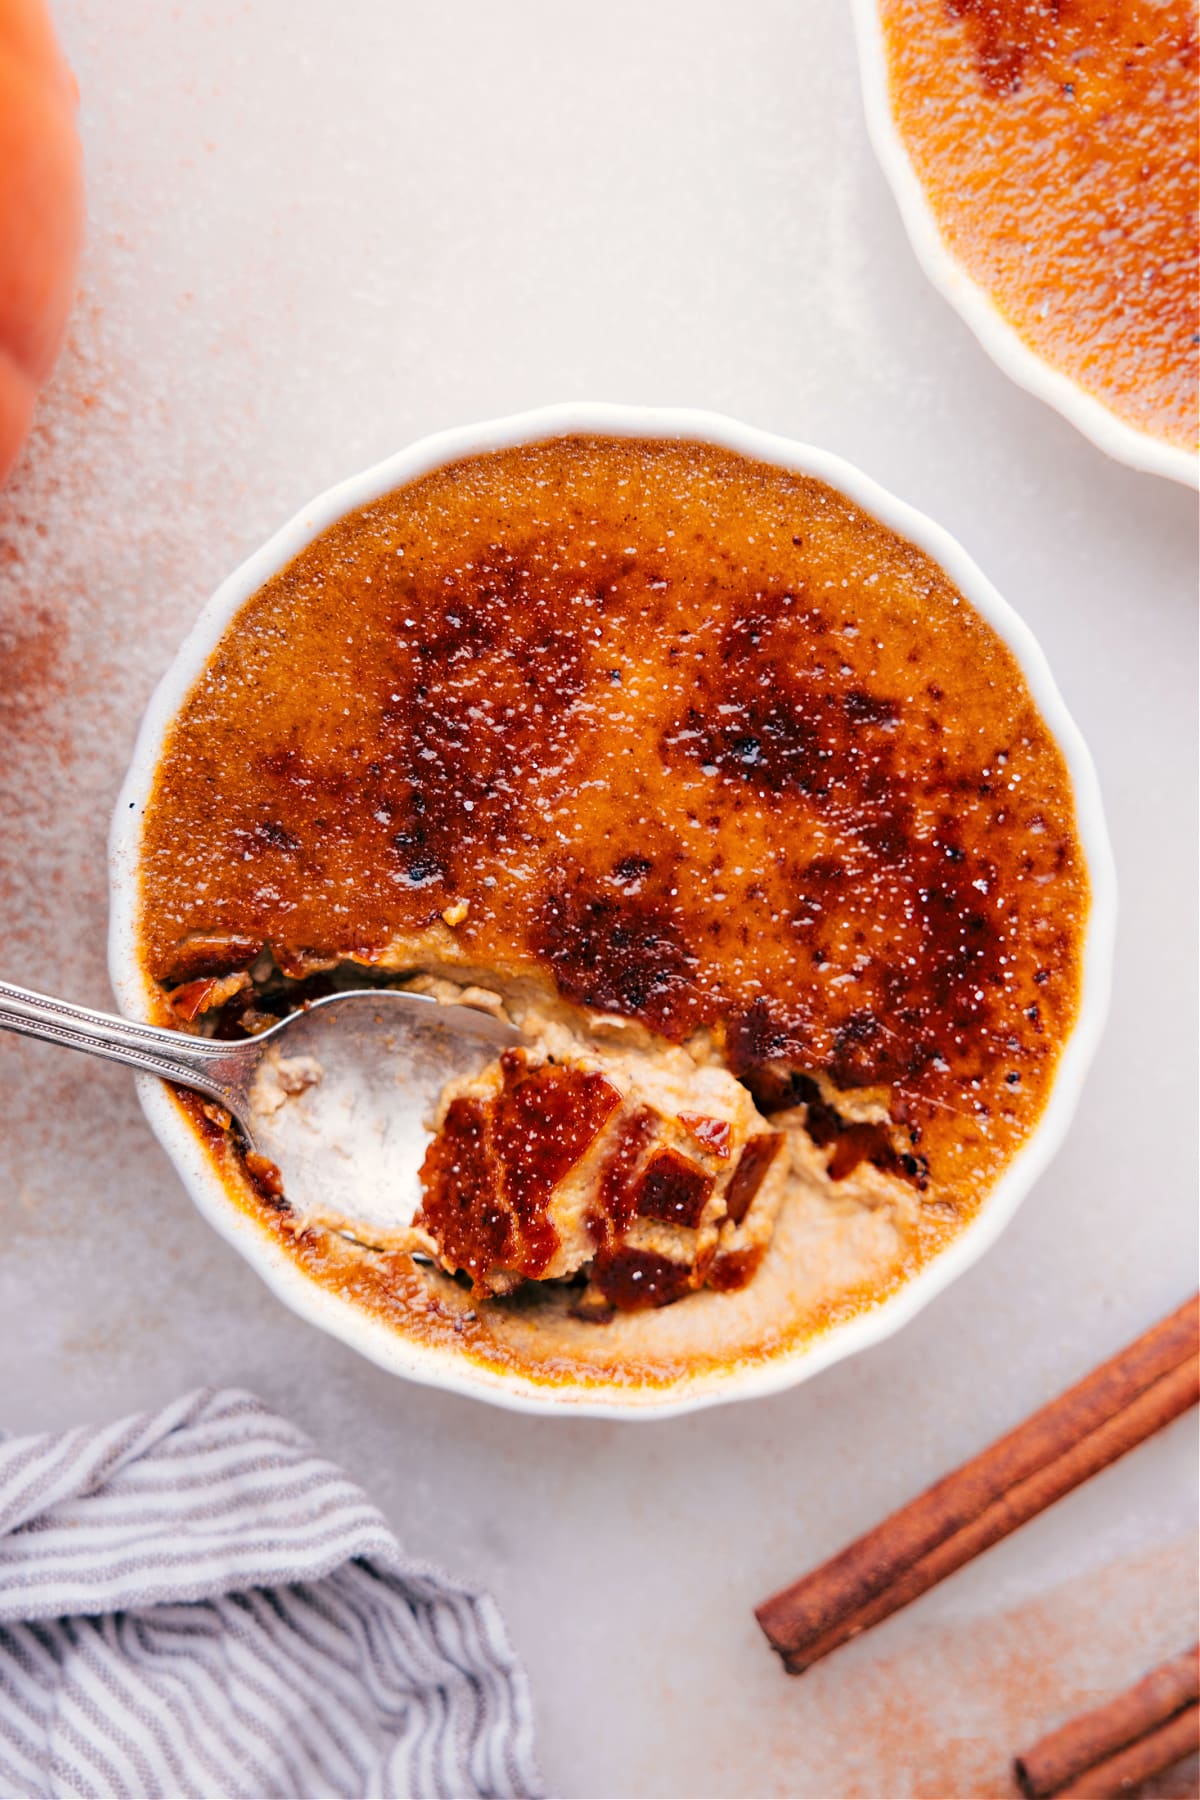
Pumpkin Créme Brûleé has creamy pumpkin-spiced custard filling and a caramelized sugar topping. It’s a fun twist on regular crème brûleé!
Pumpkin Créme Brûleé is the perfect dessert to make ahead of time. You can prepare the custard several days in advance, store it in the fridge, and then torch the tops with sugar just before serving.
If you’re as obsessed with pumpkin as we are, try these pumpkin-filled treats next: Pumpkin Cupcakes, Pumpkin Coffee Cake, or this Pumpkin Cheesecake Ball.
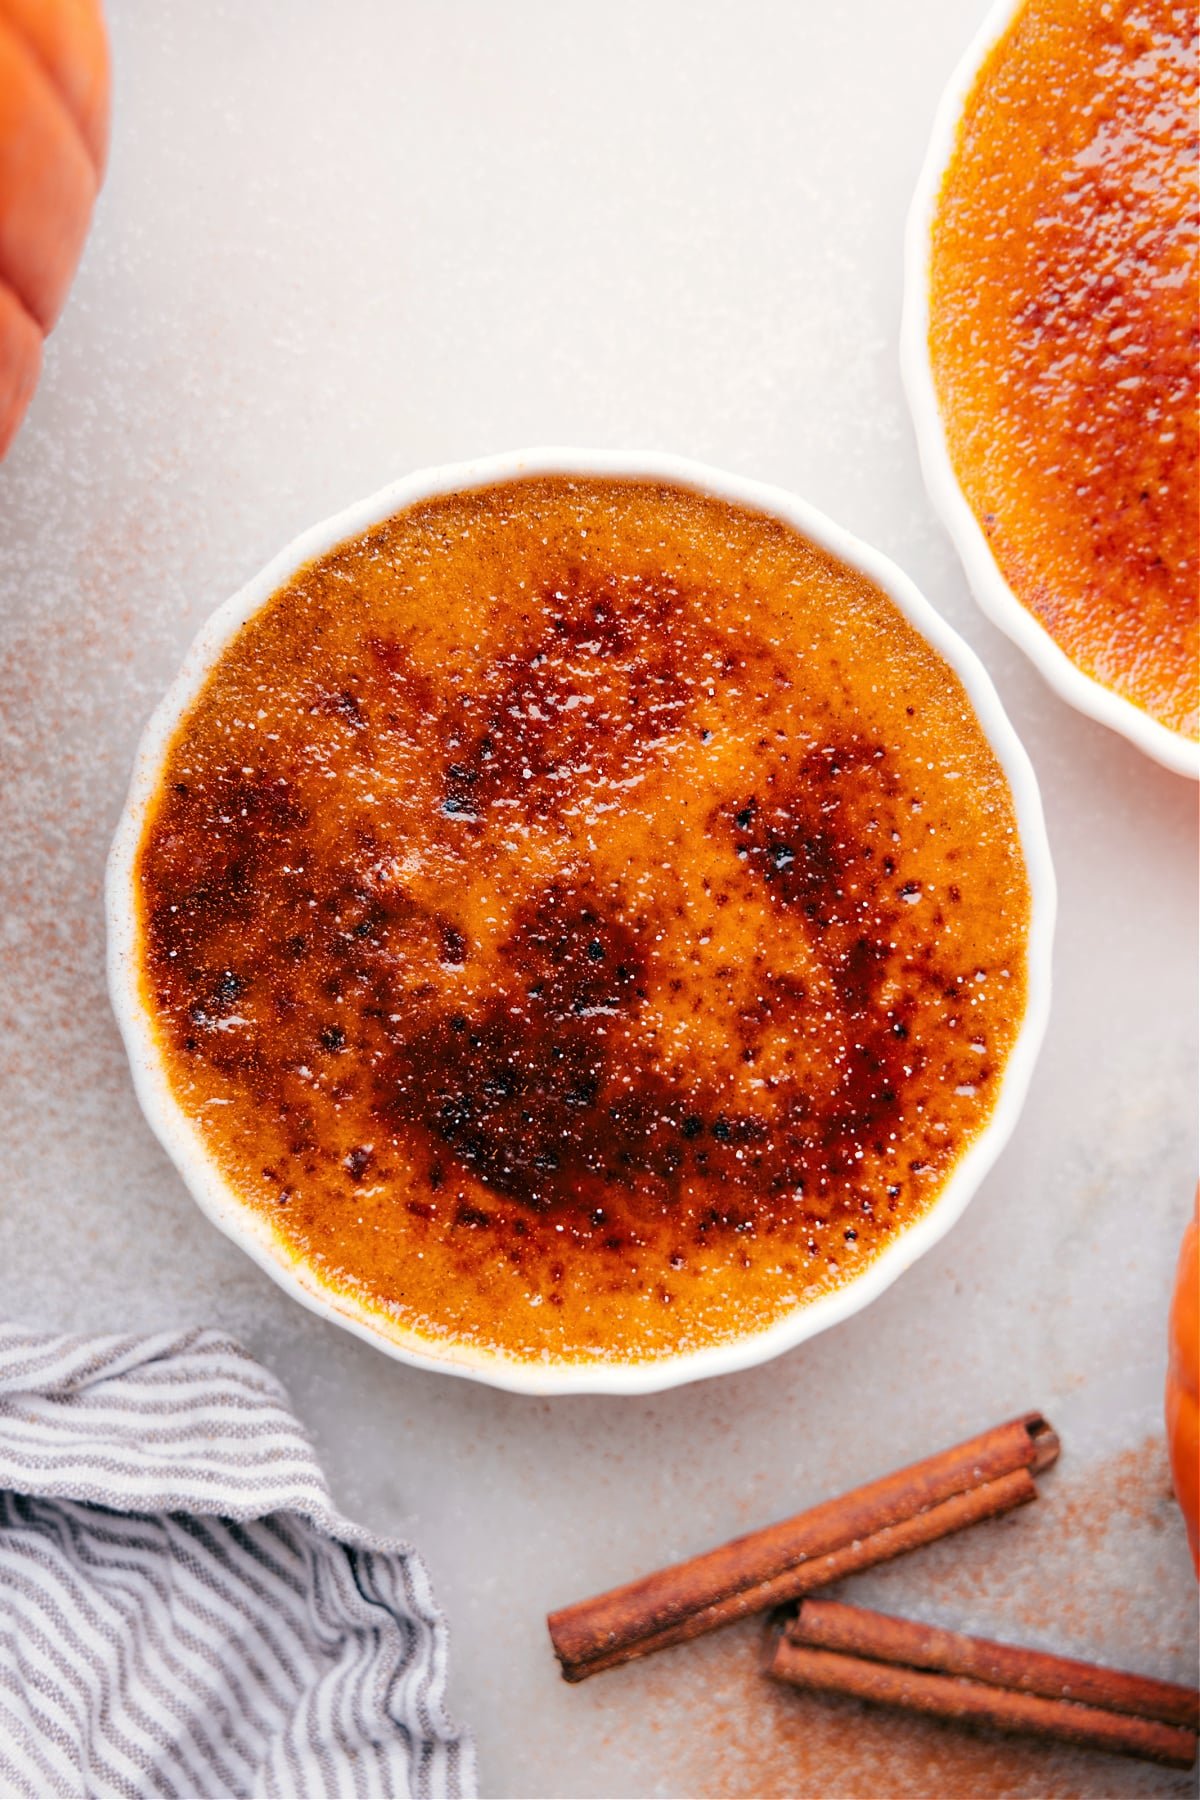
Pumpkin Créme Brûleé
While turkey is good and all, if you’re a sweets lover, the real showstoppers of Thanksgiving dinner are the desserts!
Sure, Pumpkin Pie and Pecan Pie are classic treats, but our table’s favorites tend to be the unconventional ones, like Pumpkin Cheesecake Bars or, wait for it, Pumpkin Créme Brûleé!
Not only is this Créme Brûleé far simpler to make than pumpkin pie, but it’s also an ideal make-ahead dessert. With its ease and festive twist, it’s the perfect dessert for fall and Thanksgiving festivities.
Quick Tip
The term “créme brûleé” is French, evident from its accent marks. Over 300 years ago, its English translation was “burnt cream.” While less elegant sounding, “brûleé” shares its root with “broil,” so the name makes sense.
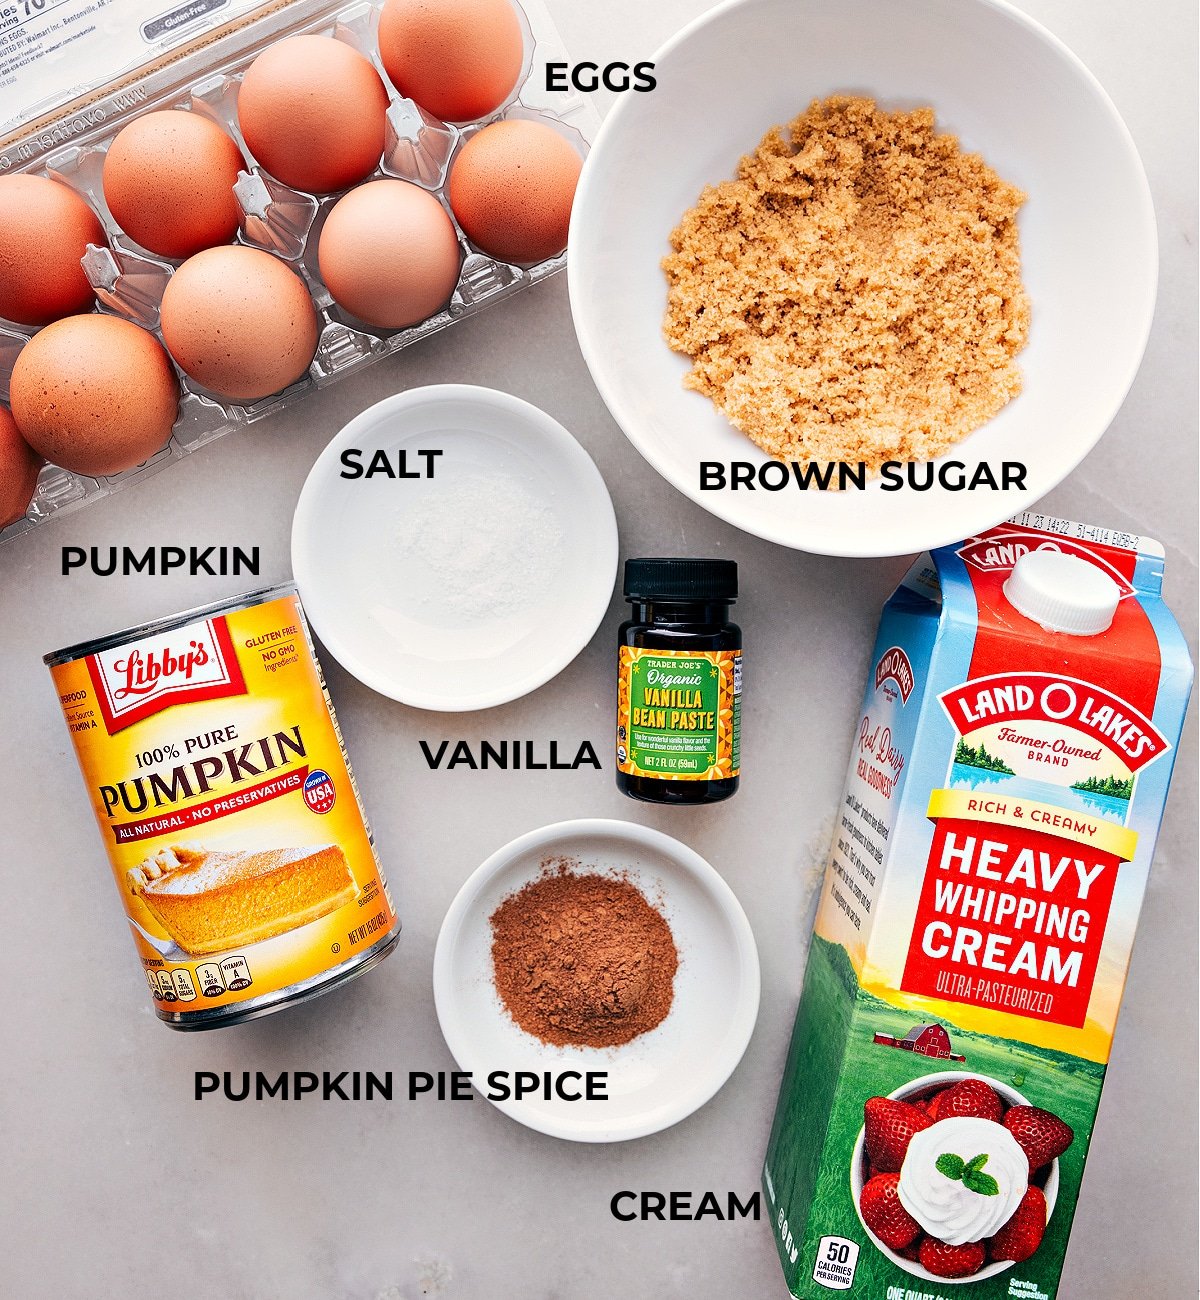
Ingredients In Pumpkin Créme Brûleé
- Water: Used to create a water bath for baking the Créme Brûleé, ensuring even cooking and a silky texture.
- Heavy cream: Provides the rich base for the custard.
- Large egg yolks: Gives the custard its creamy texture and structure.
- Dark or light brown sugar: Adds sweetness and depth to the custard.
- Pumpkin pie spice: Imparts warm fall flavors to the dessert.
- Salt: Enhances the dessert’s flavors.
- Canned pumpkin: Provides pumpkin flavor and enhances the dessert’s texture.
- Vanilla bean paste (or pure vanilla extract): Infuses the custard with vanilla flavor.
- White sugar: Used for the signature caramelized topping of Créme Brûleé.
How To Make Pumpkin Créme Brûleé
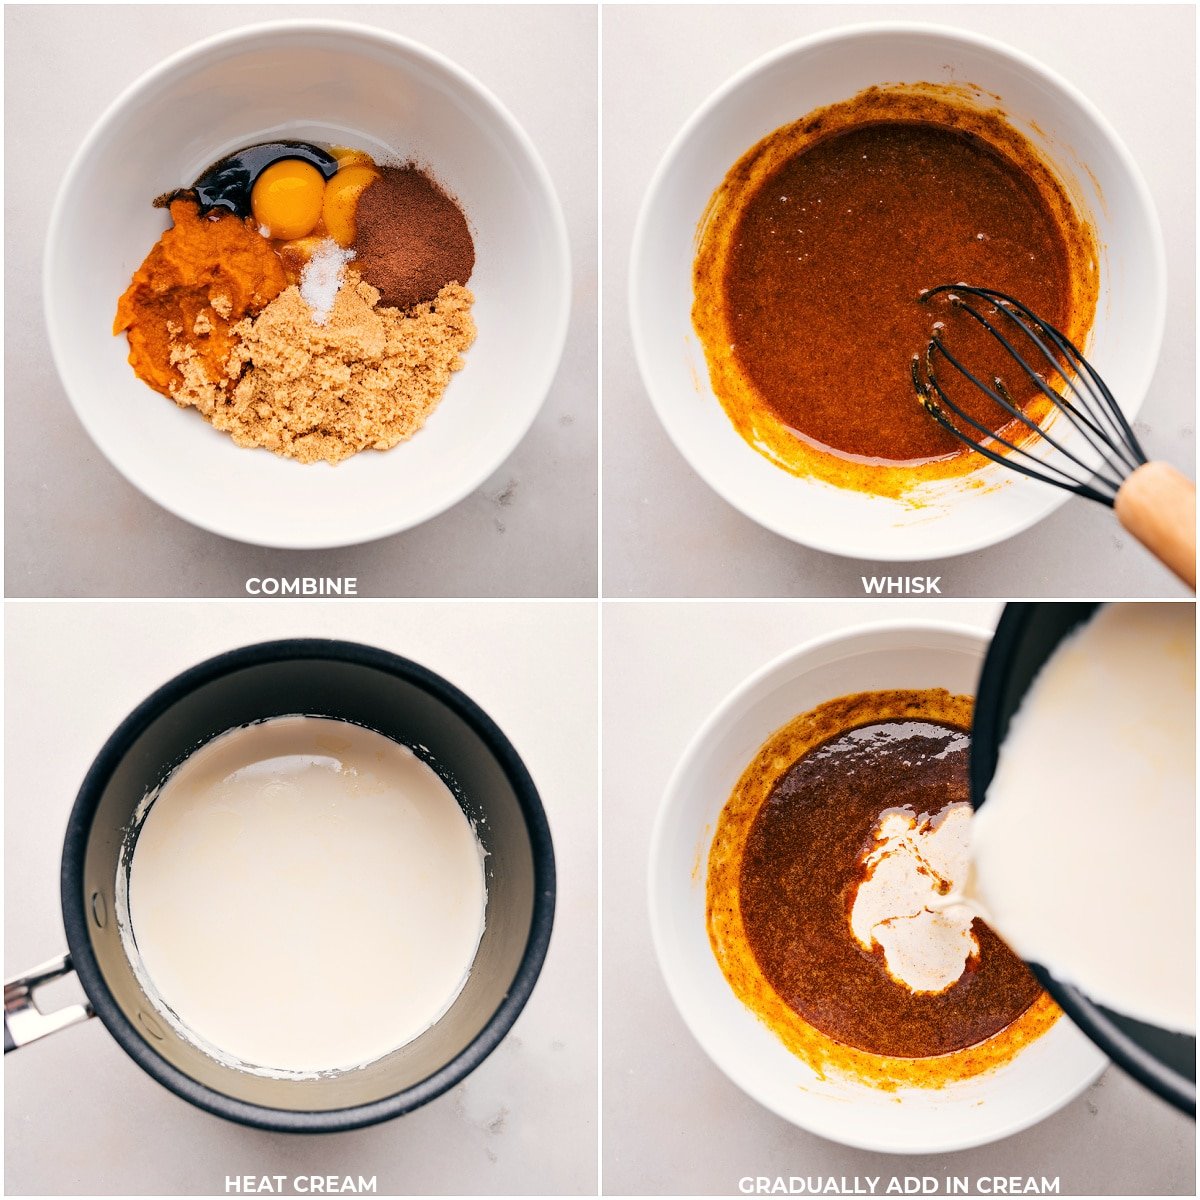
- Combine the yolks, brown sugar, spices, salt, vanilla, and pumpkin. For optimal results, choose a high-quality, non-watery pumpkin.
- Use a whisk to mix until it’s smooth and creamy.
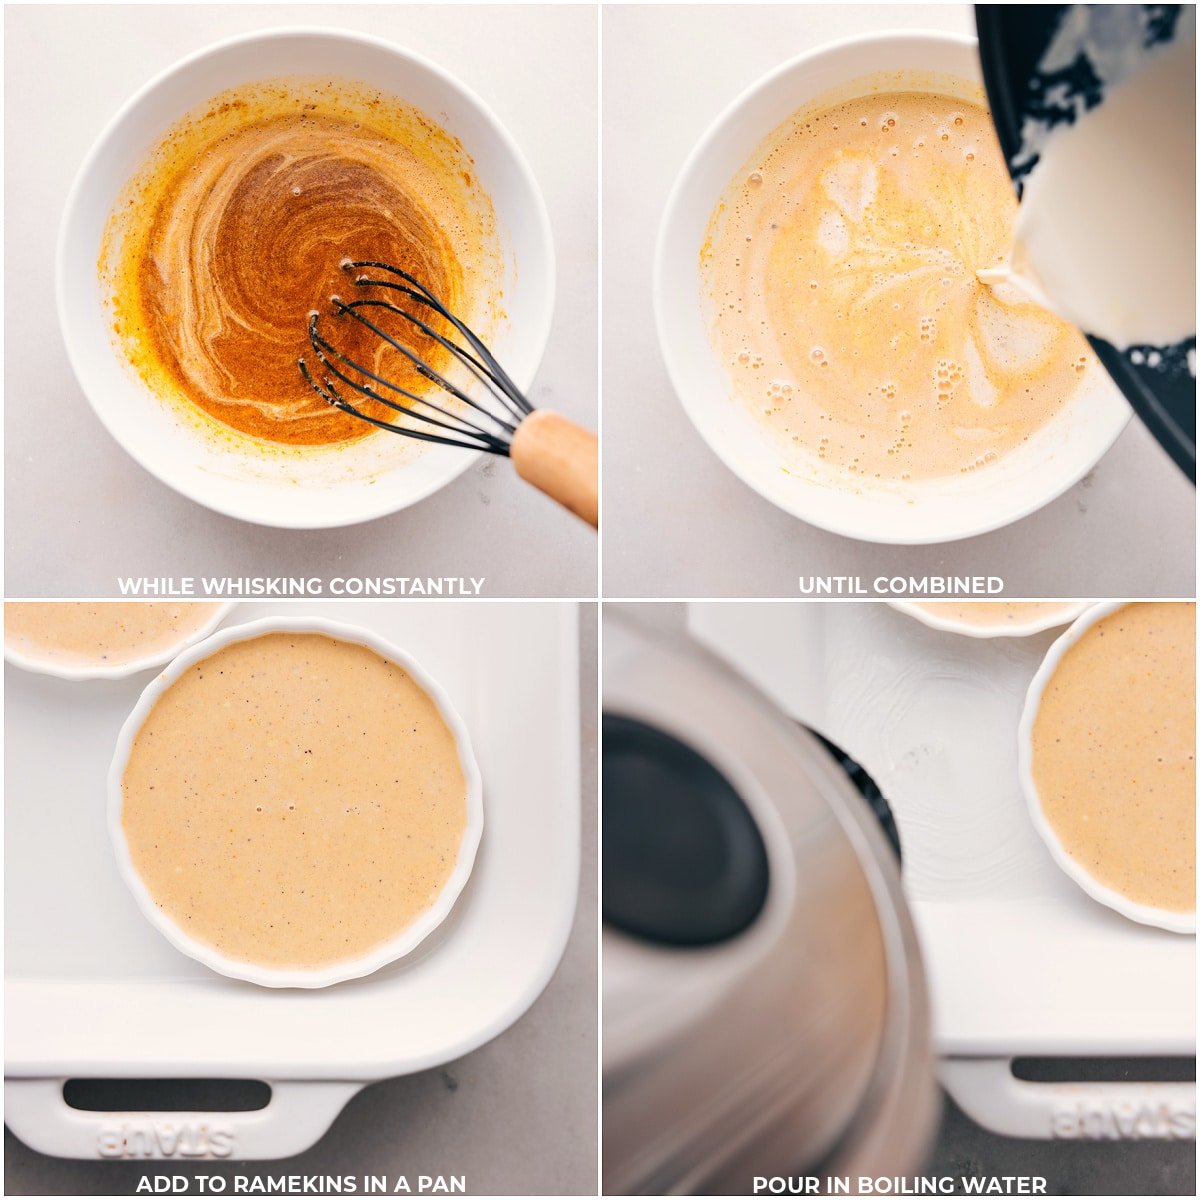
- Slowly drizzle in the hot heavy cream, whisking constantly to temper the eggs without scrambling them.
- Keep adding the heavy cream, continuing to whisk.
- Pour the mixture into the ramekins set within a 9×13-inch baking pan. Add boiling water to the pan so it reaches halfway up the ramekin sides.
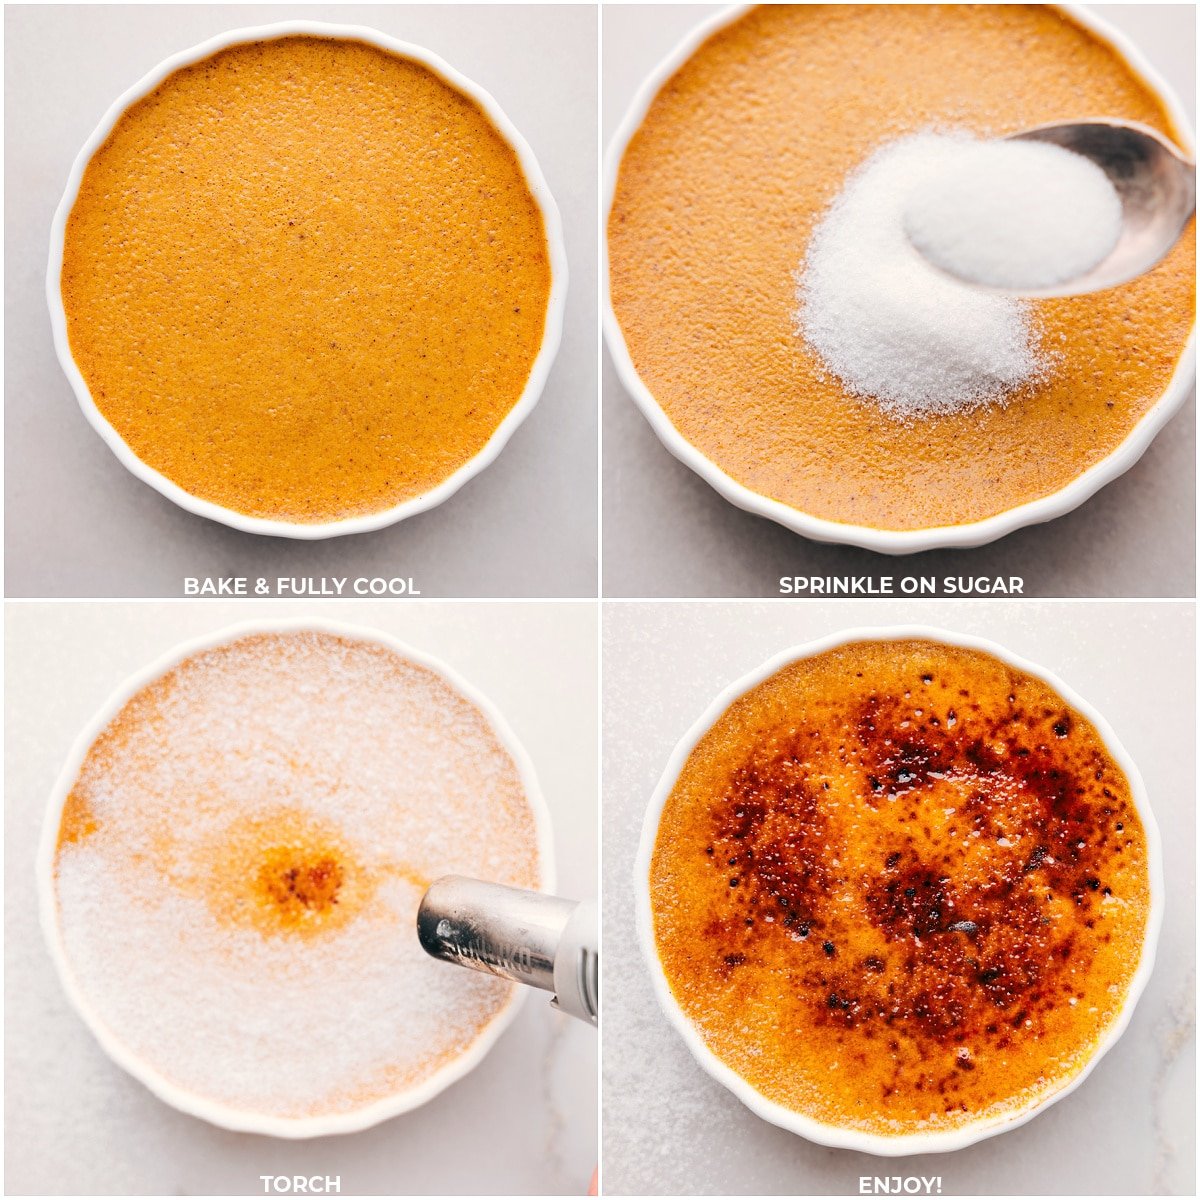
- Bake until the centers exhibit only a slight jiggle. Allow to cool at room temperature before chilling in the refrigerator until they set, about 6-8 hours.
- Before serving, top each with sugar and use a torch to achieve a caramelized finish.
Quick Tip
Pumpkin Créme Brûleé does require a few specialty tools, and below are exactly what I use when making Pumpkin Créme Brûleé! (Affiliate links below)
How To Torch Your Pumpkin Créme Brûleé
- Evenly sprinkle white sugar over each custard. Use extra sugar to ensure the top is fully coated, pouring any excess onto the next ramekin.
- Using a kitchen torch, sear the sugar-coated tops until the sugar melts, browns, or even slightly blackens.
- Serve and enjoy immediately.
Don’t Have A Kitchen Torch?
You can make Pumpkin Crème Brûlée without a torch:
- Move the oven rack to the top.
- Preheat to high broil, then evenly sprinkle sugar over the custards.
- Set ramekins on a sheet pan and broil on the top rack, watching closely.
- Don’t over-broil; it can alter the custard’s texture.
- Serve and enjoy!
Tips For Success
- Use ingredients at room temperature. Ensure the eggs are at room temperature to prevent them from “cooking” when hot heavy cream is added. (Tip: Use this method to quickly warm eggs to room temperature).
- Avoid over-beating the mixture, as this introduces excess air, altering the texture.
- Enhance the flavors by adding a hint of salt to the crème brûlée mixture.
- Cook the Pumpkin Créme Brûleé in a water bath to ensure the custard cooks evenly and slowly without scorching.
- Achieve the perfect sugar crust with a kitchen torch. Hold it about 6 centimeters from the surface, moving it continuously to avoid melting the underlying custard. The sugar will crystallize shortly after torching, so be cautious to avoid over-burning.
Use Leftover Pumpkin In
- Pumpkin Snickerdoodles reader favorite!
- Pumpkin Chocolate Chip Muffins bakery style
- Pumpkin Protein Shake using vanilla protein
- Not cake-y Pumpkin Cookies
- Pumpkin Granola with nuts and seeds
Pumpkin Créme Brûleé
Equipment
- ramekins see note 1
- Kitchen torch see note 2
Ingredients
- Water for water bath
- 2 cups heavy cream
- 4 large egg yolks at room temperature, see note 2
- 1/3 cup dark brown sugar or light brown sugar, firmly packed
- 2 teaspoons pumpkin pie spice
- 1/8 teaspoon salt just a tiny pinch!
- 1/4 cup canned pumpkin not pumpkin pie filling; not an entire can
- 1 teaspoon vanilla bean paste or 1 and 1/4 teaspoon vanilla extract
- 1/4 cup granulated sugar
Instructions
- Preheat oven to 325°F. In a small pot, gently heat heavy cream until it reaches a simmer; avoid boiling. Remove from heat and let cool slightly. Boil about 6 cups of water.
- In a large bowl, combine egg yolks, brown sugar, pumpkin pie spice, salt, canned pumpkin, and vanilla. Whisk until smooth.
- Do not whisk too briskly or your custard will rise and fall or have lots of bubbles. While whisking at a slow and steady pace, very gradually pour in 1/4 of the warmed cream mixture. Once incorporated, gradually whisk in the remaining cream to make a custard mixture
- Position ramekins in a 9x13-inch pan. Divide and pour custard mixture amongst them, filling nearly to the top. Carefully scoop boiling water from pot to the pan until it's halfway up the sides of the ramekins.
- Carefully transfer to oven and bake for 30–35 minutes until custards are set (with a slight jiggle in the center when you gently shake). Remove from water bath and cool at room temperature, then chill in fridge 6–8 hours (or up to 4–5 days).
- When ready to serve, sprinkle granulated sugar evenly over the custards. Swirl sugar for even coverage, tipping excess into the next ramekin. Caramelize the sugar using a kitchen torch until golden or slightly charred. Serve immediately!
- Here's an alternative caramelization without a torch: Chill brûlées for at least 24 hours. Adjust oven rack to topmost and set to high broil. Broil sugar-topped custards for 1–3 minutes, watching very closely, then refrigerate for 10–20 minutes to re-firm custard.
Video
Recipe Notes
Nutrition
Nutrition information is automatically calculated, so should only be used as an approximation.
