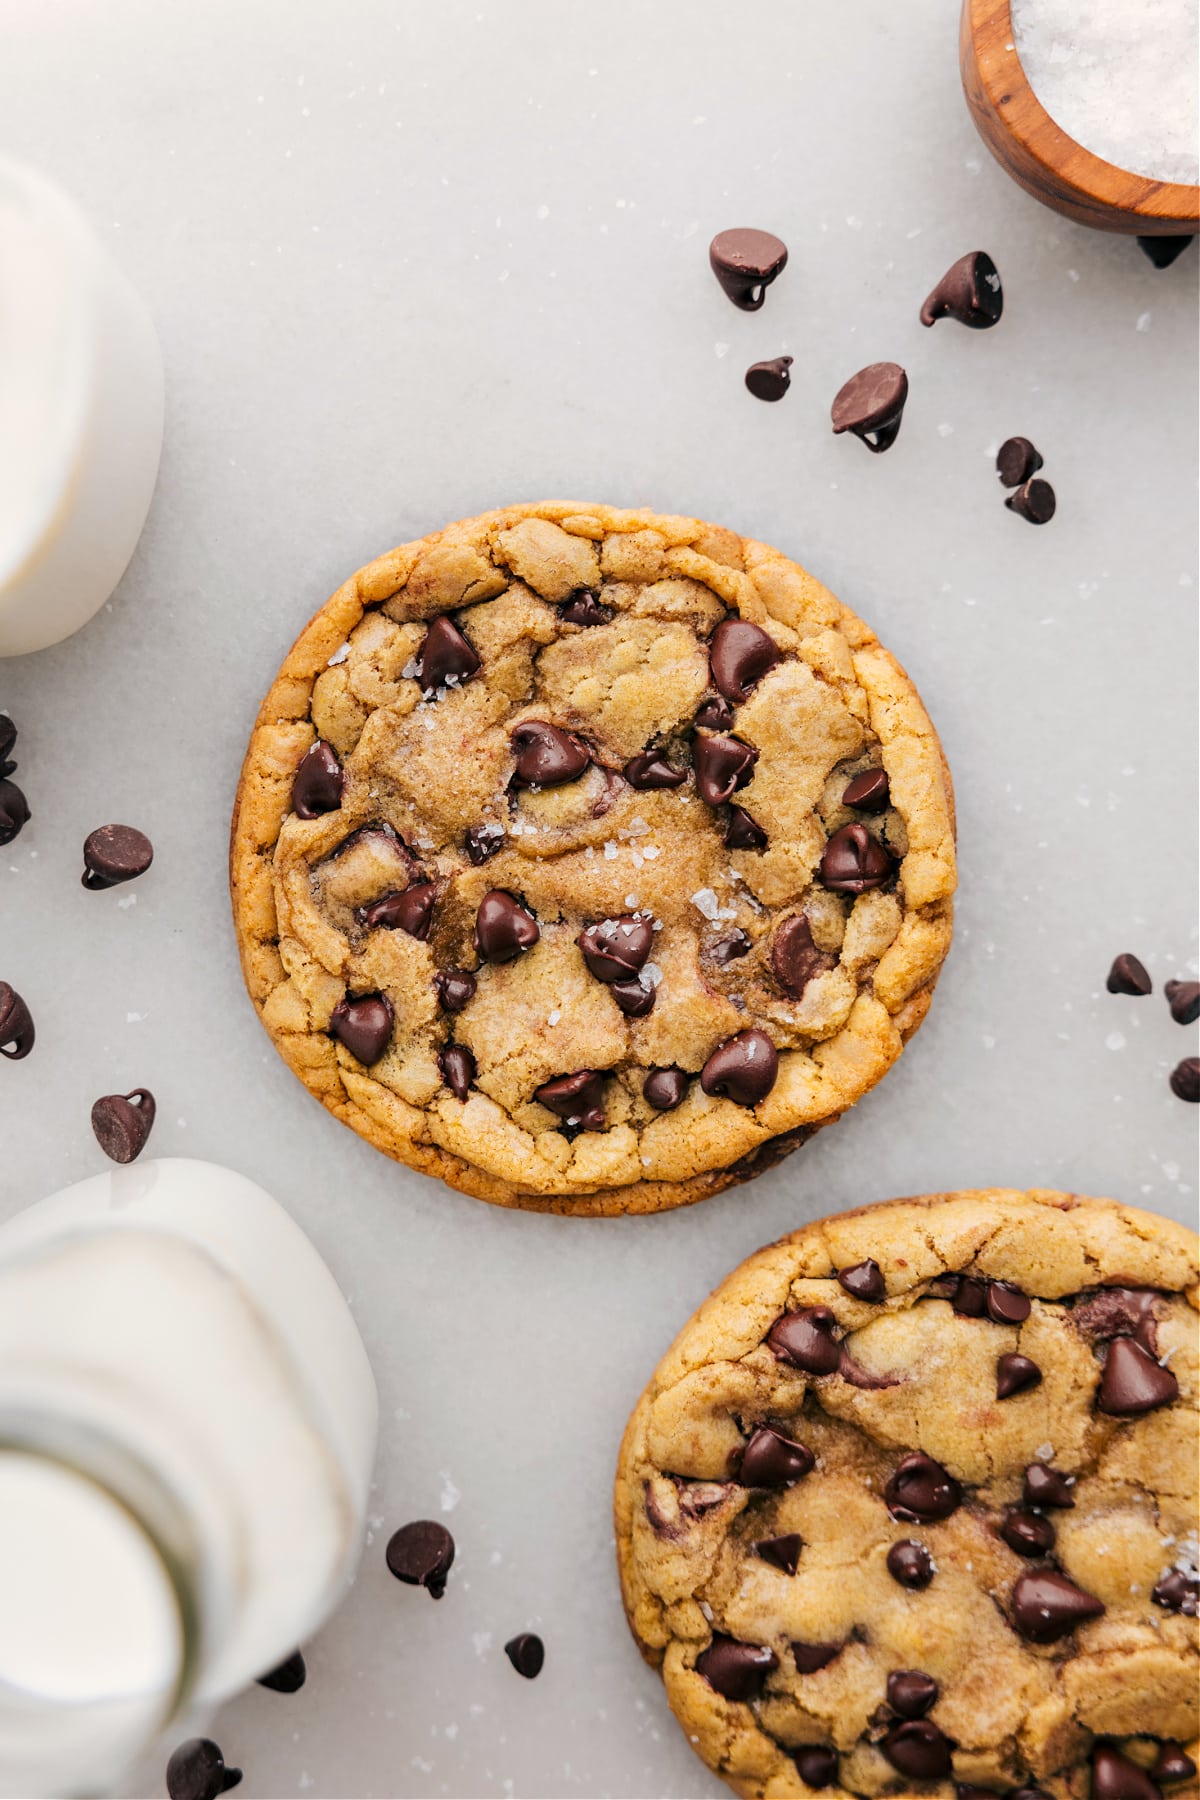
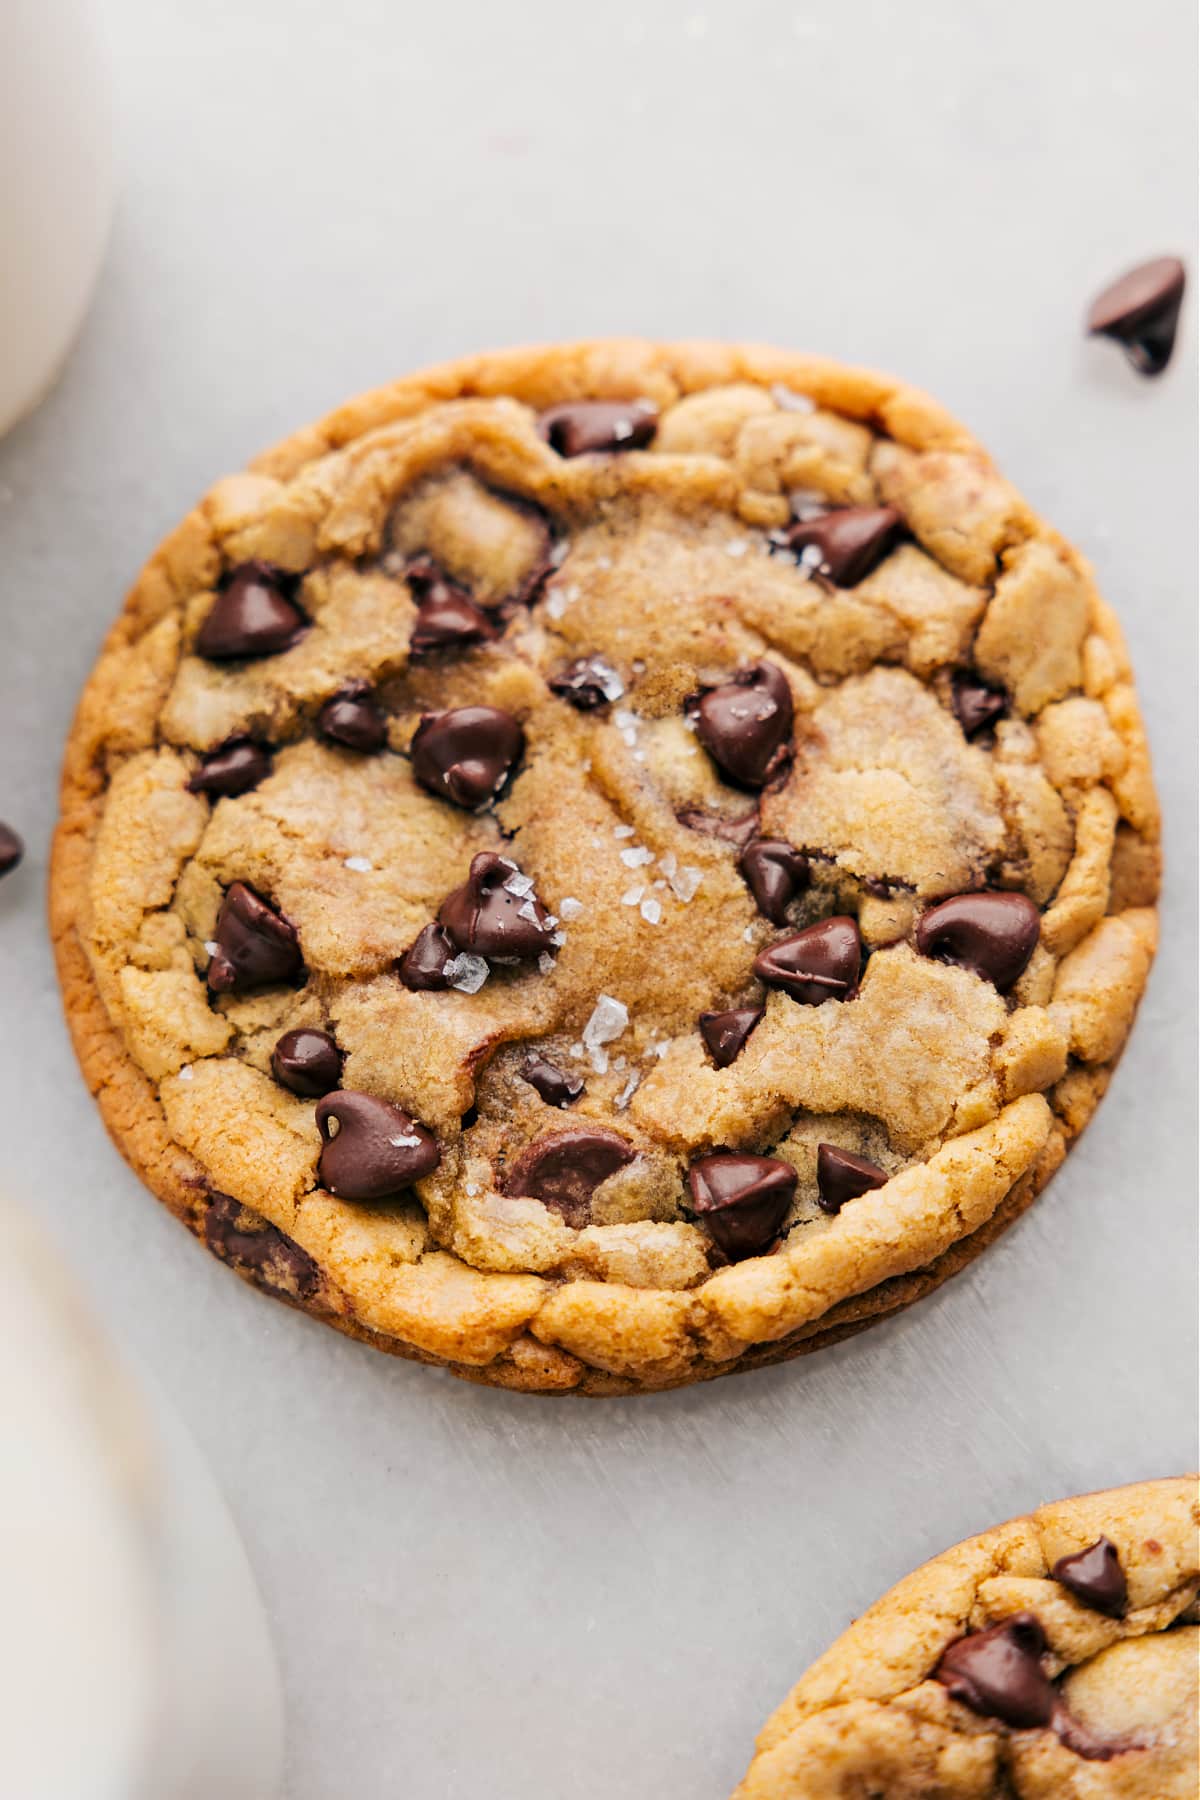
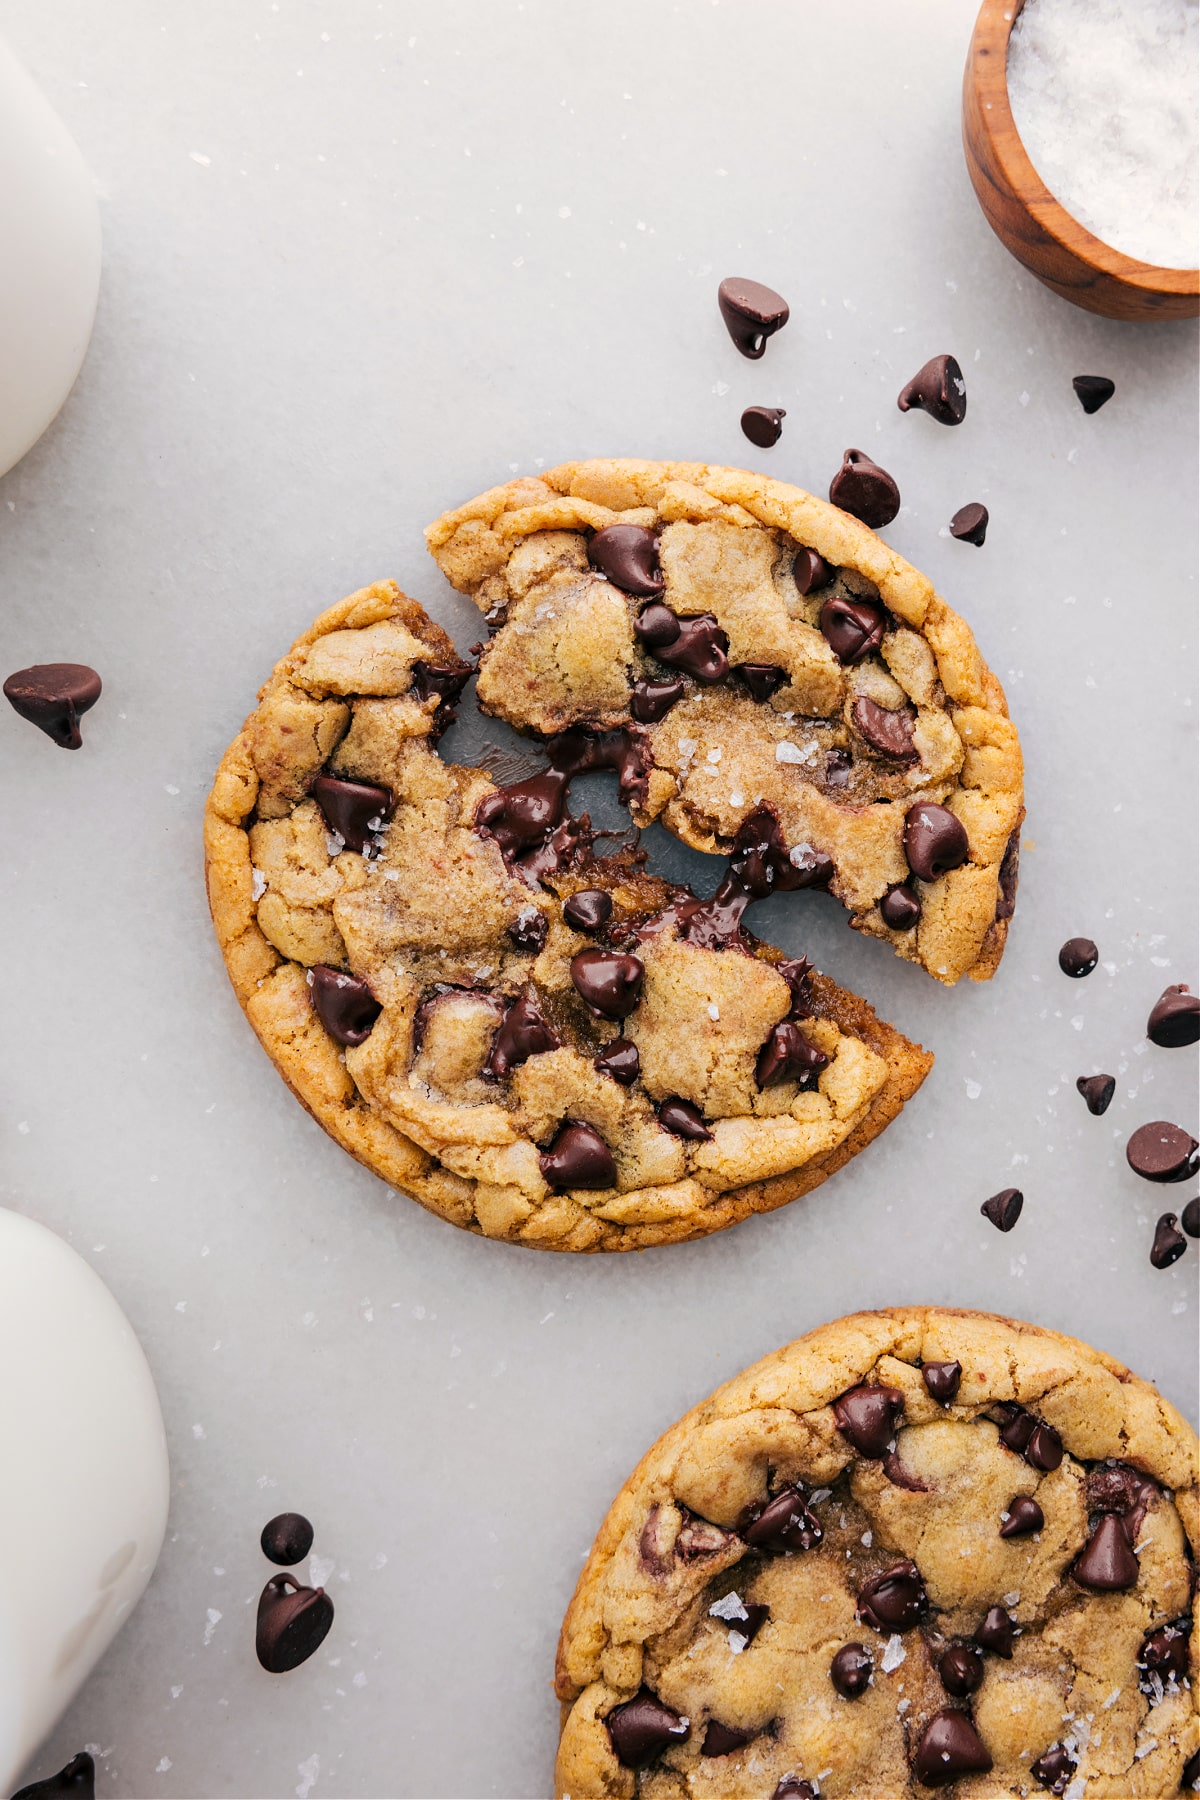
A Single Serve Chocolate Chip Cookie is my go-to when I’m craving something sweet! This is the BEST small-batch cookie recipe—with perfect crisp edges, a soft, gooey, chewy center, and pops of chocolate in every single bite!
Table of Contents
- What Is A Single Serve Chocolate Chip Cookie?
- Single Serve Chocolate Chip Cookie
- Ingredients For Single Serving Chocolate Chip Cookie
- How To Make A Single Serve Chocolate Chip Cookie
- Tips For Making This Single Serve Chocolate Chip Cookie Recipe
- FAQs
- Helpful Tools
- Single Serve Chocolate Chip Cookie Recipe Leftovers
- More Quick Cookie Recipes:
- Single Serve Chocolate Chip Cookie Recipe
What Is A Single Serve Chocolate Chip Cookie?
A single serve chocolate chip cookie recipe makes just a few cookies, enough for one or two servings. It’s perfect for anyone who wants a quick treat without lots of leftovers.
This recipe doesn’t need a long chilling time, so you can enjoy these cookies quickly when the cravings hit!
And if you’re craving a double hit of chocolate, be sure to try this Single Serve Double Chocolate Cookie!
Single Serve Chocolate Chip Cookie
Sometimes you need a giant, delicious chocolate chip cookie, but not an entire batch—or even a small-batch. That’s where these single-serving chocolate chip cookies come in!
These cookies are absolutely incredible, but exact measuring is important for the best results. You’ll be rewarded with delicious, sweet, buttery, chewy cookies that have soft insides and crisp edges. These cookies are the BEST!
Over the 10+ years I’ve been sharing recipes, this single-serve chocolate chip cookie recipe is one I constantly return to.
Here are the key lessons I’ve learned from making this recipe repeatedly:
- No Hour-Long Chilling: As much as I love the effects of chilling on a cookie recipe, when I’m craving a single-serving, small-batch cookie, I want it ASAP. You too, right?
- Melted Butter: This recipe originally called for softened butter, but as I revise the photos and text, I’ve switched to melted butter. I’ve figured out how to make it work! While using melted butter does require attention to detail, it is so much easier to mix in and the texture of the cookies are even better!
- Accurate Flour Measurement: Very important for achieving the right texture. Too much flour results in cake-y cookies, while too little causes excessive spreading.
And it’s not just me who loves this recipe—here’s what one reader said: “If I could give this recipe 10/5 stars, I would. I’ve tried many other chocolate chip cookie recipes and they just didn’t taste great. THIS IS THE BEST RECIPE I’ve ever used. Everyone I’ve given one of these cookies to absolutely LOVES them. I’ve made this recipe dozens of times now, I even memorized it! I just simply LOVE it!!!! THANK YOU!”
Ingredients For Single Serving Chocolate Chip Cookie
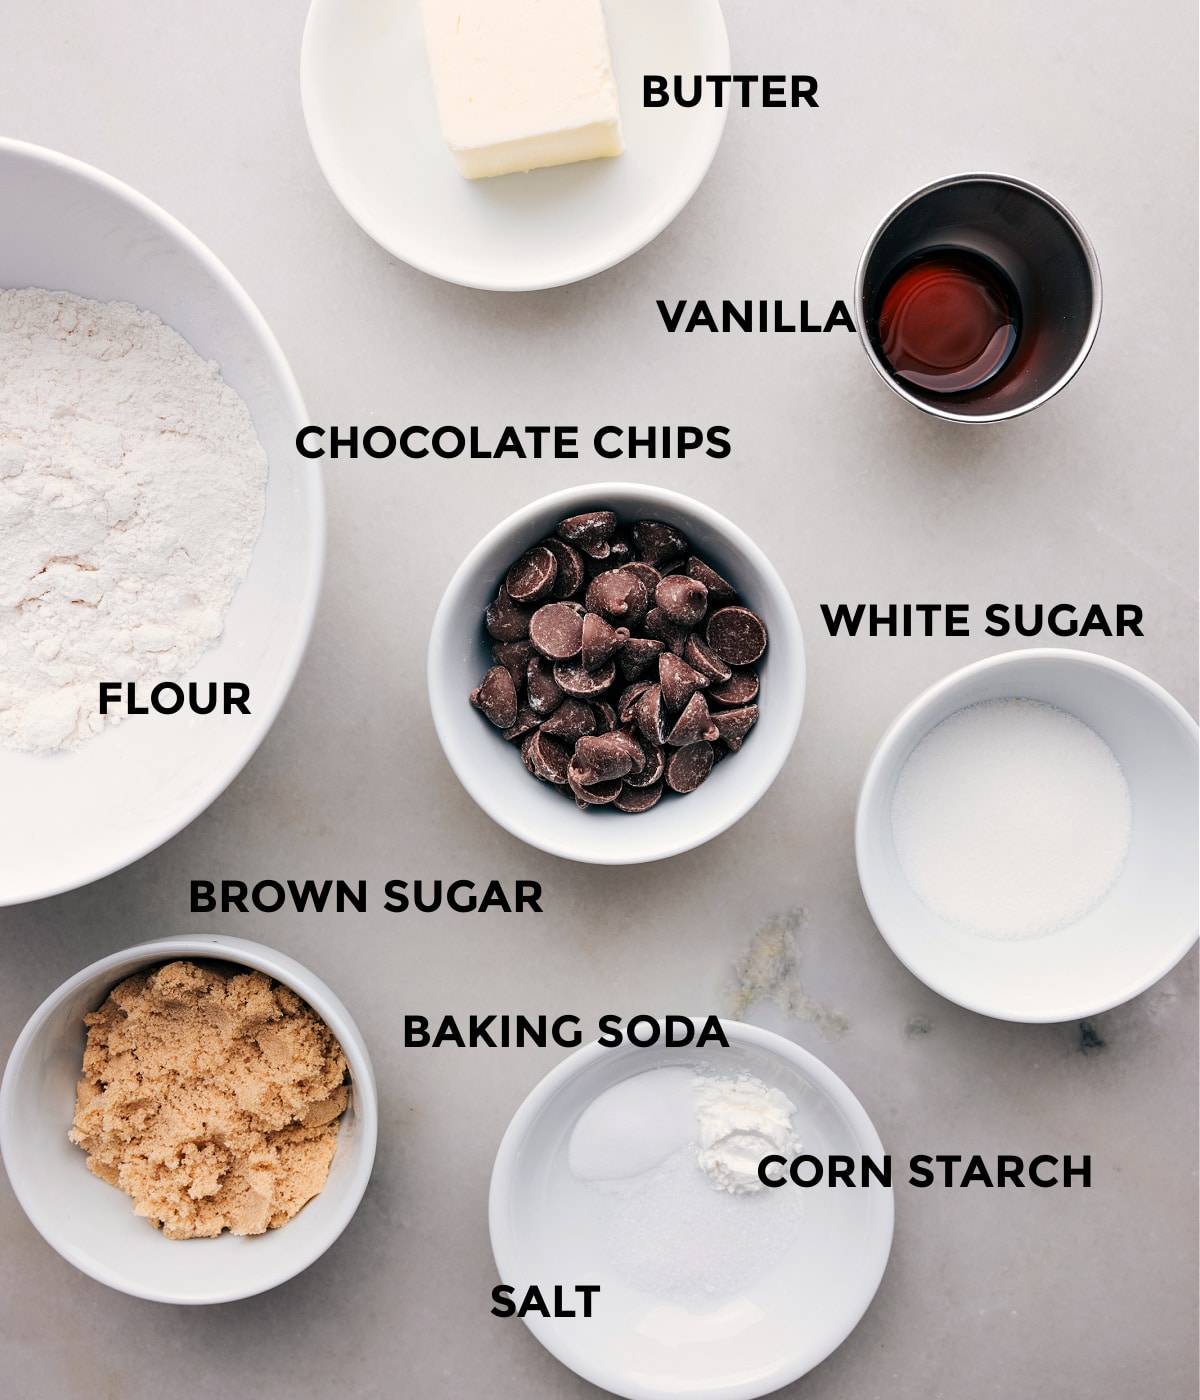
Here are some tips on each ingredient used in these cookies:
- Salted or Unsalted Butter: If you use unsalted butter, add a heaping 1/8 teaspoon of salt to the dough. For an extra hit of flavor, sprinkle sea salt flakes on top.
- Light Brown Sugar and White Sugar: Make sure the brown sugar is soft and free of clumps. Pack it tightly into the measuring spoons and level off the top. By the way, 1/2 tablespoon is the same as 1 and 1/2 teaspoons.
- Vanilla Extract: Optional, but it makes the flavor of the cookies even better!
- Egg Yolk: Use only the yolk to make the cookie richer and to help bind the dough. Be sure to remove all the whites and to pinch off the stringy part (chalaza).
- Baking Soda: Ensure it’s fresh and free from clumps. If needed, sift it through a fine mesh strainer.
- Cornstarch: Optional, but it helps make the cookies softer.
- All-Purpose Flour: Accurate measurement is key. Spoon the flour into your measuring cup and level it with the back of a knife or use a food scale!
- Chocolate Chips: Choose any type you like. Mixing different types like milk and semi-sweet or dark chocolate is fun and a nice way to change things up.
How To Make A Single Serve Chocolate Chip Cookie
Tips For Making This Single Serve Chocolate Chip Cookie Recipe
- Measure Precisely: For the best measurements, use a food scale to add ingredients directly into your mixing bowl. If you’re using measuring cups and spoons, be sure to level off the tops to get the right amounts.
- Proper Butter Measurement: Cut butter from the middle of the stick to avoid using too much, since the wrapping might be put on unevenly.
- Slightly Underbake: Remove the cookies from the oven just before they’re done. They’ll continue to set as they cool, and you’ll have a nice chewy center.
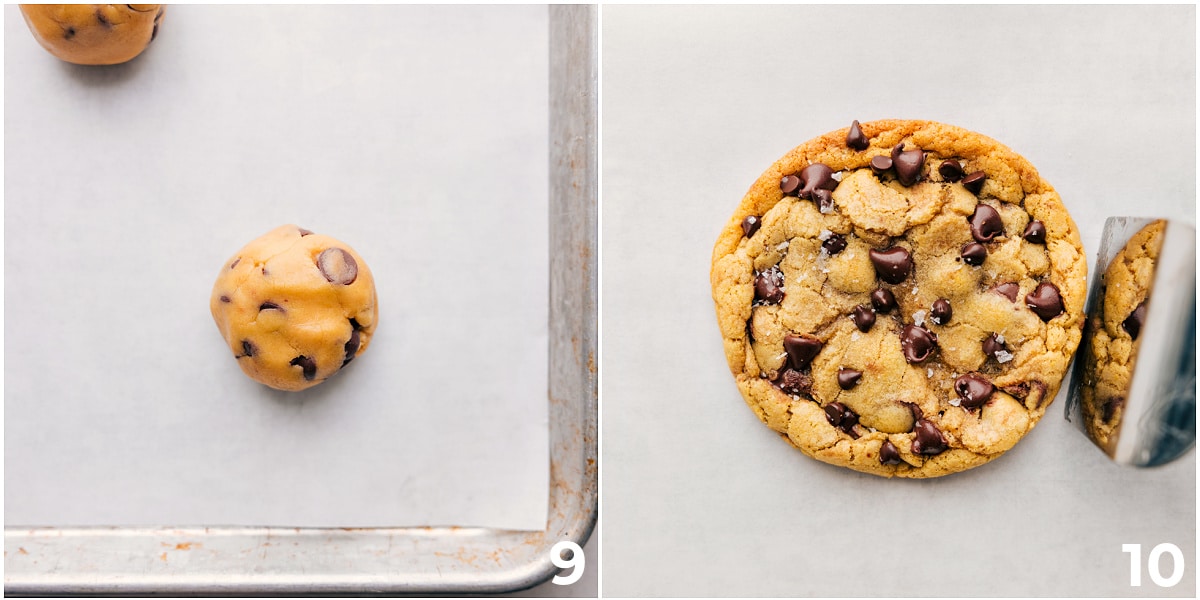
- Shape After Baking: Right out of the oven, use a metal spatula to press any uneven edges inwards. Press in some extra chocolate chips on top to make sure chocolate is in every bite!
- Cool the Butter: Let the melted butter cool completely before mixing it with sugars to prevent the dough from becoming greasy.
- Mix Well: Thoroughly combine the egg yolk into the dough until it’s creamy.
- Flatten If Needed: If the cookies look too puffy after baking, gently tap the pan on the counter to flatten them slightly.
FAQs
Can I make more cookies by doubling or tripling this recipe?
Yes, you can double or triple this recipe to make more cookies, but it’s probably easier to just make a bigger batch! Try my favorite Chewy Chocolate Chip Cookies or these popular Bakery Style Chocolate Cookies. I’ve also shared this Gideon’s Bakehouse Cookie Recipe Copycat.
Can I reduce the sugar in this recipe?
Reducing the sugar is not recommended. Sugar is very important to the texture of a single serve chocolate chip cookie. If you’re concerned about sweetness, use dark chocolate chips and an extra pinch of salt.
How can I tell when the cookie is done baking?
The cookie is done when the edges are set and lightly browned, but the center is soft. It will firm up as it cools. Slightly under-baked cookies have the best texture!
Can I make this cookie ahead of time?
Yes, I like storing the dough rather than baked cookies. Simply roll the dough into balls, place them in a freezer-safe bag, and freeze. When ready to bake, just add a few extra minutes to the baking time.
Can I make this in the microwave?
This recipe won’t work in the microwave; it’s created to be baked! If you’re looking for a quick microwave-able dessert, try this Microwave Caramel Corn!
Helpful Tools
For these single serve chocolate chip cookies, you’ll need these tools to help you:
- Microwave-Safe Porcelain Bowls: Great for melting butter in the microwave and then cooling down quickly after.
- Fork: For mixing the sugars with melted butter and for briskly whisking in the egg yolk and vanilla to get a nice smooth blend.
- Silicone Spatula: Helps mix the dough when it gets thick. It’s also good for scraping dough from the bowl.
- Baking Tray and Liner: You’ll need a baking tray to cook the cookies. A liner, like a baking mat, gives the bottoms of the cookies a better texture. Plus, quick clean-up!
- Metal Spatula: After baking, use this to shape the cookies and fix rough edges while they’re still warm and soft.
Storage
Single Serve Chocolate Chip Cookie Recipe Leftovers
These cookies are the best when they’re hot out of the oven! They’re even better with a scoop of ice cream on top!
For leftovers, store the cookies in an airtight bag at room temp. If you have unbaked dough, keep it in an airtight bag in the freezer and bake directly from the freezer when ready.
More Quick Cookie Recipes:
- No Bake Cookies chocolate oat cookies made quickly on the stovetop.
- Chocolate Chip Cookie Bars easier to make a pan of cookies than to individually roll them out!
- Sugar Cookie Fruit Pizzas use store-bought sugar cookies to make these even faster.
- Avalanche Cookies no baking needed for these fun crunchy cookies.
- Fudge Brownie Cookies these cookies start with a brownie mix!
Single Serve Chocolate Chip Cookie
Equipment
- Parchment paper or silicone baking mat
Ingredients
- 3 tablespoons unsalted butter or salted buttered, see note 1
- 3 tablespoons light brown sugar firmly packed
- 1-1/2 tablespoons granulated sugar
- 1/2 teaspoon vanilla extract optional
- 1 large egg yolk see note 2
- 1/4 teaspoon baking soda
- 1/2 teaspoon cornstarch optional
- 1/2 cup all-purpose flour see note 3
- 6 tablespoons chocolate chips I love milk chocolate!
- Flaky sea salt for topping, optional
Instructions
- Use exact measurements and level off the tops of measuring cups/spoons for best results.
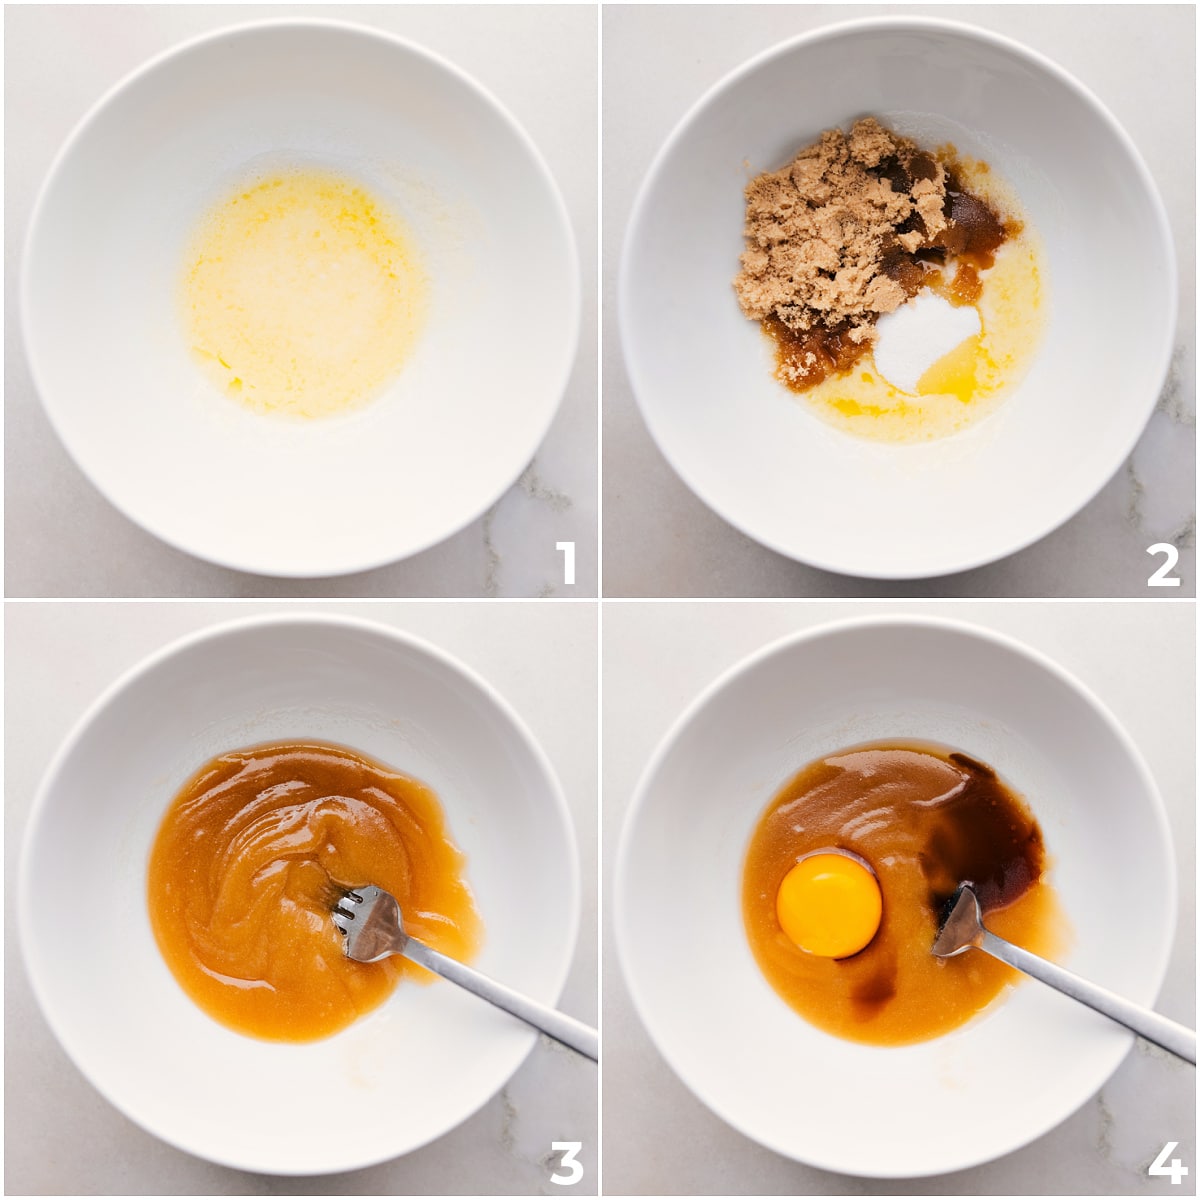
- Preheat oven to 350°F. Add butter to a ceramic/porcelain bowl and microwave until just melted but not hot. Let butter and bowl fully cool to room temperature.
- To the cooled butter, add both brown and granulated sugars. Stir briskly with a fork until well combined. Add the egg yolk and vanilla. Continue to whisk with a fork until the mixture is emulsified and appears very creamy.
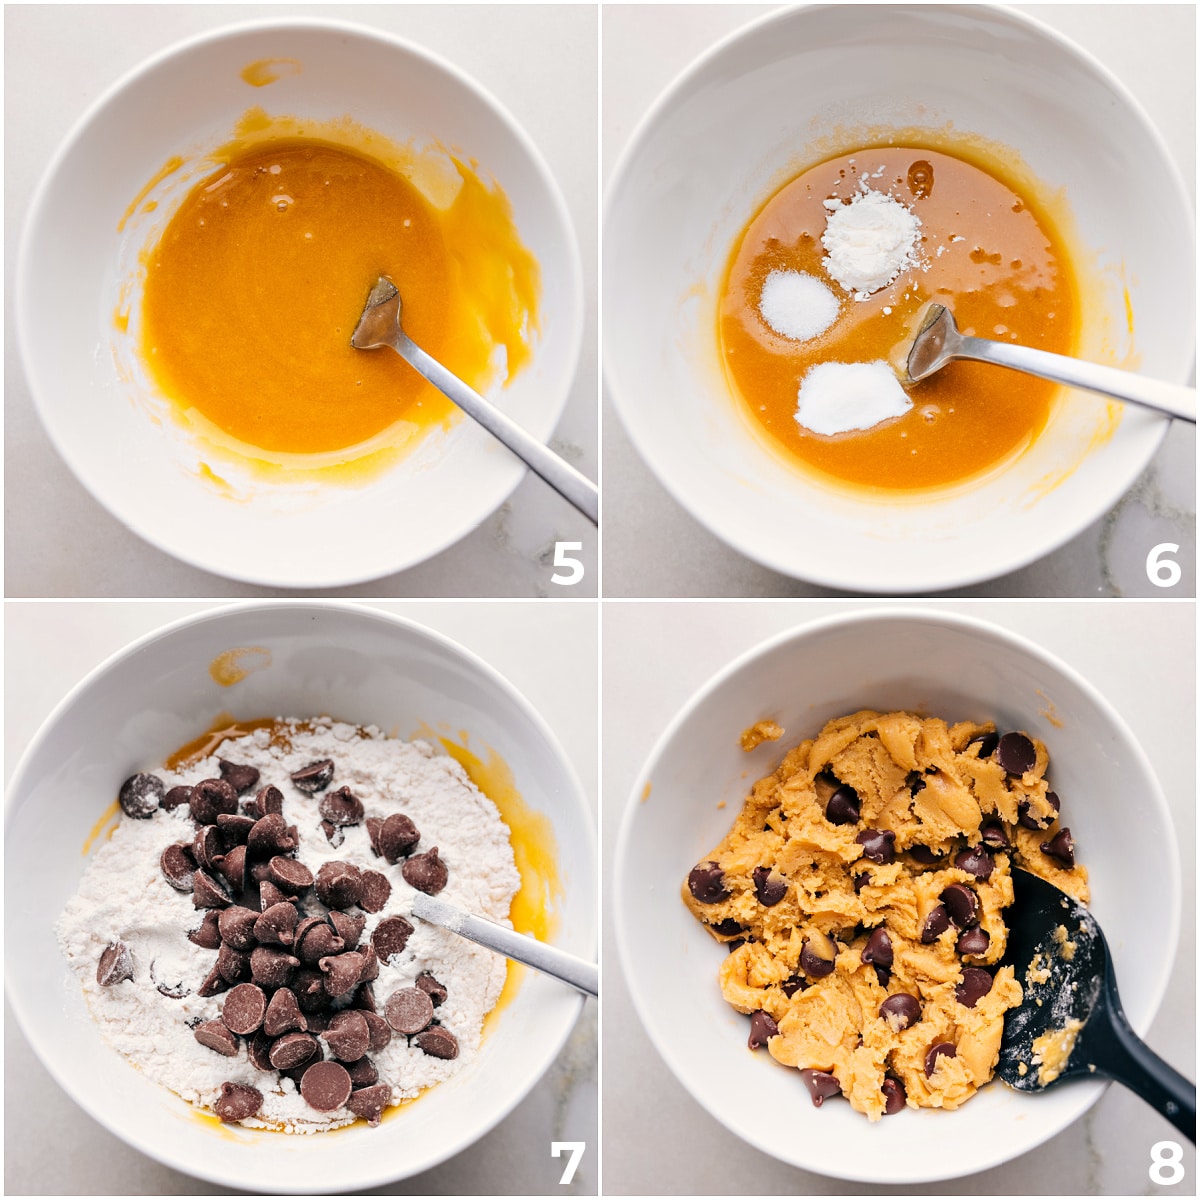
- Add baking soda, salt (if using unsalted butter), and cornstarch. Mix thoroughly with a fork. Add flour and chocolate chips. Continue stirring with a fork until it becomes difficult, then switch to a silicone spatula and fold until the dough is uniform without dry streaks.
- With the dough, fill up a 1/4 cup measuring cup and level off the top. Roll into a large ball. Repeat until you have 3 dough balls. (Anything left over is your treat!) Place the balls on a parchment or silicone-lined baking sheet. Freeze for 5–10 minutes while the oven heats.
- Bake for 10–12 minutes or until the edges are lightly browned and the tops are set but soft looking. Immediately after you pull the tray from the oven, use a metal spatula to press the edges of the cookies inward if needed.
- Optionally, press additional chocolate chips into the tops and sprinkle with sea salt. Allow cookies to cool on the baking sheet for 5 minutes before enjoying.
Recipe Notes
Nutrition
Nutrition information is automatically calculated, so should only be used as an approximation.




I love this recipe, although I don’t make the individual cookies. I place the dough in a 6” cast iron skillet and it fits perfectly. 15-20 mins in the oven, and it’s sweet perfection. Ice cream doesn’t hurt either. ?
I’m so happy you love this! And YUMMM!! I need to try that! Thanks for your comment Chari! 🙂
I have to say, I was quite skeptical before making this recipe as i’ve tried so many other single serving chocolate chip cookie recipes and they lack flavor. This recipe is AMAZING! The ooey gooey cookie is so good my husband and I fought over the last cookie !! I made a single batch last night and hubby wants me to make many more tonight lol This is definitely going into my recipe book! Thanks so much Chelsea!
YAY!! Love hearing that 🙂 Thank you so much for the comment Rachelle! 🙂
BEST cookies!!! I’ve made these so many times and they always turn out perfect. I double the batch and bring them to cozy nights with the ladies. It’s the best treat when you are craving a cookie and don’t want to make a couple dozen! I can’t rave about these enough!! Eating a fresh warm one now !
Yay!! So happy to hear that! Thanks for the comment Sara 🙂
The best cookies I’ve ever baked!! Thank you for sharing this recipe
So happy to hear that, thank you!
These really were tasty, I needed them in my life and realized the kids ate most of my Toll House moresles. If not for you, I would’ve given up and been grumpy Dad. Oh and I’m hysterical, the pic of your mixing bowl has the tell tale signs of microwaved butter, I totally found u out didn’t I? …?
I forgive you xoxo
Haha you’re right! I think I did microwave it in that picture 🙂 Trying to “speed” through some of those process shots before I lost the light in my kitchen hah. But I definitely don’t recommend it if you aren’t trying to take pictures of the process! So happy these were enjoyed!
I followed the recip but decided to use butter straight out of the fridge and only let sit out while I got everything ready (maybe 4 minutes). My cookies melted and turned into one large pan shaped cookie in the oven. I have yet to taste it – it like like it may taste okay but definitely would be embarrassing if I wasn’t the only one here!
Hi! Did you freeze the cookies before cooking them? It could also be an altitude thing and you need a bit more flour!
Do you have a recipe if I wanted to make a larger batch like 24 cookies?
These cookies are the closest https://www.chelseasmessyapron.com/chocolate-dipped-toffee-pecan-cookies/ (just leave out toffee (add more chocolate chips) and don’t dip them in chocolate :))
This receipe is wonderful, such good cookies! Question: what does the optional cornstarch add to the receipe/ how does it change the cookie?
I’m so happy you’ve enjoyed these cookies! 🙂 Cornstarch in baking actually softens the final baked good when combined with flour so you’ll get a slightly more tender/soft cookie 🙂
I was scrolling the comments, hoping some one had asked this. I don’t have cornstarch, but I also prefer crunchier cookies, so sounds like it will work out well for me!
Question: what does the optional cornstarch add to this rec
I’ve made these a handful of times now and they are absolutely perfect!! I’m not much of a sweet tooth but I love a cookie once in a while and these are so easy to whip up and enjoy in a pinch! Thank you!!
So happy to hear these are perfect!! Thank you so much for the comment Sara 🙂