This Lemon Tart starts with a thick, sweet, and buttery crust which we load with a creamy, custardy tart lemon filling. Top your tart with fresh berries and a sprinkle of powdered sugar for the perfect finishing touch!
Love lemon desserts? You’ll love these Lemon Bars, this creamy Lemon Pie, or these Lemon Cookies!

A Homemade Lemon Tart
This lemon tart is a variation of my favorite lemon bars recipe. But instead of a shortbread crust, I’ve created more of a sugar-cookie-inspired crust. The crust is divine! It’s buttery, sweet, and has the perfect texture — it’s got a great bite without being too firm.
The lemon filling is tangy, sweet, and a little creamy. It’s the perfect complement to the cookie-esque crust. With a few kitchen tools, you’ll be well on your way to Lemon Tart heaven! More on the tools you’ll need below.
Tools You’ll Need
This Lemon Tart recipe isn’t too hard to re-create with a few kitchen tools:
- A large food processor makes a world of difference in creating the crust.
- You’ll also need the right size tart pan for the recipe to work properly.
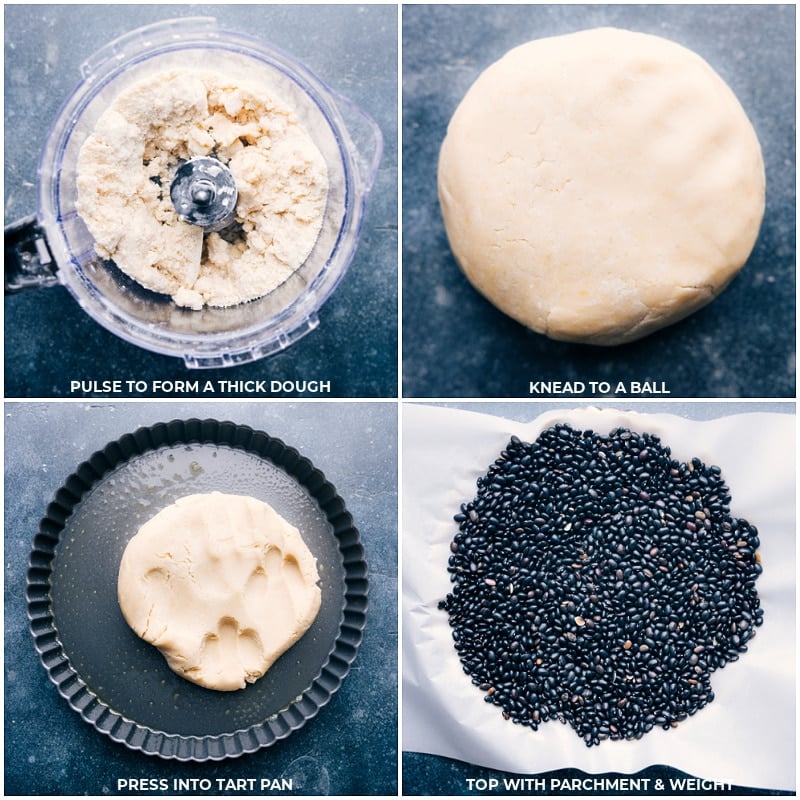
- It’s also important to have pie weights or dried beans (or lentils or rice!). After chilling the pie crust, use a large sheet (or two) of parchment paper to cover the inside of the crust. Then fill up the parchment paper with pie weights or dried beans. This keeps the dough from bubbling up and the sides from shrinking or sliding down.
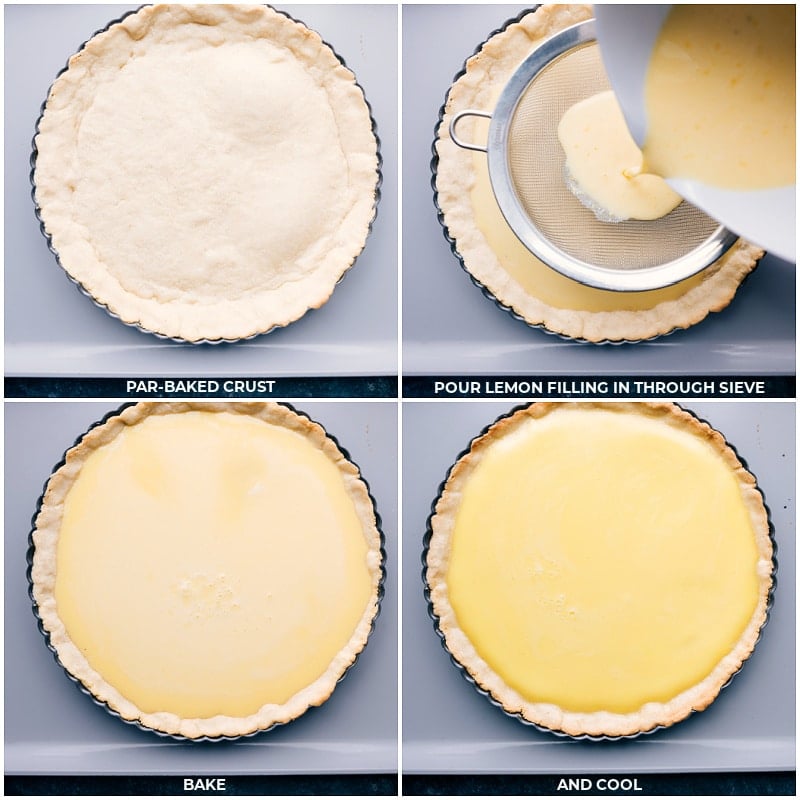
- We’ll pour the lemon filling through a sieve so it can catch everything we don’t want in our tart. (The lemon zest prevents an ultra-smooth custard.)
Lemon Tart Crust; And All About Par-Baking
For this lemon curd tart, the crust needs to be par-baked before adding the lemon filling.
Blind Baking, is the process of partially baking a crust before adding the filling. We want to evenly cook the pastry thoroughly so it is golden brown throughout. Because, once we add the filling, the pastry won’t cook too much more.
Par-baking can sometimes be tricky, but the tips below will make it a cinch!
- Don’t stretch or pull the dough. This will cause the crust to shrink when baked. Instead gently press and coax it, taking your time to fill the tart pan evenly.
- Prick the base of the crust with the tines of a fork to keep the crust from bubbling up. Don’t pierce all the way through the crust though; just about 1/2 way through.
- Use pie weights or dried beans. The weight keeps the dough from bubbling up and the sides from shrinking or sliding down. Don’t skip the weights; I’ve tried and it has been disastrous!
- Bake with the weights in. After par-baking, remove the weights and bake again to fully solidify the crust without the parchment paper and beans or weights.
What Is A Lemon Tart Made Of?
We’ve got butter, sugar, an egg yolk, flour, salt, and vanilla in the crust. Eggs, cream, lemon zest, sugar, and lemon juice make up the lemon curd filling. See? It’s really not that much.
A few ingredients worth going into detail about:
- Butter: The better the butter, the richer the flavor of the cookie crust. We love Challenge® Butter. Choose unsalted to have perfect control over the amount of salt in the dough.
- Vanilla: We love adding vanilla bean paste to add even more flavor and nuance to the crust. That said, a pure vanilla extract also works well.
- Heavy cream: Perhaps a unique ingredient for a Lemon Tart, but I swear by this addition! It helps balance the tartness and adds a velvety feel to the custard.
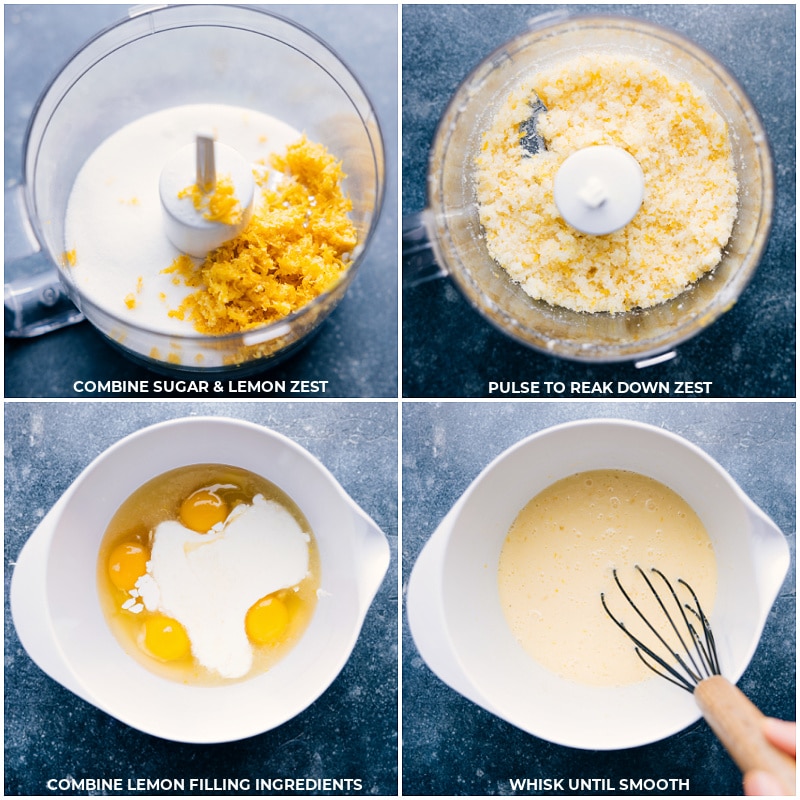
- Lemon zest. When zesting the lemon, avoid the white pith of the lemon — this is very bitter. Using a microplane (like this one), zest only the very outside yellow part of the lemon for this recipe.
How To Get More Juice From Lemons
- Microwave the lemons for 15-20 seconds.
- Knead the lemons with your hand against the counter for 20-3o seconds.
- Cut the lemon in half horizontally and juice the lemon using a juicer.
Quick Tip
This citrus juicer makes juicing the lemons a breeze! You’ll have 2/3 cup in no time at all! A medium lemon generally yields 4 ounces of juice.
How To Make A Lemon Tart (Tips)
- Number 1 Tip: Keep everything as cold as possible. For the crust, use ingredients right out of the fridge, handle them as little as possible and get the dough back in the fridge as quickly as you can.
- Handle the dough as little as possible. The less the dough is touched, the better the crust will taste, and the less it will shrink as it bakes.
- Do not overmix the dough in the food processor. We don’t want to warm the ingredients too much.
- Let the Lemon Tart cool in the tin before removing it, or you risk cracks.
- Bake the tart until the lemon custard is set with a bit of a wobbly center. Gently nudge the pan to check for this wobble.
Storage
How Long Does Lemon Tart Last In The Fridge?
Tarts are best eaten the day they’re made and shouldn’t be refrigerated for extended periods. It’s best to make this Lemon Tart early in the day to allow plenty of time for it to rest before serving.
What To Serve With This Lemon Tart:
This gorgeous tart can stand on its own — it’s a delicious, show-stopping dessert. We love adding fresh (completely dry) berries and a few sprigs of mint. A sprinkle of powdered sugar finishes off everything beautifully.
More Delicious Desserts:
- Dessert Cheese Ball brownie-batter flavored
- Cheesecake Bars with a graham cracker crust
- Peach Lemonade with real peaches and lemons
- Mini Fruit Tart with sugar cookie cups
- Blueberry Cobbler with a sweet cookie topping

Lemon Tart
Equipment
- Tart pan 11-inch
- Large food processor or powerful blender
Ingredients
Pie Crust
- 14 tablespoons unsalted butter almost 1.5 sticks
- 3/4 cup powdered sugar
- 2-1/2 cups flour
- 1 large egg yolk
- 1 teaspoon vanilla extract
- 3/4 teaspoon salt
- 2 tablespoons cold water
Lemon Filling and Topping
- 4 large eggs
- 3/4 cup granulated sugar
- 3 to 4 large lemons
- 1/2 cup heavy cream
- 1/8 teaspoon salt
- Serving suggestions see note 1
Instructions
Pie Crust
- Cut the cold butter into small cubes and refrigerate. Grease the tart pan with cooking spray and place it on a large tray. Set aside.
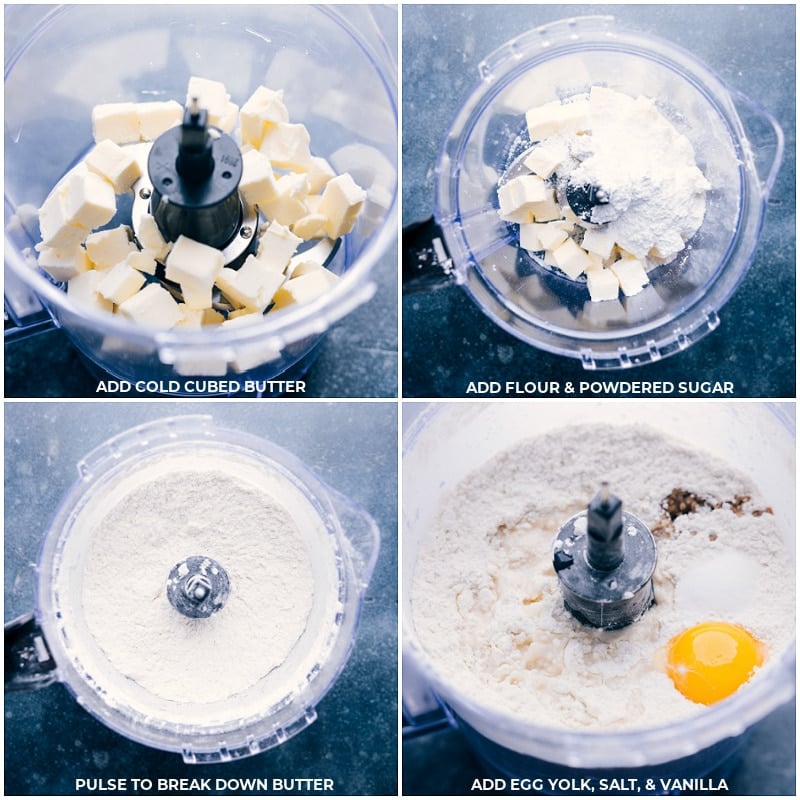
- In a large food processor or powerful blender, add cubed butter, powdered sugar, and flour. Pulse in 1-second intervals until the butter forms small pieces, about 20–25 pulses.
- Add egg yolk, vanilla extract, salt, and the very cold water. Pulse until the dough starts to clump, about 20–25 more pulses. The dough should form large clumps but still appear a bit crumbly. Transfer the mixture to a clean work surface and shape it into a ball. Add a touch of flour if needed (if the dough is too sticky). Press the dough evenly into the prepared tart pan, covering the sides and center. Poke the bottom of the crust 8 times with a fork, only halfway through. Freeze for 20 minutes or cover and chill in the fridge overnight.
- Preheat oven to 350°F.
- Remove tart from freezer. Place a sheet of parchment paper over it and fill with dried beans, rice, or pie weights to keep the crust in shape. Bake for 25 minutes. Remove the weights and parchment, then bake another 5–10 minutes until the edges are light brown and the bottom is set. Let cool while preparing the filling.
Lemon Filling and Topping
- Meanwhile, add eggs to a large bowl. In the same food processor or blender, add sugar and the zest of 3 large lemons (about 2 tablespoons packed). Pulse until the zest is broken down, but avoid turning the sugar into powdered sugar. Add this sugar mixture to the eggs along with 1/2 cup lemon juice, cream, and a pinch of salt. Whisk thoroughly until combined.
- Pour half the lemon filling through a mesh strainer into partially baked crust. Carefully transfer tray back to oven, then pour in remaining filling. Bake for 18–25 minutes, or until tart is set with a slight jiggle in the center. Let cool to room temperature, then refrigerate for at least 1 hour.
- Remove the tart and slice it using a hot, sharp knife (run under hot water and dry with a towel). If desired, top with fresh berries and a sprinkle of powdered sugar just before serving.
Video
Recipe Notes
- A large food processor is essential for making the crust.
- Use the right size tart pan for the recipe to work properly.
- Have pie weights, dried beans, lentils, or rice on hand. After chilling the crust, cover it with parchment paper and fill with weights or beans to prevent bubbling and shrinking.
- Pour the lemon filling through a sieve to catch unwanted bits, ensuring a smooth filling.
Nutrition
Nutrition information is automatically calculated, so should only be used as an approximation.






I followed your recipe, but the tart would not set properly. Exact measurements for the lemon
juice ingredients would be beneficial as all lemons are not equal. I used lemons from my tree which are enormous here in Califonia.
It does say exact amounts in the recipe card — 1/2 cup juice and 2 tbsp zest
This lemon tart is right up my alley! It looks so gorgeous.
Thank you so much Jessica! 🙂
I’m usually not the biggest lemon fan, but this tart looks soooo good. My mom is a lemon fanatic, so I should definitely make this for her – she’d go nuts for it!