Special thanks to Danish Creamery for making delicious, high-quality butter and for sponsoring this post. As always, all opinions are my own.
Smooth, creamy, and indulgent vanilla Cheesecake Bars with a thick, sweet graham cracker crust. Plus, suggestions for how to top your cheesecake bars — add a few berries, a simple berry sauce, caramel sauce, or caramelized sugar topping — all these ideas are outlined in the post. Enjoy!
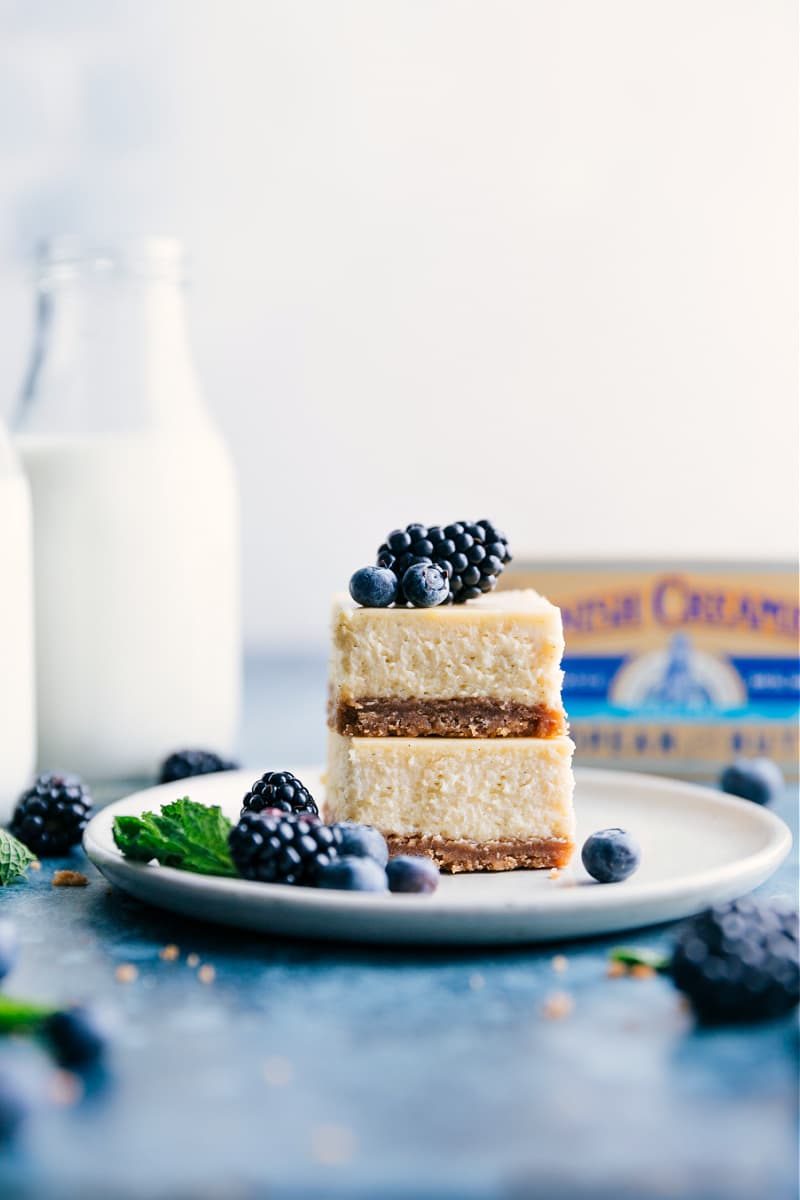
Cheesecake Bars
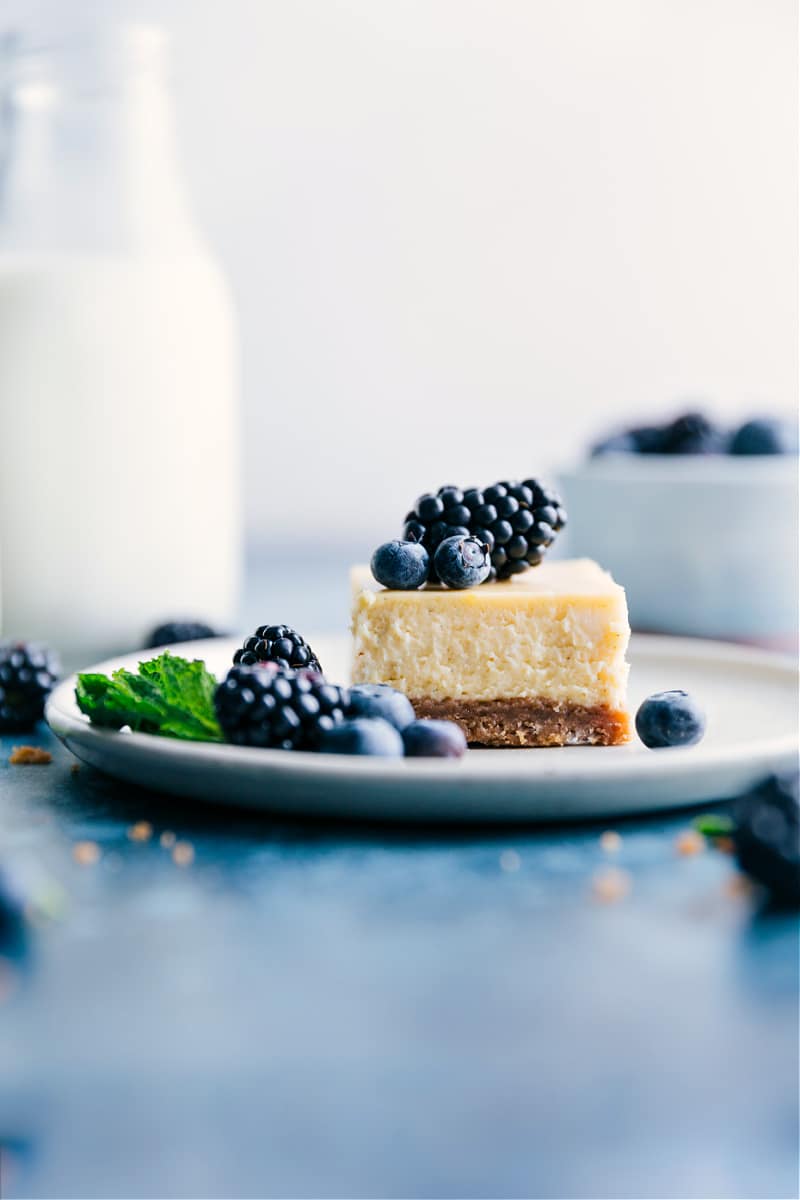
These are our favorite Cheesecake Bars! They’re thick, creamy, and sweet. The sweetness is mingled with a little bit of tang from the cream cheese and a touch of acidity from the lemon.
And, as great as the cheesecake is, it can’t overshadow the thick and buttery graham cracker crust — it makes the perfect cheesecake base!
Beyond how tasty these Cheesecake Bars are, they’re also pretty easy to make. You won’t need to worry about preparing a water bath or lining a springform pan — we make these in an 8×8-inch pan instead. The pan simplifies everything (just like how much easier cookie bars are to make than regular chewy chocolate chip cookies!)
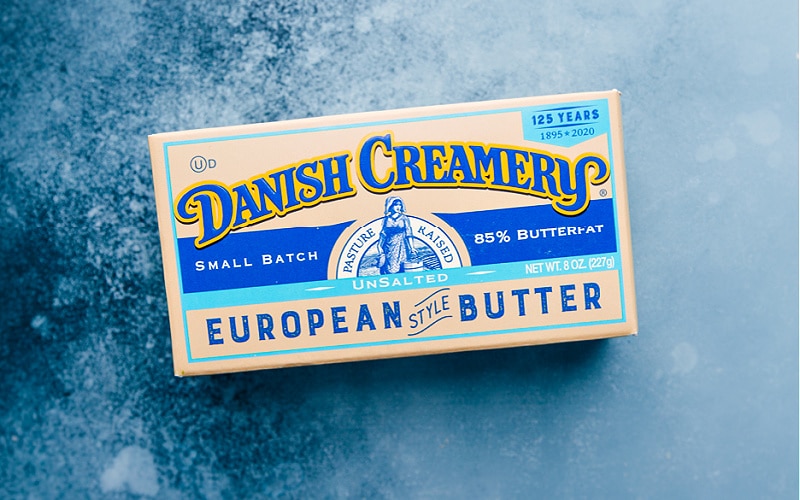
Danish Creamery Butter
I’ve shared quite a bit about my personal favorite — Danish Creamery Butter in previous recipe posts, but below is a quick re-cap.
- Since 1895, the recipe for Danish Creamery Butter hasn’t changed: high–quality cream and a touch of sea salt.
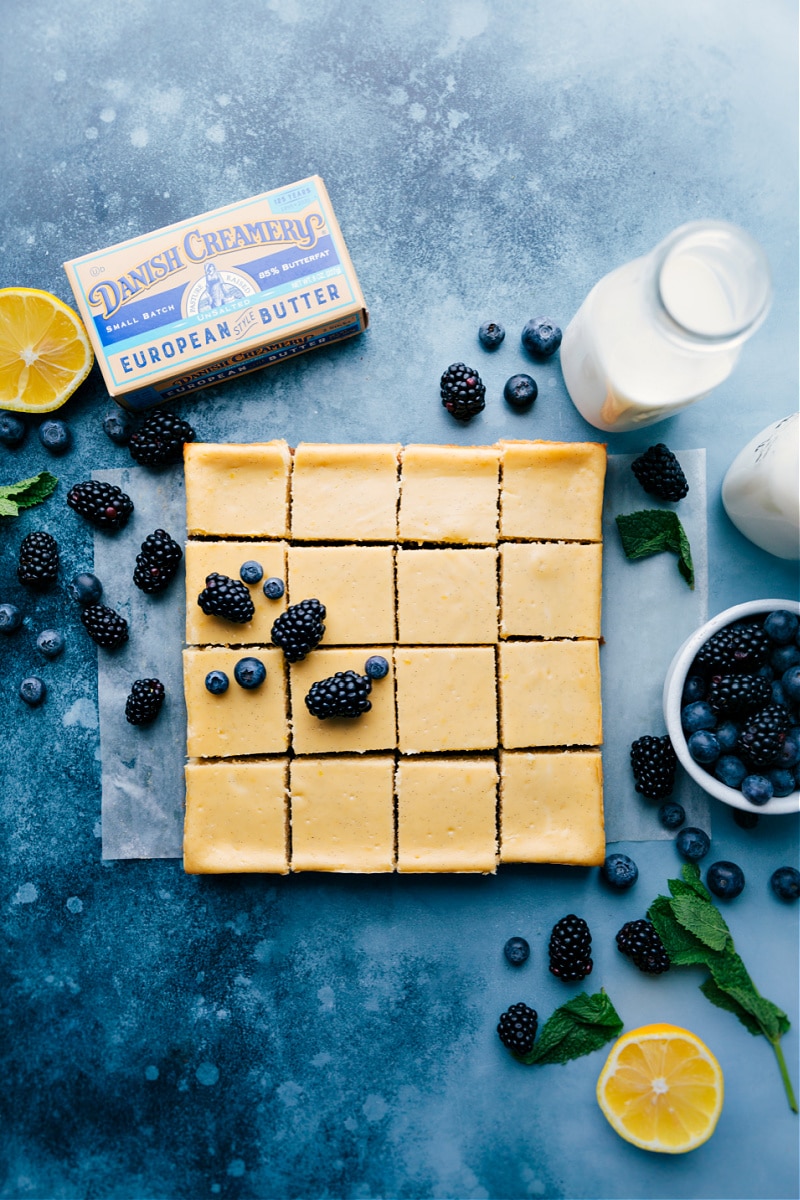
- Danish Creamery’s European Style Butter boasts an 85% butterfat content (much higher than most other European Style butters which come in at around 82-83%), making it a dream for baking applications, sauces, or even just for your morning toast! And it’s the ultimate best addition to these cheesecake bars
Graham cracker crust
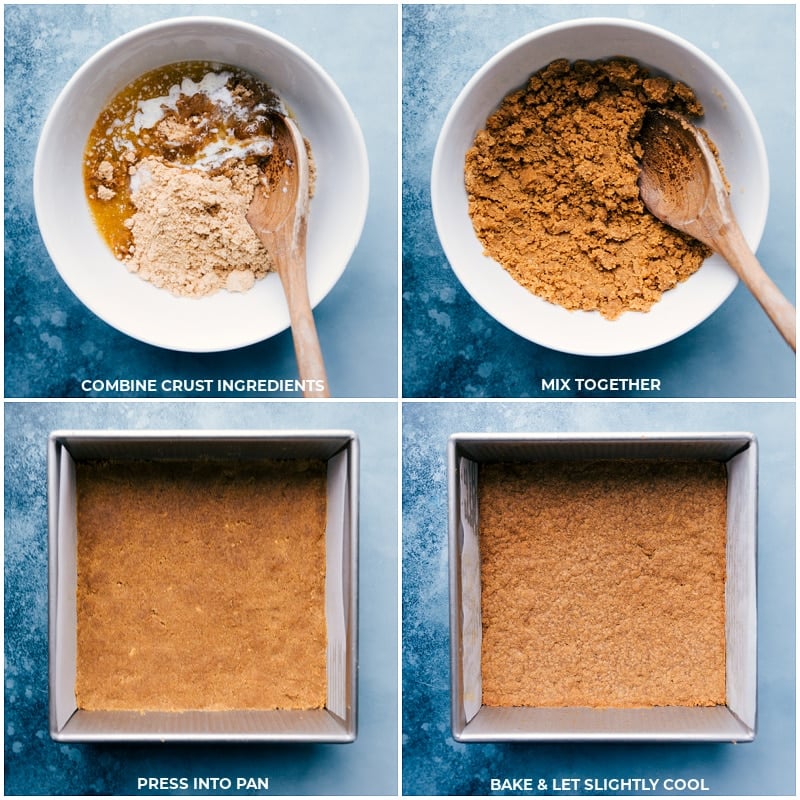
Thanks to the best butter around, this graham cracker crust is perfection! It’s thick, sweet, and has a nice prominent butter flavor. Here are a few tips:
- Let the melted butter cool. Once the butter is melted, it needs to cool back to room temperature. If the butter is hot, it will melt the brown sugar, which will cause a greasy crust. Butter may even pool on top of the crust making for an unpleasant texture.
- Measure the crumbs. While it’s easiest to just add graham cracker sheets to the blender, there can be a good amount of variation cracker to cracker and brand to brand. For a fool-proof crust, measure the crumbs instead of counting out graham cracker sheets. Slightly overfill the measuring cups and then level off the top with the back of a table knife for the perfect measurement.
- Blend graham crackers thoroughly. To ensure there aren’t large chunks of graham cracker in the crust, which will affect how nicely the cheesecake bars cut out, thoroughly blend the graham crackers until they are fine crumbs. Add any large chunks back into the blender to fully blend.
- Compress the crust. I like to lightly spritz the back of a flat one-cup measuring cup with cooking spray and then press the crumbs tightly to form a nice, even crust.
- Bake the crust. To ensure the crust doesn’t get too soft, we bake it before adding the cheesecake filling. While the crust doesn’t need to be cooled completely, we do want it slightly cooled before adding the filling.
Cheesecake Bars Tips
- Use room-temperature cream cheese: Room-temperature cream cheese becomes creamier when it is mixed and it incorporates much better with the other ingredients in this recipe. If your cream cheese is too cold, it tends to stay lumpy and the batter doesn’t fully mix. You’ll also likely be tempted to overbeat the batter (which is not good for a cheesecake!) to get rid of the lumps. See “quick tip” below.
- Use room-temperature eggs and sour cream. The more even the temperature of the ingredients, the better they will incorporate and the less chance you have for getting cracks in the cheesecake bars.
- Don’t overmix the batter: it’s important to mix the cream cheese enough to remove the lumps and to combine the ingredients sufficiently, but overmixing the batter will introduce too much air into the mixture. Too much air causes the cheesecake to rise too quickly in the oven and then fall (and cause cracks in cheesecake).
- Mix the cheesecake batter at low and consistent speeds. This reduces the risk of adding in too much air which will cause cracks on top. I recommend beating the cheesecake batter in the same direction for the duration of mixing.
- Allow the cheesecake to cool completely at room temperature: It might not seem like a big deal to speed up the chilling process of the cheesecake and put it in the fridge right out of the oven, but this will cause condensation to form on top or create cracks in the cheesecake.
Get cream cheese to room temperature quickly: Remove the cream cheese from the packaging and microwave in bursts of 15-20 seconds until it is room temperature (not softened or melted at all). Quick Tip
Cheesecake Bars Topping Ideas
- Fresh berries: Keep it simple with a few fresh berries on top, or glaze the berries for an extra-special presentation. To glaze the berries, warm apricot preserves in the microwave and then brush over the berries with a pastry brush.
- Berry sauce: Our favorite way to top Cheesecake Bars is with a berry sauce I’ve included in the recipe card. It’s sweet, smooth, and just a little bit tart. If you don’t want to make a homemade berry topping, top with a good jam or this blueberry syrup instead.
- Lemon topping: Smooth some of this lemon curd on top and garnish with blueberries or blackberries.
- Salted or plain caramel sauce: Whip up our favorite caramel sauce using a stick of Danish Creamery’s salted butter — yum! A sprinkle of Maldon Sea Salt Flakes would make the perfect finishing touch.
- Crushed cookies or candies: Jazz up these cheesecake bars by topping them with a swirl of homemade whipped cream and then sprinkling a crushed candy or topping on the whipped cream (think seasonal M&M’s, crushed up Oreos, miniature chocolate chips, or crushed toffee. The sky’s the limit here)
Variations
Try one of these fun ideas:
- Crème Brûlée cheesecake bars: Once bars are fully cooled, sprinkle the top with a layer of white sugar. Torch the tops with a kitchen torch until caramelized — perfect crème brûlée cheesecake bars!
- Lemon cheesecake bars: Add 1 full teaspoon lemon zest, 1 full tablespoon lemon juice, and 1 teaspoon lemon extract to the cheesecake batter.
- Chocolate cheesecake bars: Top bars with a chocolate ganache (like the one featured on this chocolate tart). Swap out the graham crackers for Oreo® cookies in the crust and reduce the amount of sugar in the crust (keeping the butter quantity the same).
- Strawberry cheesecake bars: Use the strawberry topping on these mini cheesecakes to add to these bars.
Cheesecake Bars can at room temperature for up to 2 hours, but after that, they do need to be refrigerated. To store: Place leftover Cheesecake Bars in an airtight container or individually wrapped in the fridge for up to 5 days (the crust softens more everyday they are stored). To freeze: Wrap individual cheesecake bars tightly with plastic wrap and then place all the individually wrapped bars in an airtight container. Freeze for 2-3 months. Thaw in the fridge overnight and leave out at room temperature for about 20-30 minutes before serving. Storage
More Dessert Recipes
- Fruit Tarts with sugar cookie cups
- Lemon Bars with a shortbread crust
- Carmelitas with a caramel and chocolate filling
- Chocolate Cheesecake with a chocolate cookie crust
- Lemon Curd a delicious lemon filling
Cheesecake Bars
Equipment
- Baking pan 8 x 8-inch
Ingredients
- Cooking spray
- 1-1/4 cups graham cracker crumbs
- 5 tablespoons unsalted butter melted
- 1/3 cup light brown sugar lightly packed
- 1/4 teaspoon salt
- 2 (8-ounce) packages cream cheese full-fat, room temperature
- 1 cup granulated sugar
- 2 tablespoons flour
- 1/4 cup sour cream full-fat, room temperature
- 3 large eggs room temperature
- 1 tablespoon pure vanilla extract or 1-1/2 teaspoons vanilla bean paste
- 1 large lemon optional
- 1/4 teaspoon salt
- Berry sauce optional, see note 1
- Toppings as desired see note 2
Instructions
- Preheat the oven to 375℉ and place the oven rack in the middle position. Line an 8 x 8-inch baking pan with parchment paper. Leave enough of an overhang to pull out the bars and lightly spray with cooking spray. Melt butter and set aside to cool to room temperature. Zest lemon with a zester to get 1 teaspoon zest. Juice the lemon using a citrus juicer to get 1 teaspoon lemon juice. Set aside.
- In a medium bowl, add the graham cracker crumbs, melted butter, brown sugar, and salt. Stir until completely combined and then press the crust firmly and evenly into the prepared pan. I like to compress the crust with the bottom of a flat measuring cup. Bake the crust for 10 minutes, remove, and set aside. Reduce the oven temperature to 325℉.
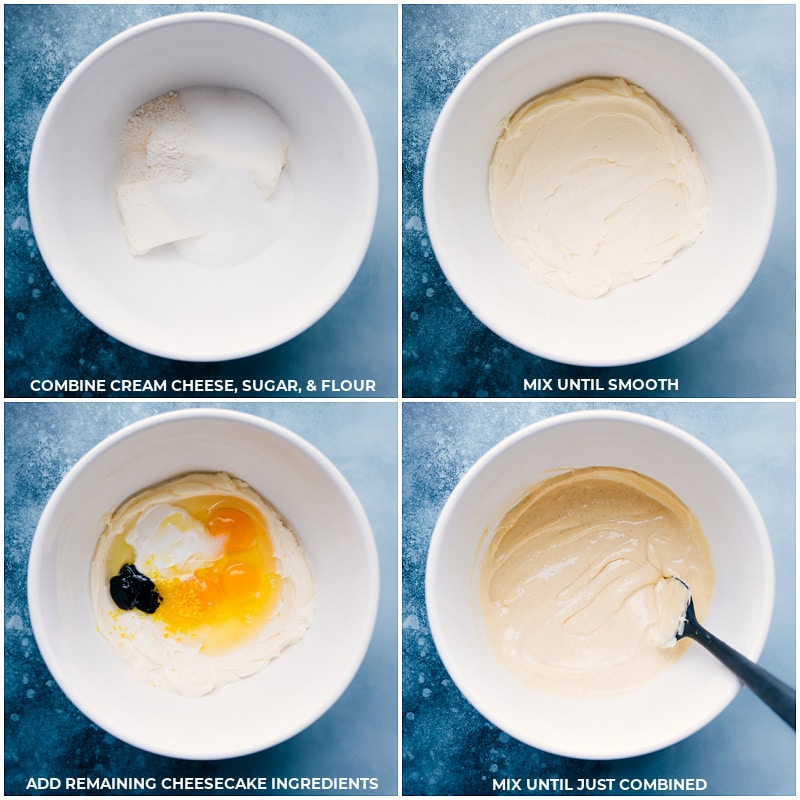
- In a large bowl, combine the room temperature cream cheese, sugar, and flour. Using a hand mixer, beat on medium speed until smooth, about 1–2 minutes. Beat in a constant circle going the same way. Use a spatula to scrape the edges and then add in the sour cream, eggs, vanilla, 1 teaspoon lemon zest, 1 teaspoon lemon juice, and salt. Beat on low speed until it's just combined and smooth. Be careful not to overmix. Again, beat the mixture in a constant circle going the same direction.
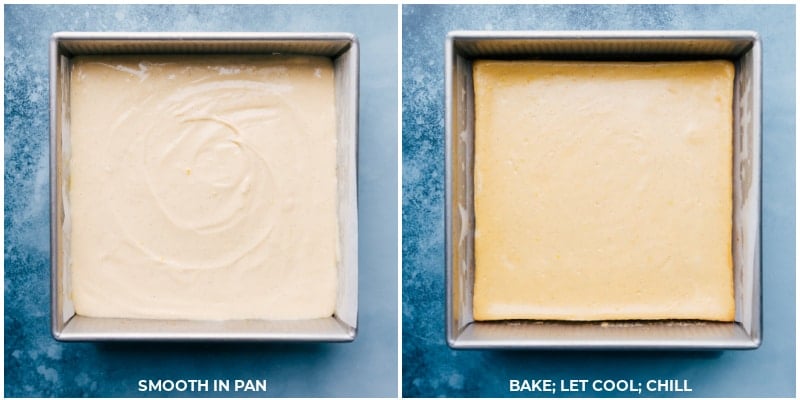
- Use a spatula to scrape every bit of the batter onto the slightly cooled crust. Smooth the top into one even layer. Bake for 37–43 minutes at 325℉ or until the filling is set but ever-so-slightly jiggly in the center. The cheesecake will continue to cook as it cools. After the bars are baked, turn off the oven, open the oven door and let the cheesecake stand in the open oven for 30 minutes. Slowly reducing the temperature reduces the risk of cracks. After 30 minutes, transfer the Cheesecake Bars to a wire cooling rack. After 1 hour, cover tightly and refrigerate until the bars are completely chilled through, 6–8 hours.
- Use the overhang to lift the Cheesecake Bars out of the pan and onto a cutting board. Cut into squares and serve with berry sauce or refrigerate, without sauce added, until ready to serve. To get clean slices, run a knife under hot water for a few seconds, wipe to dry, make 1 slice, and repeat.
Video
Recipe Notes
- 2 (16-ounce) packages frozen triple berry medley, slightly thawed
- 1 tablespoon freshly squeezed lemon juice
- 3/4 cup granulated sugar
- Pour just over 2/3 of each bag of (slightly thawed) frozen berries into a medium pot. Store the rest of the berries in a small bowl in the fridge.
- To the pot, add in lemon juice and sugar and bring the berries to a very gentle boil over medium heat. Cook the berries until they are very syrupy, about 4–6 minutes. Remove from heat and allow the berries to slightly cool and then transfer to a blender; pulse the berries to get a smooth puree.
- Pass that puree through a fine-mesh strainer and use the back of a wooden spoon to push the mixture through. You should just be left with seeds in the strainer, and that's what you'll discard.
- When ready to serve this sauce over the Cheesecake Bars, stir the reserved berries into that smooth sauce and spoon right on top of the bars. You want to top the bars right before eating, so if you won't be eating it immediately, store the berry sauce in the fridge separately.
Nutrition
Nutrition information is automatically calculated, so should only be used as an approximation.




Searching for HOURS for the perfect cheesecade bar and now I have found it.
Your instructions are excellent and thankyou for putting in grams measurements. AWESOME AWESOME bars…
I am so thrilled to hear this! Thanks Cate! 🙂
Once of the best cheesecakes I’ve made! Thanks for such a delicious recipe!
Yay! So happy to hear it! Thanks Stephanie 🙂
This cheesecake is soooooo easy to make and we love the topping…could totally eat it with a spoon!
My hubby loves cheesecake and this looks so good! I’ll be making it for sure.
These were so good! I am cheesecake OBSESSED so these were exactly what I was looking for!