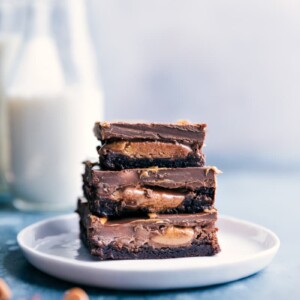
Peanut Butter Cup Brownies are indulgent treats with a soft, gooey brownie base, pressed with peanut butter cups, and topped with a thick, fudge-like layer of peanut butter and chocolate—a show-stopping dessert!

Reese’s Peanut Butter Cup Brownies
These rich, gooey, fudge-like brownies are a dream come true for chocolate and peanut butter lovers. Reese’s® cups are pressed into the brownies, which are then topped with a thick layer of chocolate and peanut butter.
Two layers of chocolate and peanut butter? Count me in!

Peanut Butter Cup Brownie Base
Start with a boxed mix for these peanut butter cup brownies. Brownie mixes are tasty and convenient, perfect for a quick and easy dessert. For homemade brownies, substitute your favorite brownie recipe for the mix, ensuring it fills a 9×13-inch pan.
A personal favorite is Betty Crocker’s Fudge Brownie Mix®. Make sure to choose the version that fits a 9×13-inch pan (18.3 ounces). Any store-bought brownie mix for a 9×13-inch pan will work. For homemade options, try the amazing Brownie Recipe or the Gluten-Free Brownie recipe on my site. (If making the gluten-free brownies, skip the frosting.)

Reese’s Cups
Partially bake the brownies and remove them from the oven a few minutes before they’re done. Quickly press unwrapped Reese’s candies into the brownies, then return them to the oven to finish baking.
With so many sizes and variations of Reese’s peanut butter cups, use the original-sized Reese’s cups for these Peanut Butter Cup Brownies. This recipe requires 15 full-sized Reese’s cups.

Peanut Butter Cup Brownie Topping
Once the bars have fully cooled, melt chocolate and peanut butter and spread them over the bars. They create a thick fudge-like topping that is ridiculously rich and delicious! A few topping tips:
- Use a commercial, sweetened peanut butter. My favorite is Skippy’s® creamy peanut butter (not sponsored). Avoid natural or no-stir peanut butters; they won’t work the same or be as tasty.
- Pick high-quality chocolate chips for the best melt and superior flavor. I love and recommend Ghiradelli® and Guittard® (not sponsored).
- I love milk chocolate chips for the topping on these brownies, but use whatever chocolate you like best. If you’d like to control sweetness, use semi-sweet or dark chocolate instead.
- For a more nuanced flavor, mix two types of chocolate — try milk and dark, milk and semi-sweet, or semi-sweet and dark.
How To Make Brownies With Reese’s Peanut Butter Cups
- Prep: Line a 9×13-inch pan with parchment. Preheat the oven as directed on the brownie mix package. Use parchment for easy removal.
- Brownie Base: Prepare the mix as instructed, but bake 2 minutes less. This underbaking allows inserting peanut butter cups without them melting too much.
- Add Cups: Press unwrapped Reese’s cups into the top, then finish baking for 2 more minutes.
- Cool Down: Let the brownies cool at room temperature to prevent the chocolate topping from becoming streaky.
- Chocolate Layer: Melt chocolate chips and shortening in the microwave in short bursts, stirring in between to avoid burning.
- Peanut Butter Layer: Melt peanut butter and shortening, stirring until smooth. Marble over the chocolate layer for a decorative finish.
- Set and Serve: Allow to set at room temperature for clean cuts. Use a hot knife for slicing to make it easier.

Peanut Butter Cup Brownie Tips
- To avoid burned chocolate, microwave the chocolate for 20 seconds at a time, and stir it for at least 20-25 seconds between each microwave burst. Keep in mind that the chocolate is still melting even after it has been removed from the microwave. I like to microwave it as little as possible, focusing instead on stirring to melt the chocolate with residual heat.
- When measuring ingredients, measure the coconut oil or shortening in the solid-state form, not melted.
- When swirling the top, run a table knife gently through just the milk chocolate and peanut butter layer, but not deep enough to go through to the brownies.
- Plan ahead. While this recipe is simple to make, it requires quite a bit of (hands-off) time waiting for the layers to cool.
- Avoid refrigerating or freezing brownies. If the brownie base is chilled when the chocolate is added on top, it can cause spotty or streaky chocolate. See “quick tip” below. Additionally, if the brownies are chilled after the chocolate and peanut butter topping is added, it makes these brownies very difficult to cut out — the top cracks instead of cutting smoothly. And finally, I think these brownies taste best at room temperature, not chilled.
- Wait for the bars to fully set up before cutting into them. Once they’re fully cool, use a sharp chef’s knife and make steady cuts. Run the knife under hot water, dry it on a kitchen towel, and repeat for each cut. This is the “secret” to getting the chocolate to cut out nicely and not break.
Quick Tip
Streaky or spotty chocolate is simply the cocoa solids separating out and rising to the top. If the brownies do end up with white spots, they are still perfectly safe to consume.

Peanut Butter Cup Brownie Storage
These bars are best enjoyed within 3-5 days. Store, covered tightly, at room temperature. There is nothing about these bars that requires refrigeration.
These bars can be frozen, but when thawed, they will most likely form white spots on top. They’re safe to eat; this is just the milk solids separating and rising.

More Dessert Recipes
- Dessert Cheese Ball brownie-batter flavored
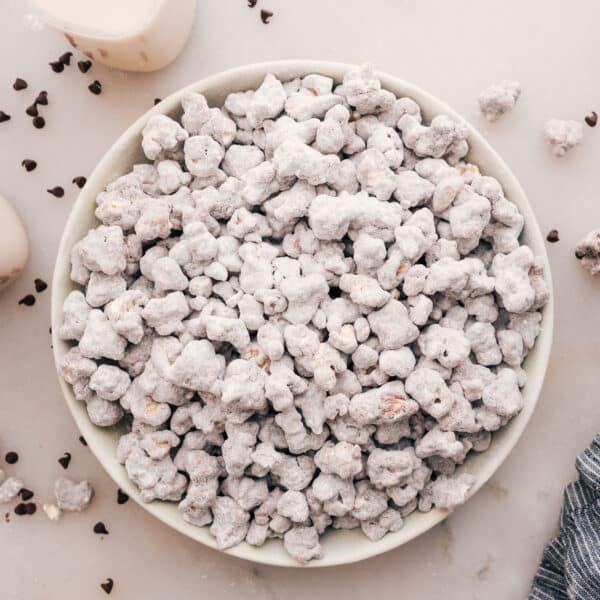
- Chocolate Peanut Butter Snack Mix no baking required!
- Peanut Butter Rice Krispie Treats with a chocolate topping
- Strawberry Frozen Yogurt made in an ice cream maker
- Magic Bars with a graham cracker crust
Peanut Butter Cup Brownies
Equipment
- Baking pan 9 x 13-inch
- Parchment paper
Ingredients
- 1 (18.3-ounce) package fudge brownie mix plus ingredients called for on the brownie mix, see note 1
- 15 regular-sized Reese’s peanut butter cups unwrapped
- 2-1/2 cups milk chocolate chips
- 3/4 cup creamy peanut butter I love Skippy
- 1 teaspoon vanilla extract optional
- 2-1/2 tablespoons shortening or coconut oil, divided
Instructions
- Line a 9x13-inch pan with parchment paper and set aside. Preheat oven according to brownie mix instructions.
- Prepare the brownies according to package directions. Pour the mixture into the prepared pan and bake for 2 minutes less than the package directs. Meanwhile, unwrap the peanut butter cups.
- Working quickly, press the unwrapped peanut butter cups evenly into the brownies—3 rows of 5 each.
- Return the brownies to the oven and bake for the remaining 2 minutes. Remove and allow to fully cool to room temperature. If you refrigerate or freeze them, allow them to come back to room temperature before topping with the melted chocolate (otherwise you’ll risk streaky/spotty chocolate—see note 2).
- In a microwave-safe bowl, combine the chocolate chips and 2 tablespoons (23g) of shortening or coconut oil. Microwave in bursts of 20 seconds, stirring between bursts for 20 seconds until the chocolate is completely melted (see note 3). Melt slowly, stirring well between bursts to avoid burning chocolate. Use a spatula to scrape every bit of the chocolate onto the cooled brownies. Smooth the chocolate into an even layer.
- In another small microwave-safe bowl, combine the peanut butter and remaining 1/2 tablespoon (6g) coconut oil or shortening. Microwave for 30 seconds. Remove and stir until smooth. If desired, stir in the vanilla extract. Pour in long stripes over the melted chocolate. Using a knife, marble the top by running the knife horizontally from left to right just through the top chocolate and peanut butter layers. Don’t go deep enough to hit the brownies.
- Allow brownies to completely set up at room temperature (do not chill!) before enjoying the bars. Cut into bars—this can get a little messy! I recommend using a sharp knife and running it under hot water for 10 seconds, drying it off, then making a cut. Repeat this process for each cut. Use a metal spatula to remove brownies.
Video
Recipe Notes
Nutrition
Nutrition information is automatically calculated, so should only be used as an approximation.


Just a warning to everyone….the boxed brownies are no longer 18.3 ounces but 16.3, shrink-flation as we all call it, as I post this. This will affect the base of this recipe and it will be much flatter. I am not sure if there is an easy solution other than trying a smaller pan and reduce the other ingredients.
*If anyone has a solution that has worked, please let me know.
Dang shrink-flation! You can still get some that are 17.8 oz so that’s what I would recommend. It doesn’t seem to make too big of a difference! Thanks Susan!
I really wish that you would put the option to save to Pinterest on these recipes. It’s a pain to have to go to Pinterest and hunt them down . Thank you
At the top of each post there is a P that you can click and pin! I hope this helps!
This was a success. I have a peanut butter / chocolate loving family. Easy to make and delicious.
I am so thrilled to hear this! Thanks Lynn! 🙂
YUMMMMM!!!!!
Thanks Penny!
what brand of brownie mix do you use. Thank you.
The two mixes that I like best in this recipe: Betty Crocker’s Supreme Triple Chunk ®(17.8 ounces) or Ghirardelli Chocolate Triple Fudge Brownie Mix® (19 ounces).
I just wanted you to know that I’ve made these many times over the years and they are always a big hit. Thank you so much for the recipe!
Awe so happy to hear that, thanks Rachel!!
These are the best brownies I’ve ever made! Making them again for a party on Sunday!
I’m so happy to hear! Thanks! 🙂